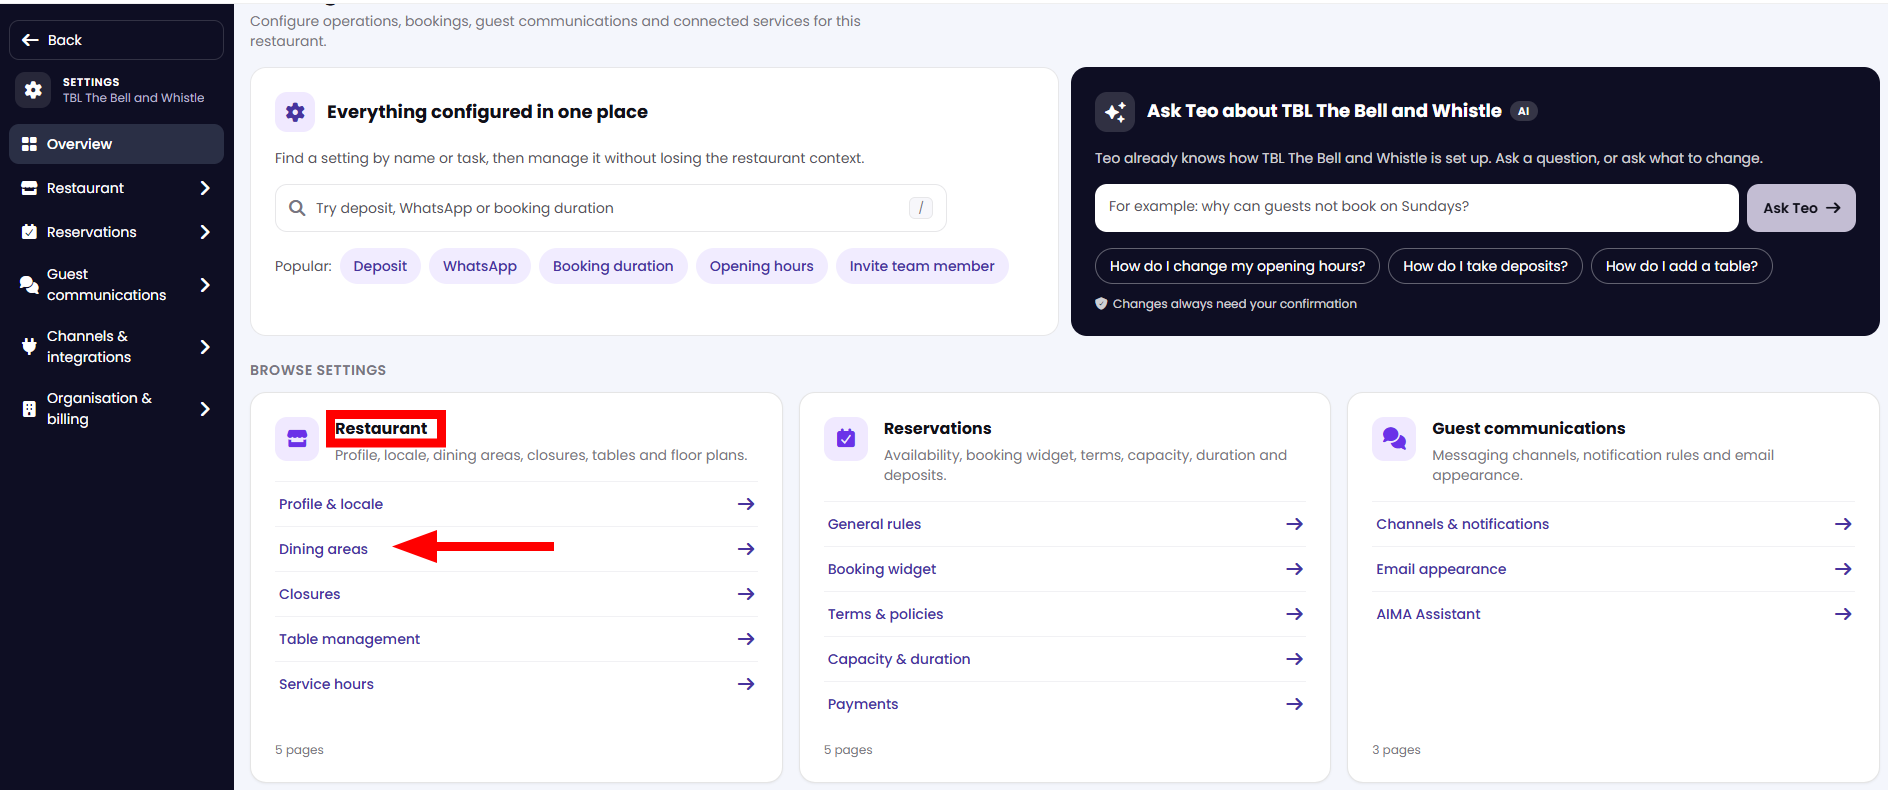
1. From the side menu, go to Settings > Restaurant > Dining Areas.
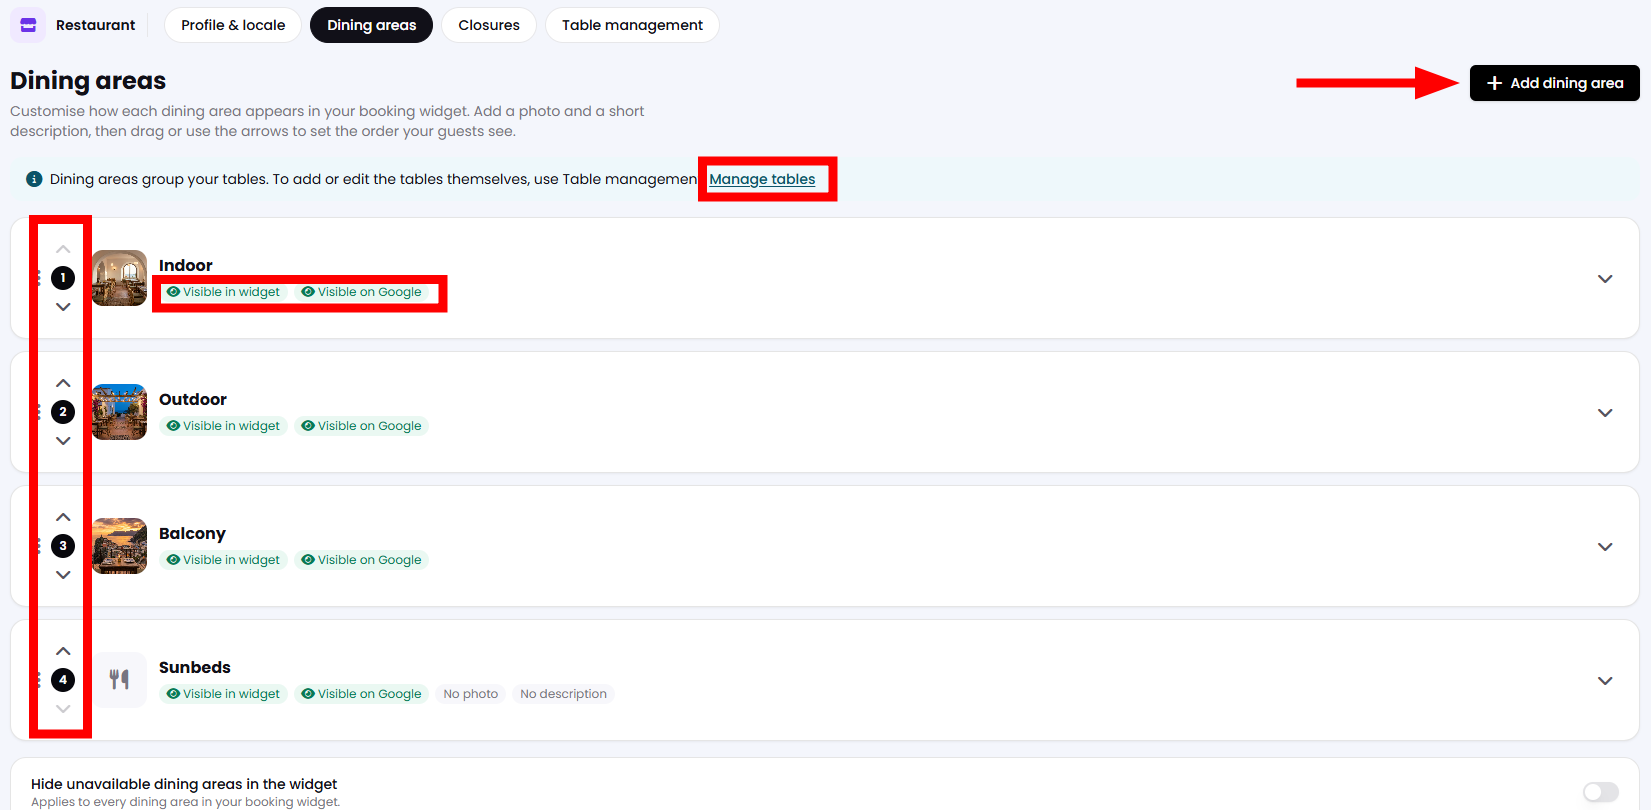
2. On this screen, you can see all your existing dining areas.
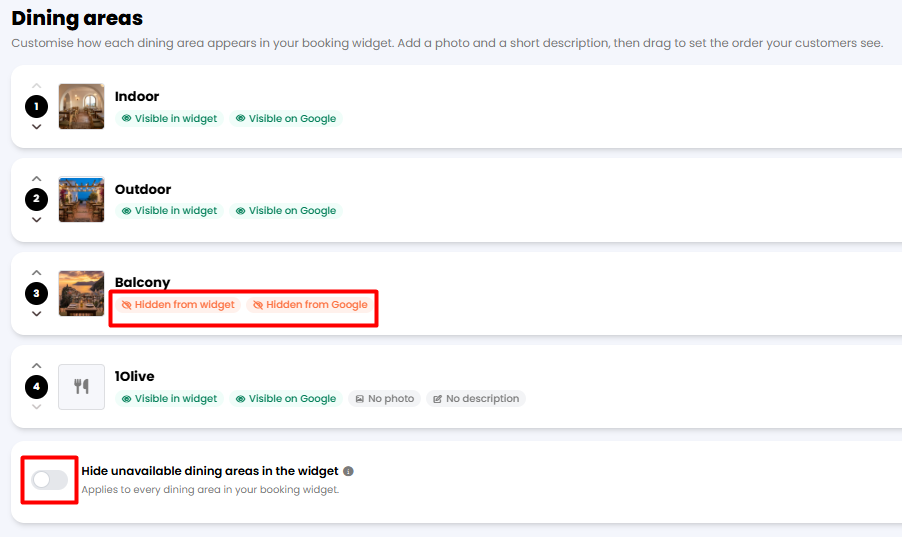
The numbers on the left show the order in which the dining areas appear in your Diary. Use the arrows to change their order.
You can also check each dining area's settings, including whether it is visible in the booking widget and on Google.
To manage your tables, click “Manage tables”.
To add a new dining area, click “+ Add dining area” at the top right of the screen.
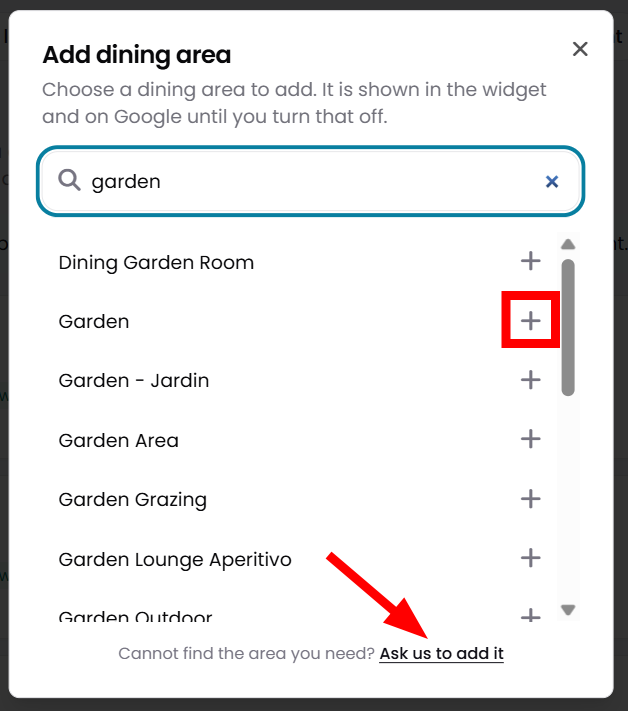
3. A new tab will open, where you can search for available dining areas by typing a name or scrolling through the list.
To add a dining area, click “Add +” on the right. It will then appear on your dining areas screen.
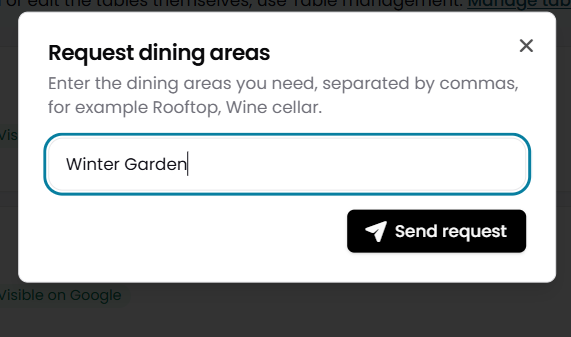
If the dining area you are looking for is not on the list, click “Ask us to add it” at the bottom.
A new tab will open where you can enter the name of the dining area you wish to add. Click the right arrow to submit your request. A “Heads Up!” notification will confirm that your request has been sent.
Our team will review your request and do their best to add it for you.
4. By clicking on the arrow on the right part of the screen in each dining area, details will be expanded. From there, you can upload photos, write a description, and manage their visibility. Changes will be saved automatically. Also, you can delete it if you want.
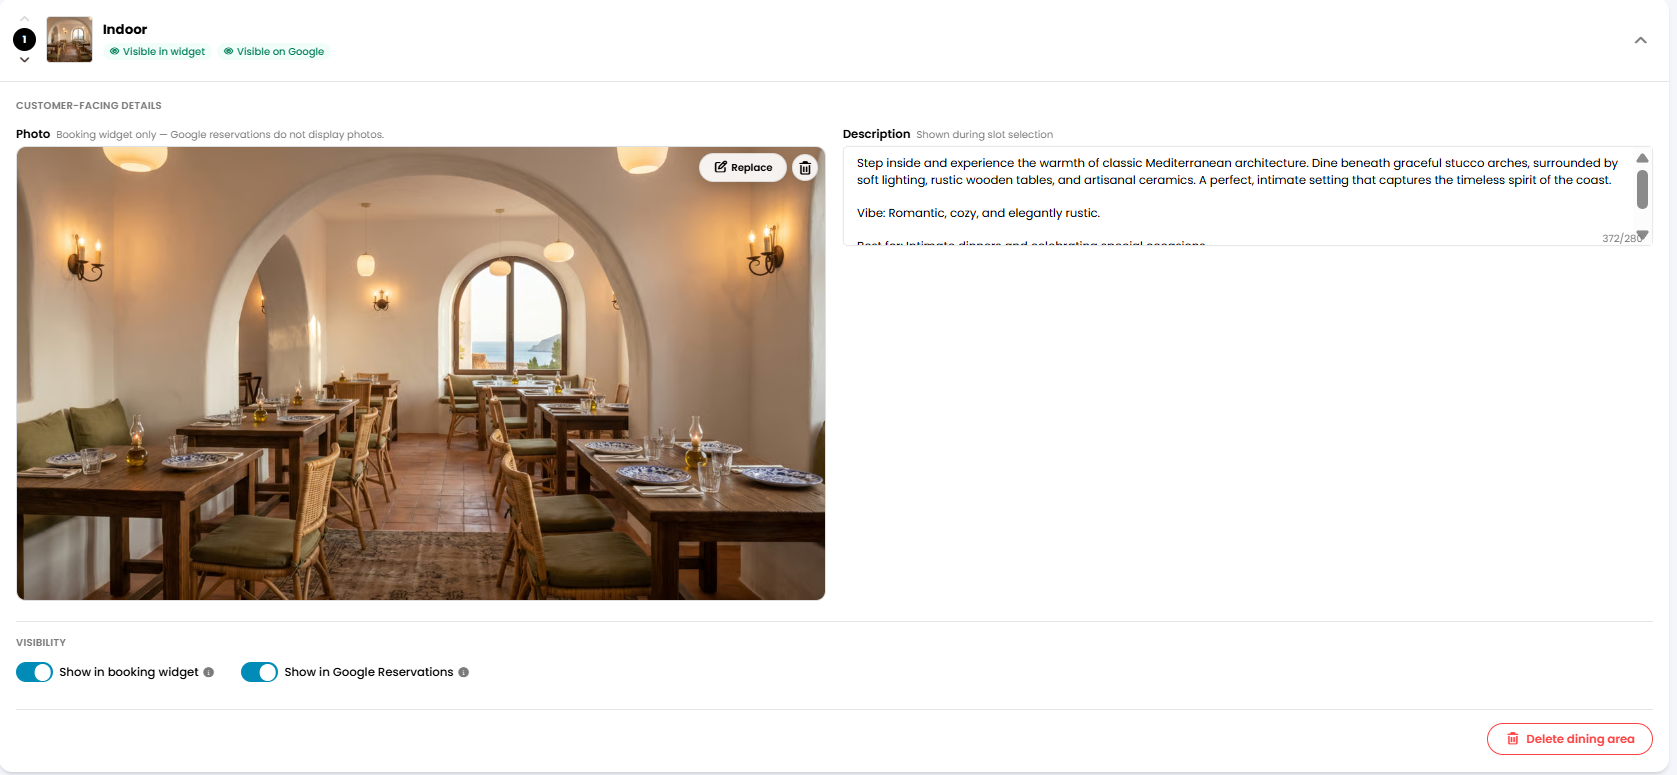
5. If you choose to hide this dining area from your widget, simply disable the option by clicking the toggle as shown above. The legend below the selected dining area will automatically read: Hidden from widget, in red letters.
If you don’t want the dining areas to be shown in the widget automatically when they’re fully booked or unavailable, enable the toggle titled Hide unavailable dining areas in widget.
While we strive to ensure the accuracy and currency of the information in our knowledgebase, some articles may contain minor discrepancies due to the constant evolution of our services and products.
Was this article helpful?
That’s Great!
Thank you for your feedback
Sorry! We couldn't be helpful
Thank you for your feedback
Feedback sent
We appreciate your effort and will try to fix the article