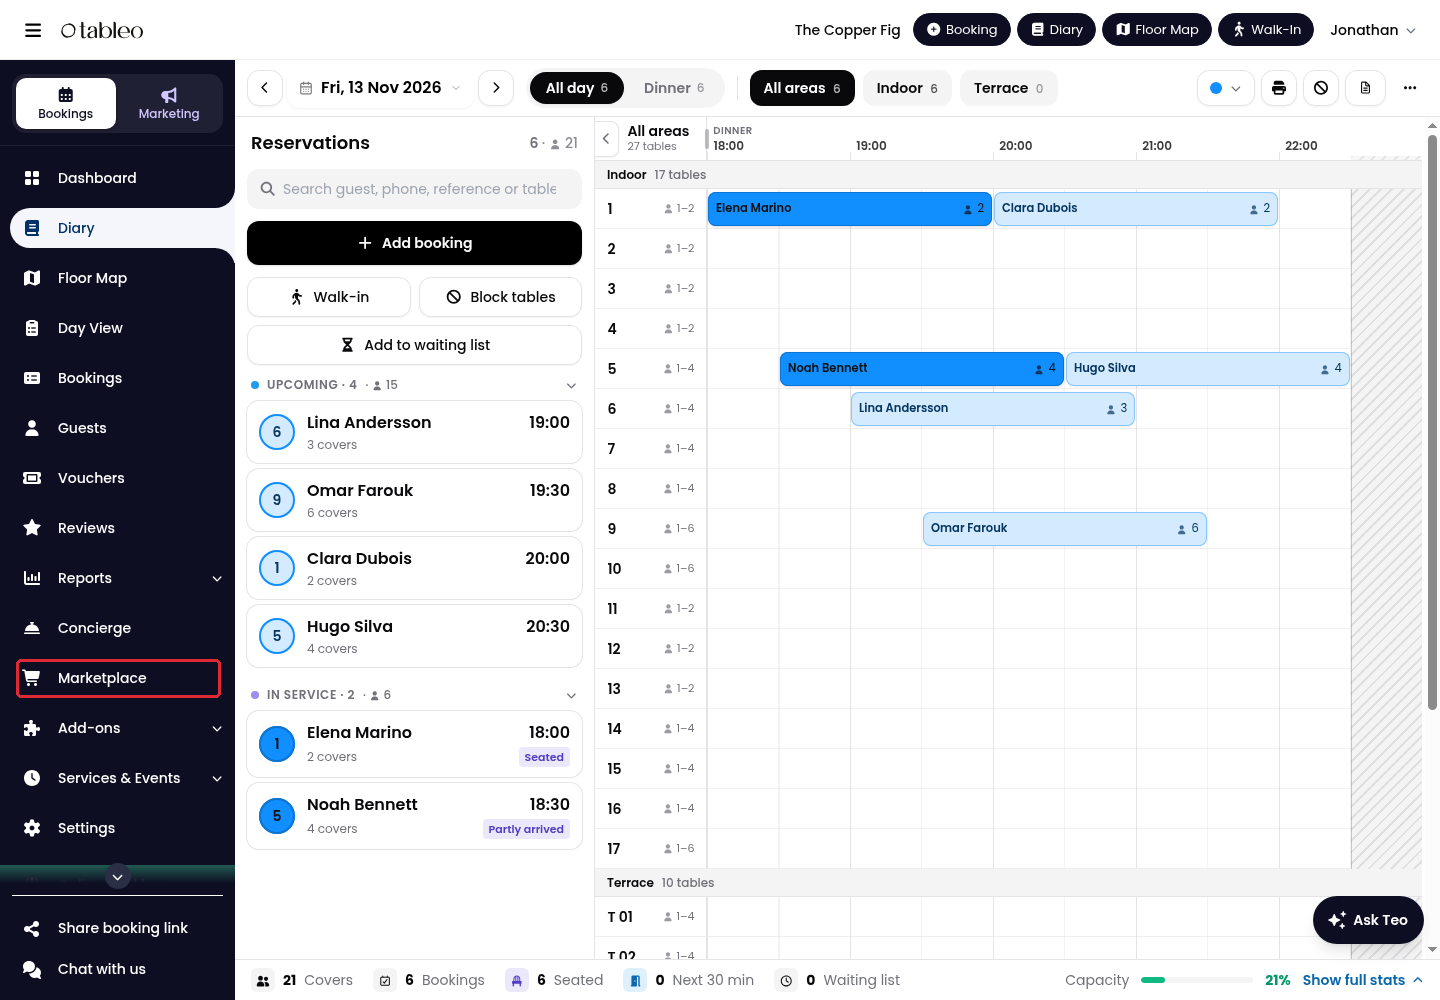
1. Click on Marketplace in the side menu.
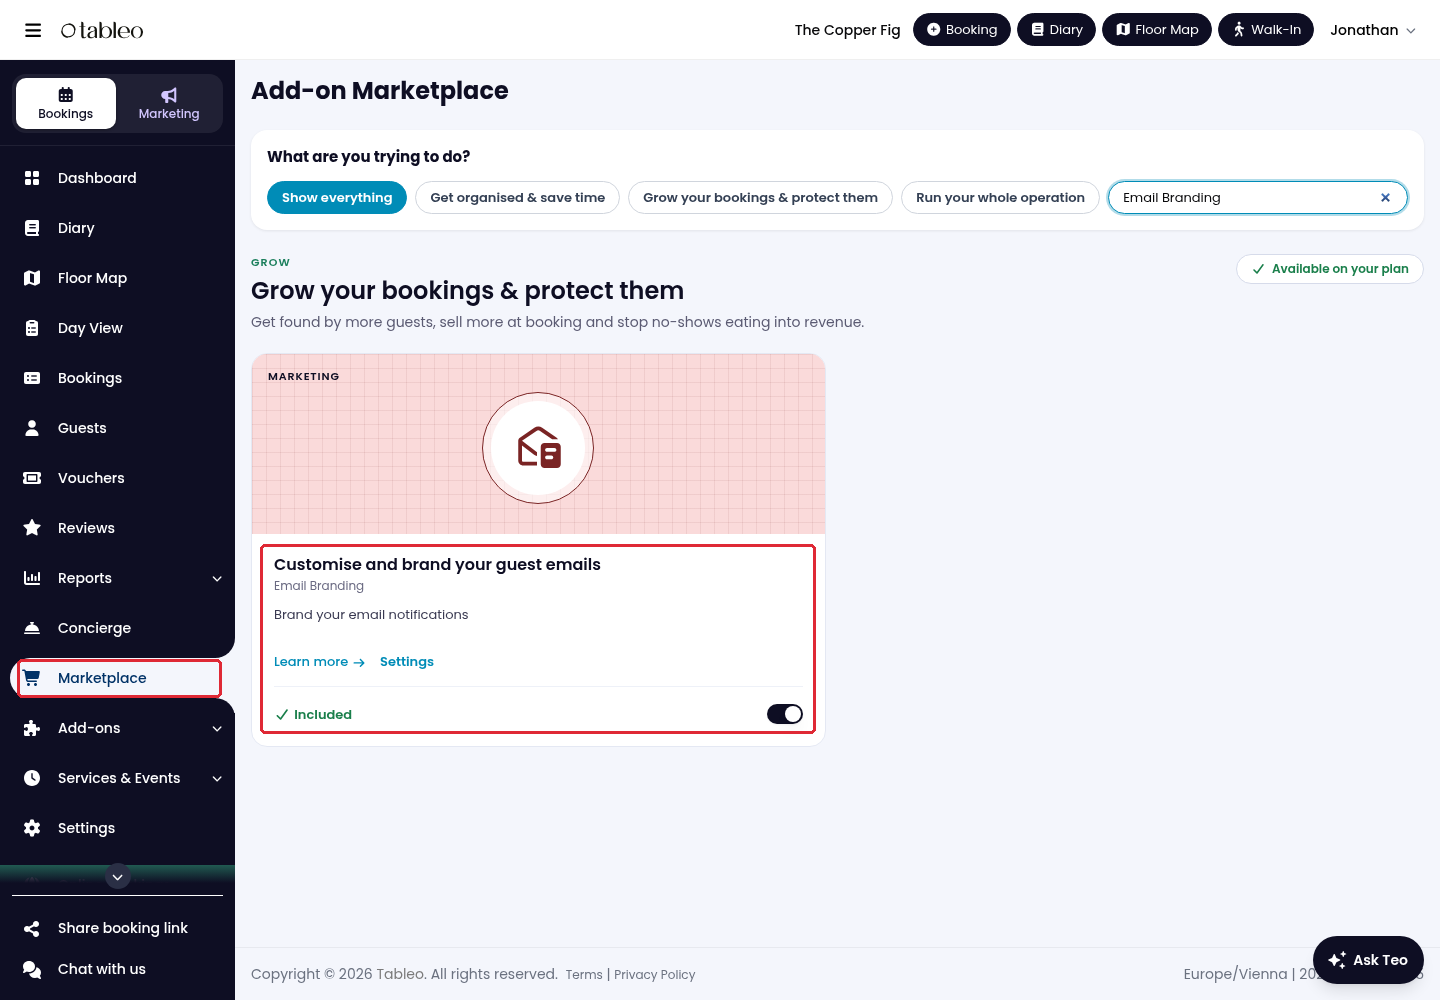
2. Find Email Branding and check that the feature is available and enabled before customising your emails.
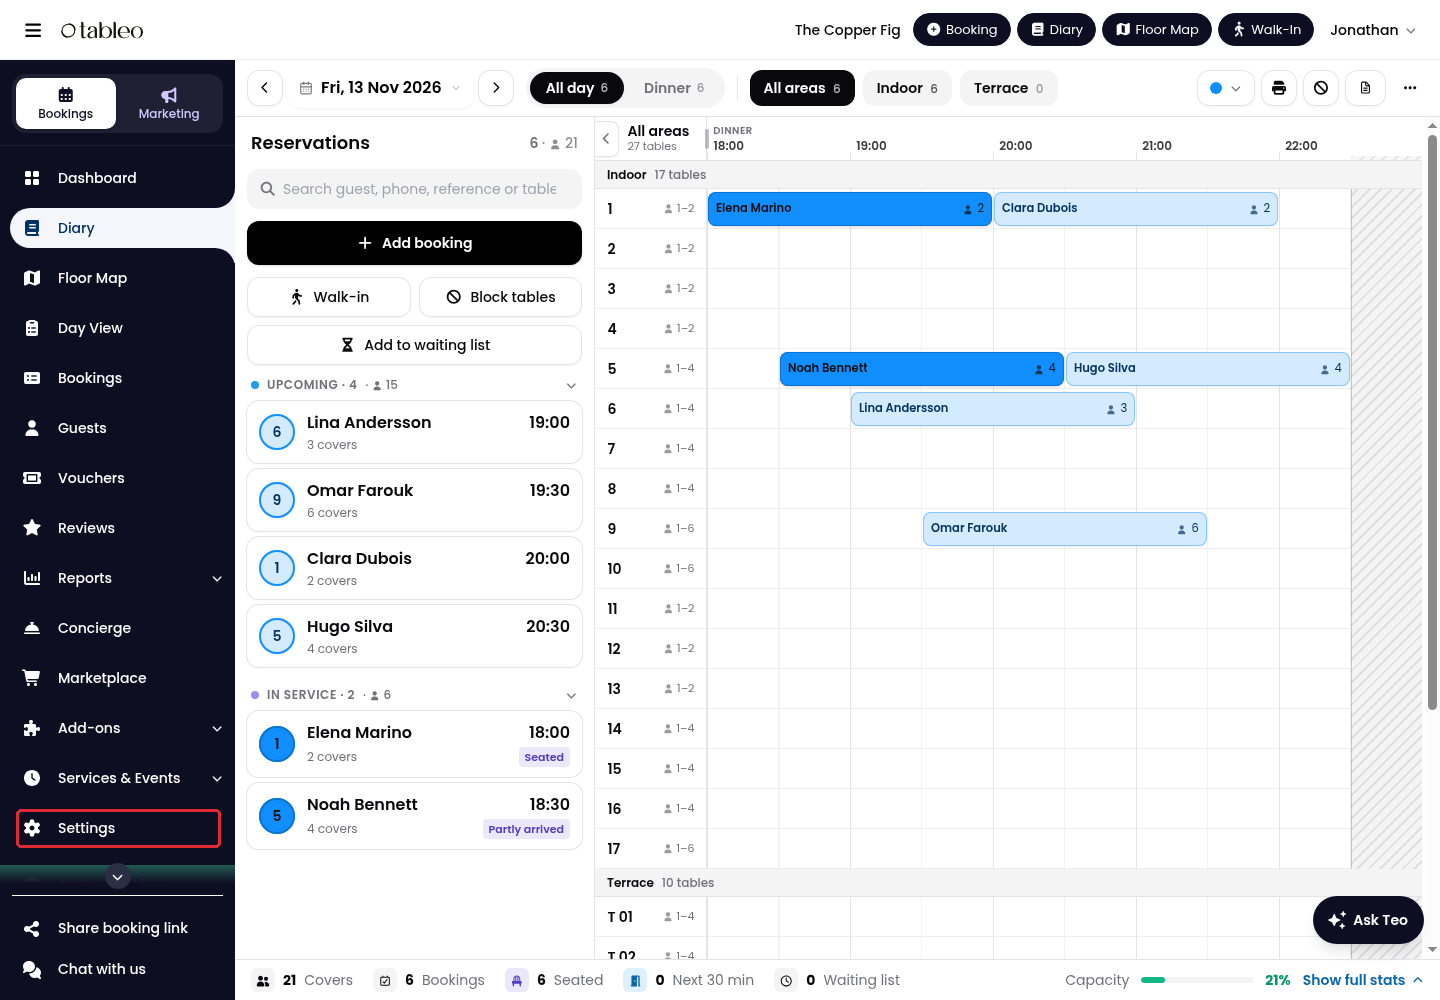
3. Click on Settings in the side menu.
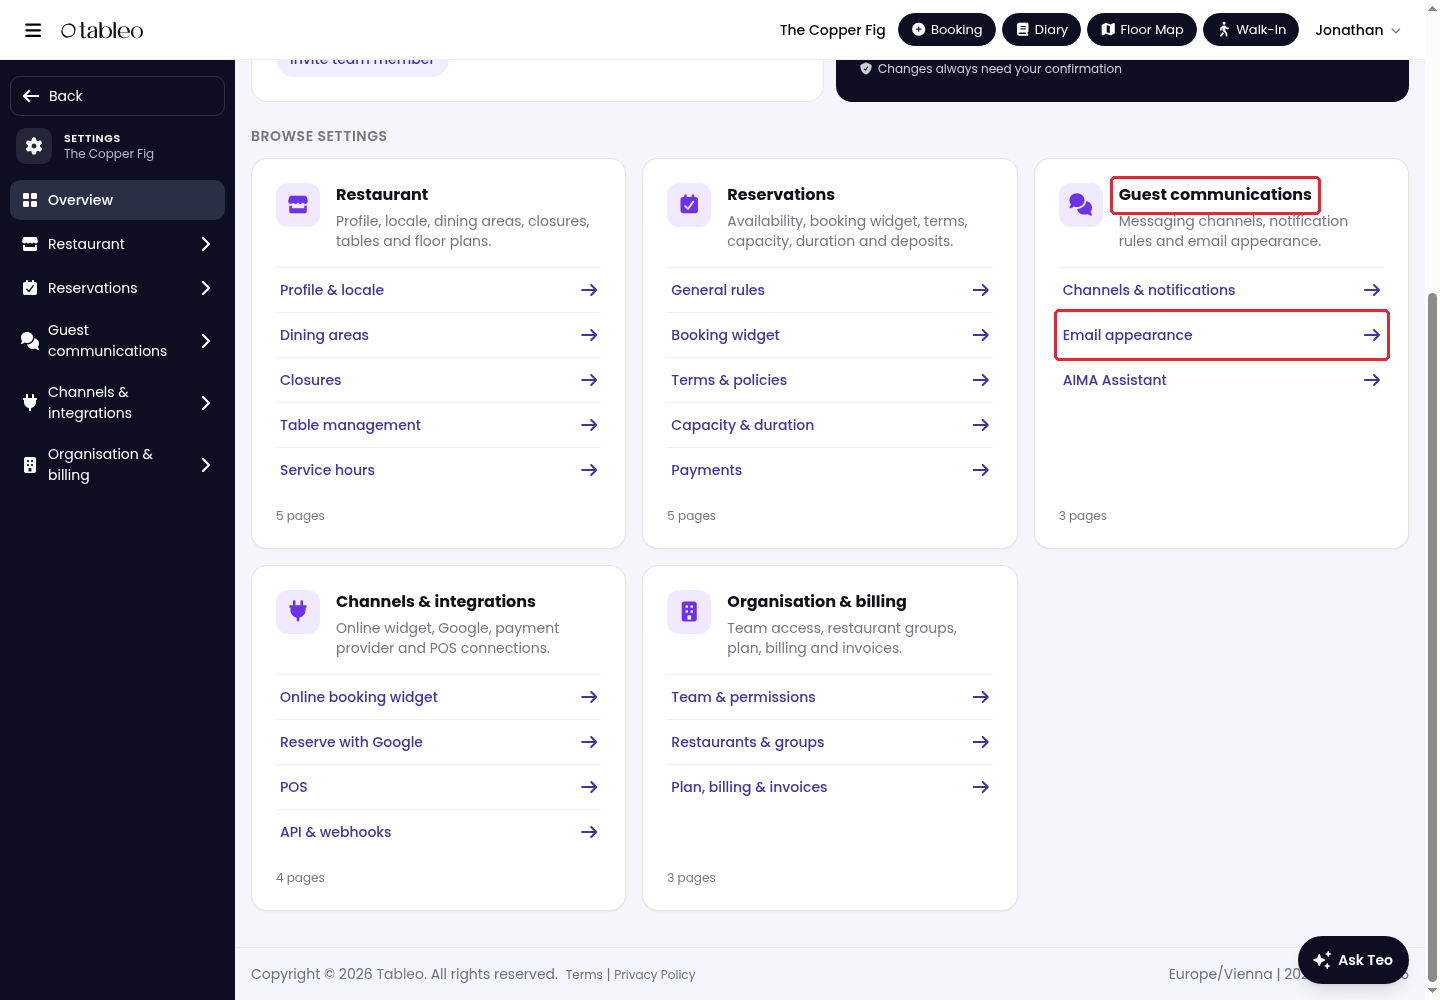
4. Under Guest communications, open Email appearance.
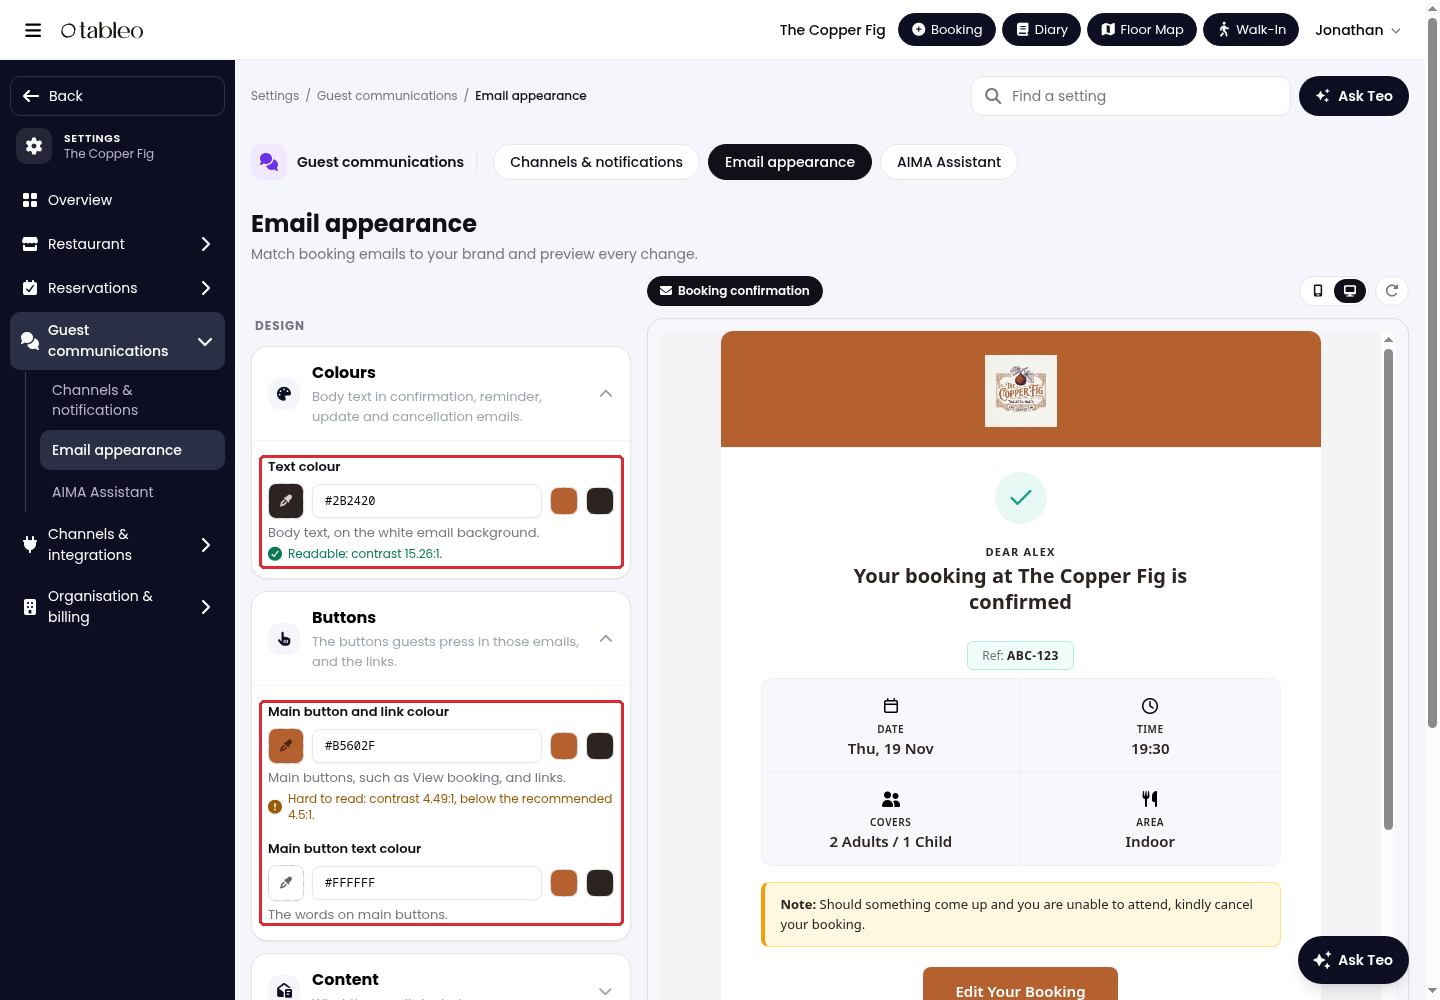
5. Open Colours to choose the Text colour. Under Buttons, choose the Main button and link colour and Main button text colour. Check the contrast feedback and preview.
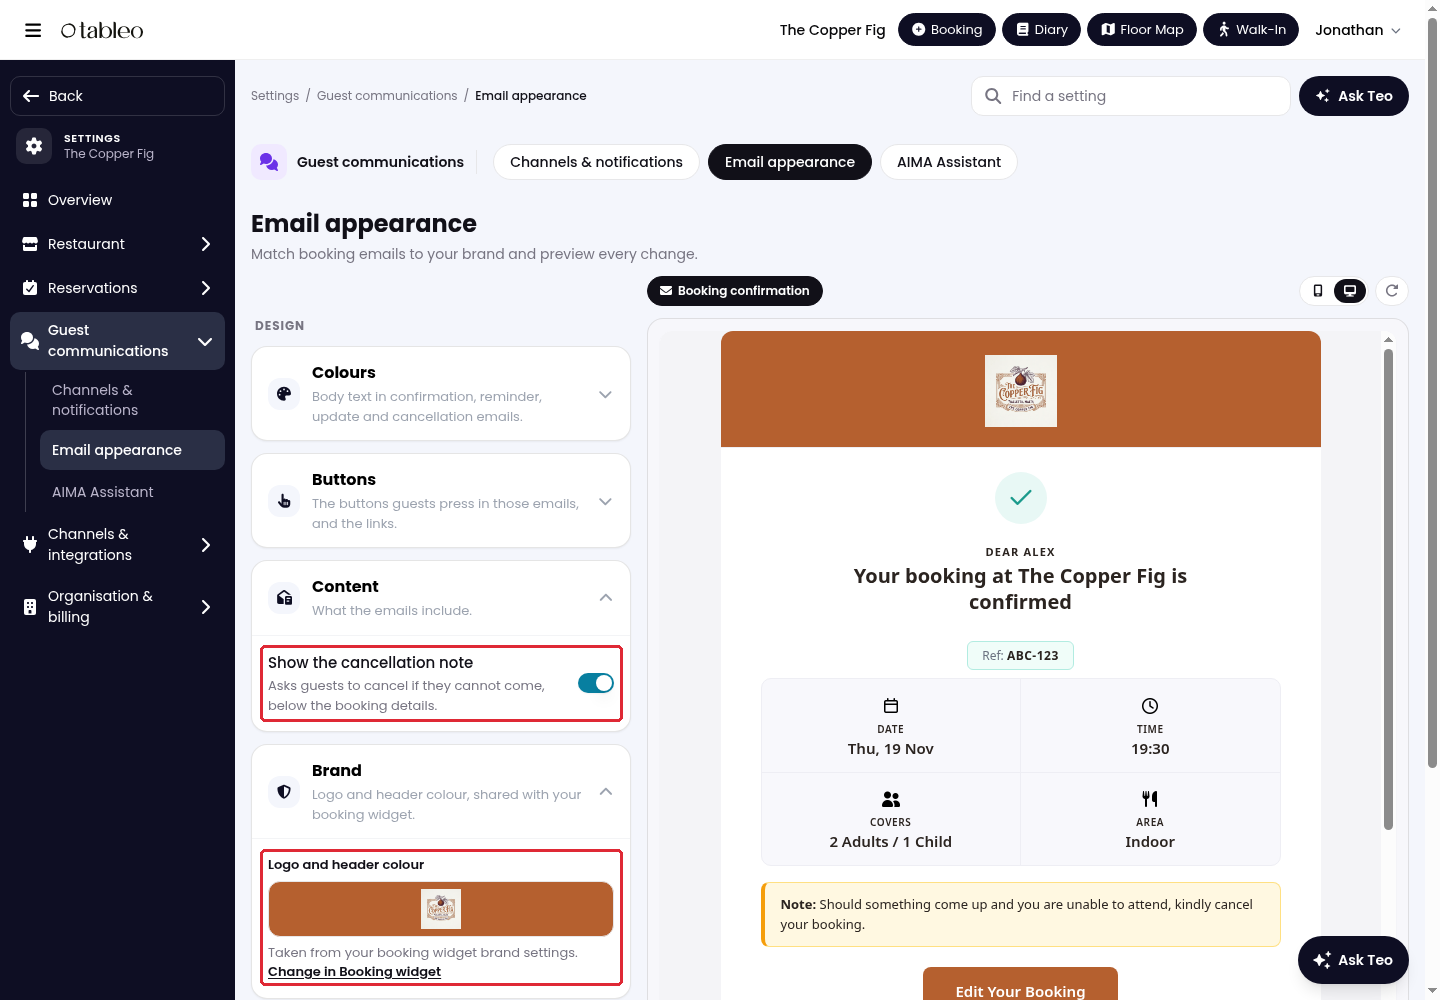
6. Under Content, use Show the cancellation note to show or hide the cancellation note. Click on Save changes to apply your email design changes before leaving this page. Under Brand, the logo and header colour come from the booking widget. Click on Change in Booking widget to open the shared branding settings.
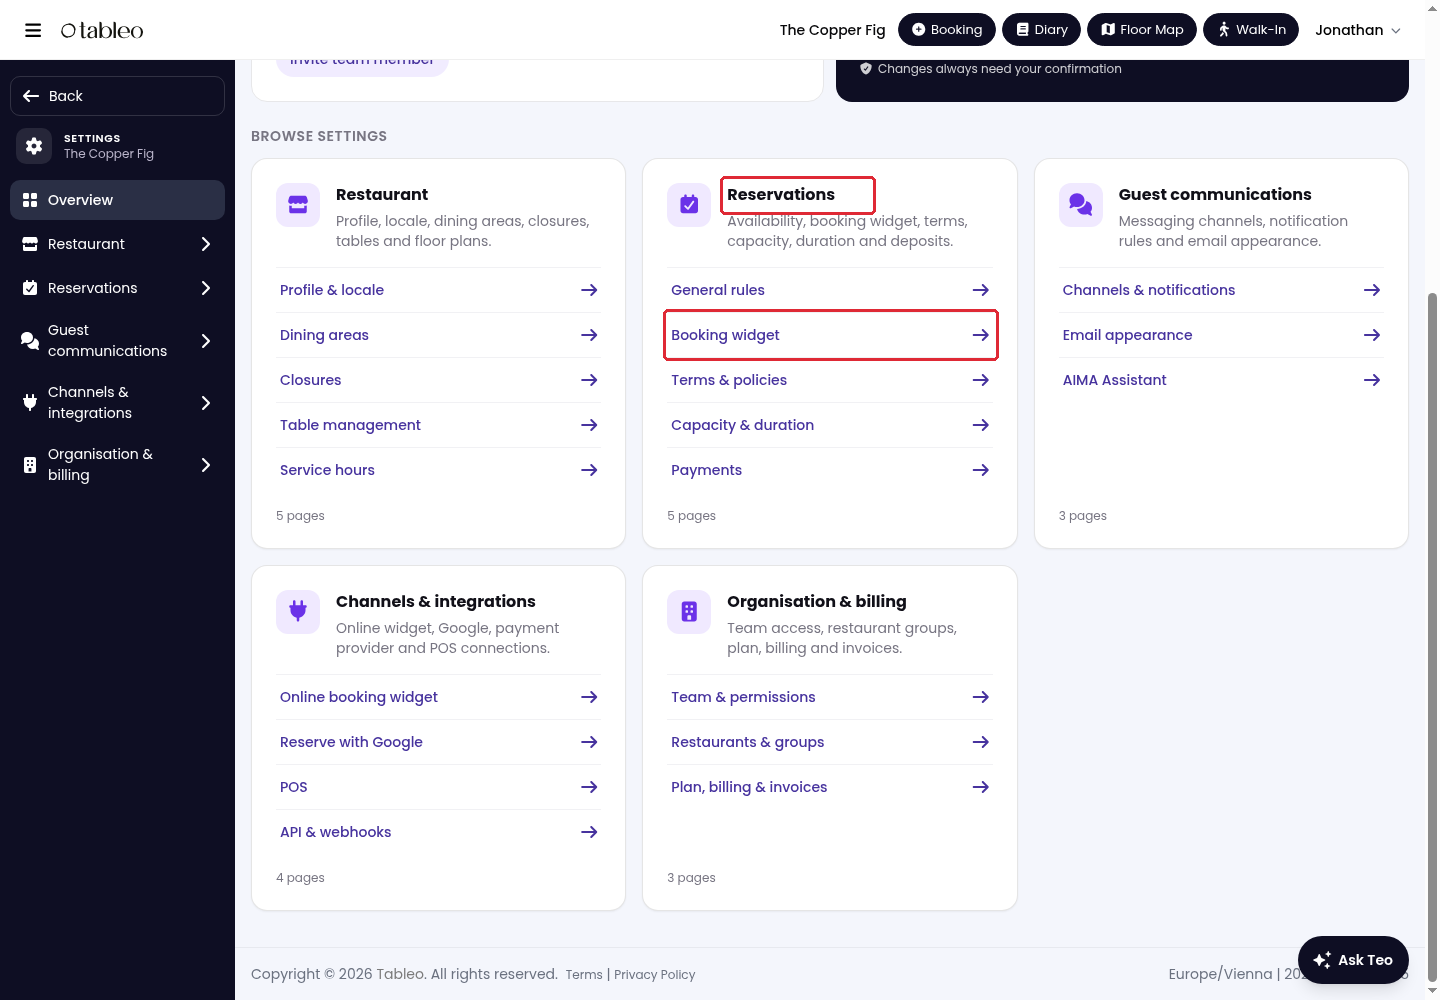
7. You can also reach these settings from Settings → Reservations → Booking widget.
8. In the widget designer, open Design → Brand. Use Logo → Replace to choose a new logo, or adjust Banner colour.
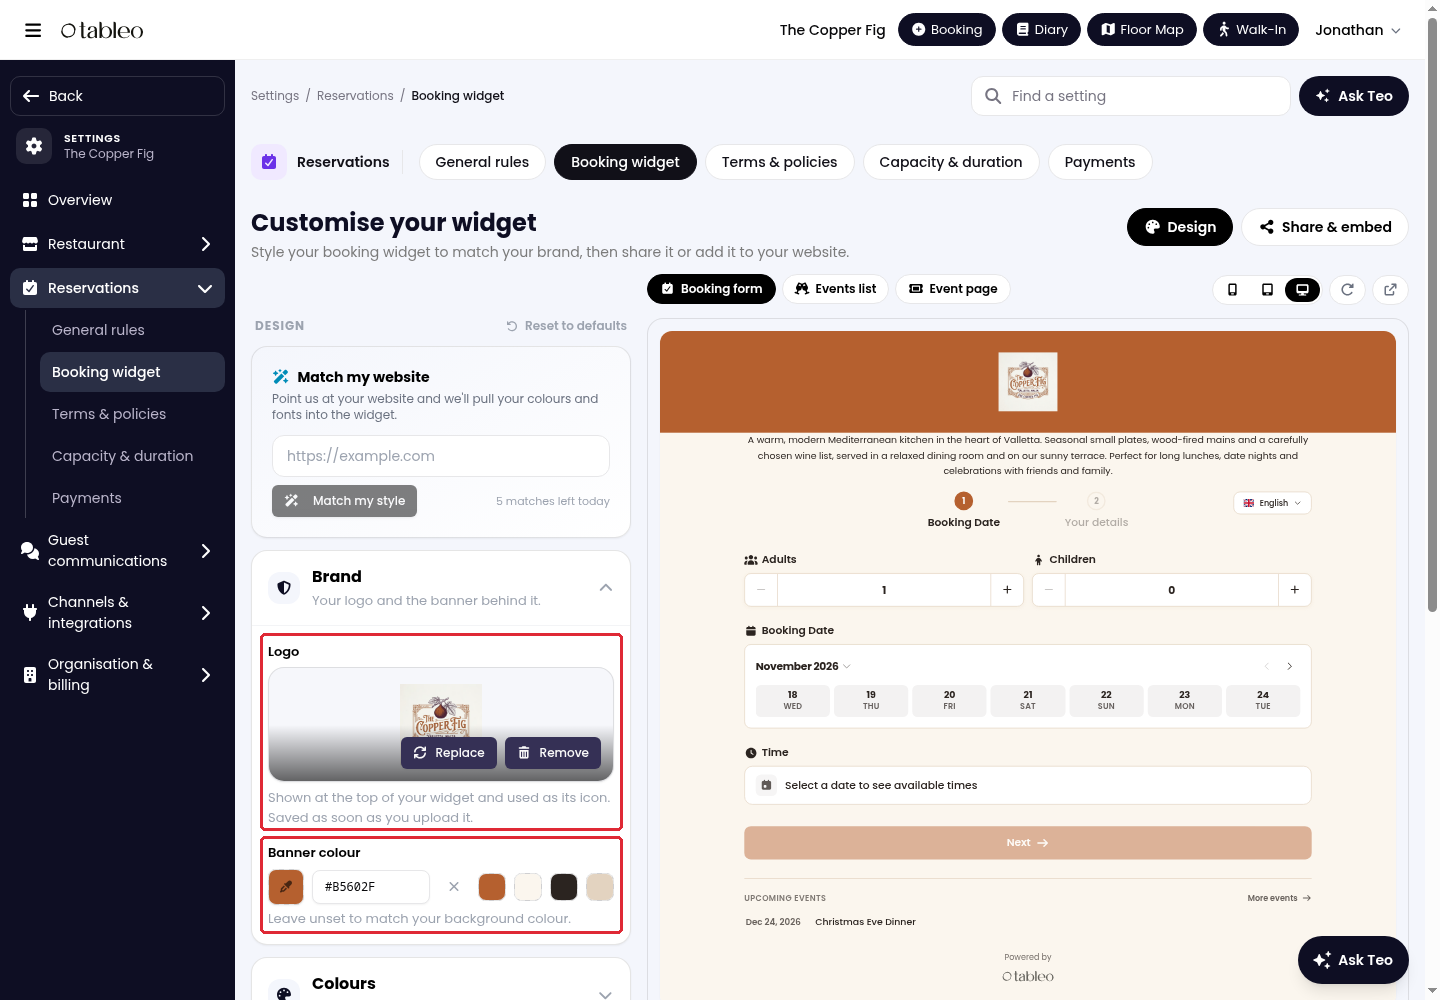
Logo uploads are saved as soon as you upload them and affect the shared booking-widget branding. Prepare the correct file before using Replace. Supported image types are JPEG, PNG, WEBP and SVG.
While we strive to ensure the accuracy and currency of the information in our knowledge base, some articles may contain minor discrepancies due to the constant evolution of our services and products.
Was this article helpful?
That’s Great!
Thank you for your feedback
Sorry! We couldn't be helpful
Thank you for your feedback
Feedback sent
We appreciate your effort and will try to fix the article