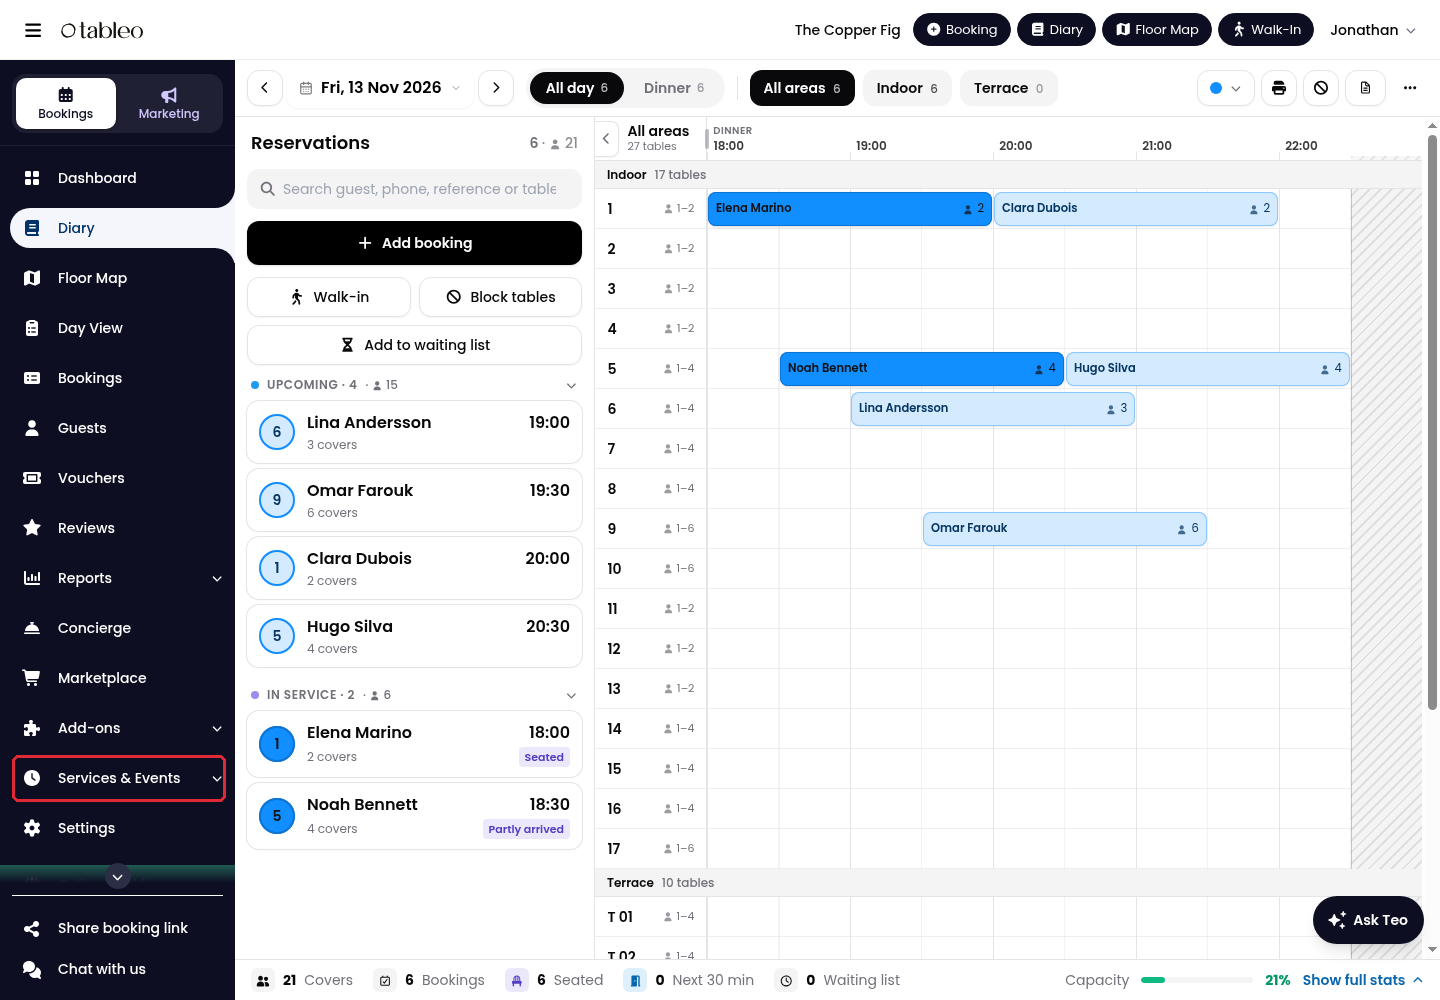
1. Click on Services & Events in the side menu.
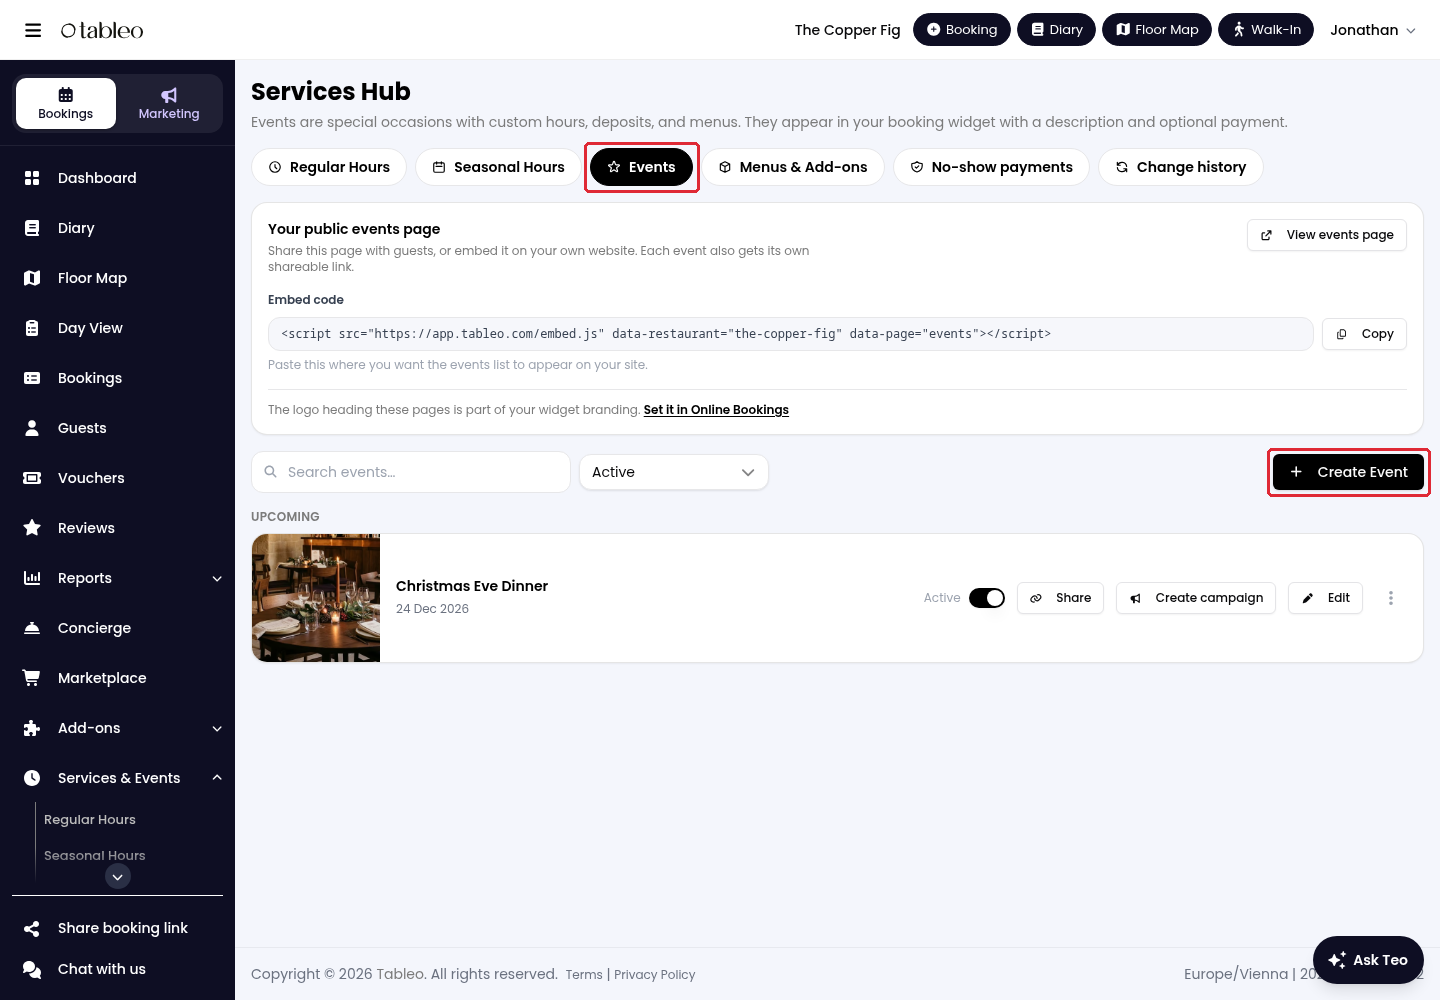
2. Select Events, then click on Create Event.
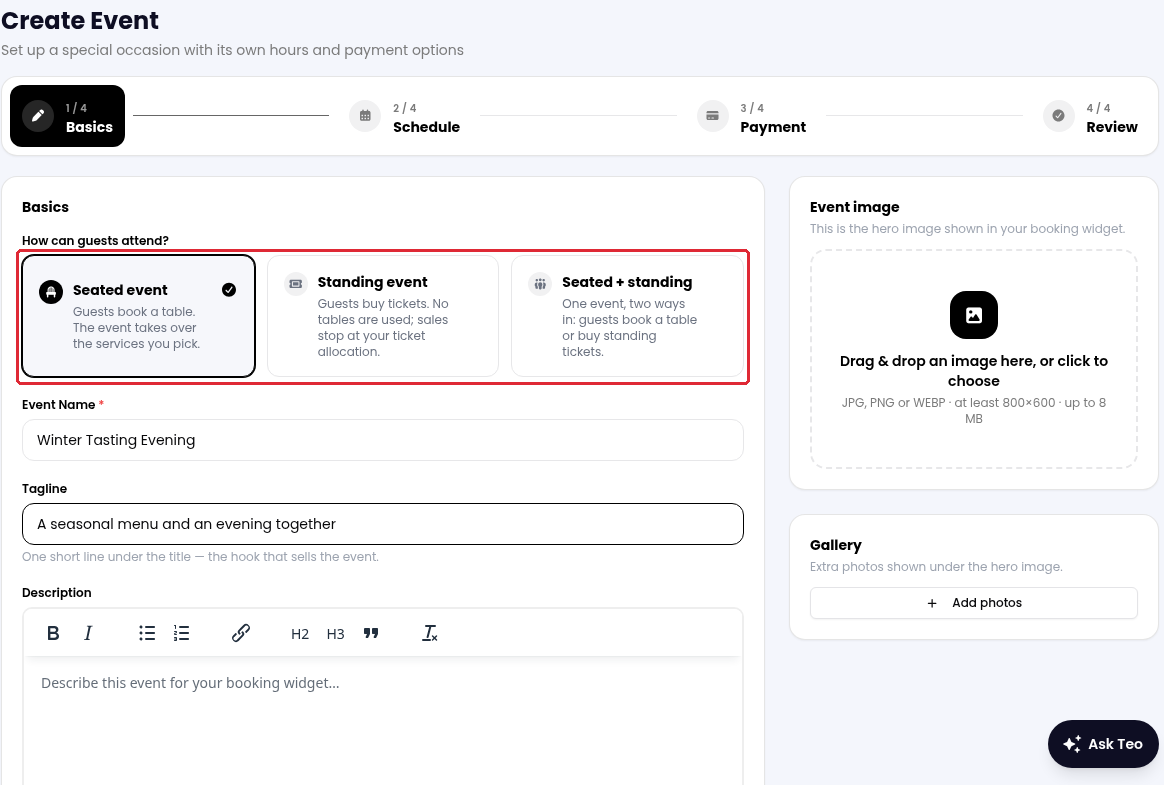
3. In Basics, choose Seated event, Standing event or Seated + standing. Seated events use tables; standing events sell tickets without using tables. Mixed events let guests choose between a table and a standing ticket.
Enter the Event Name, Tagline and Description. Add an Event image for the booking widget and use Gallery → Add photos for additional images.
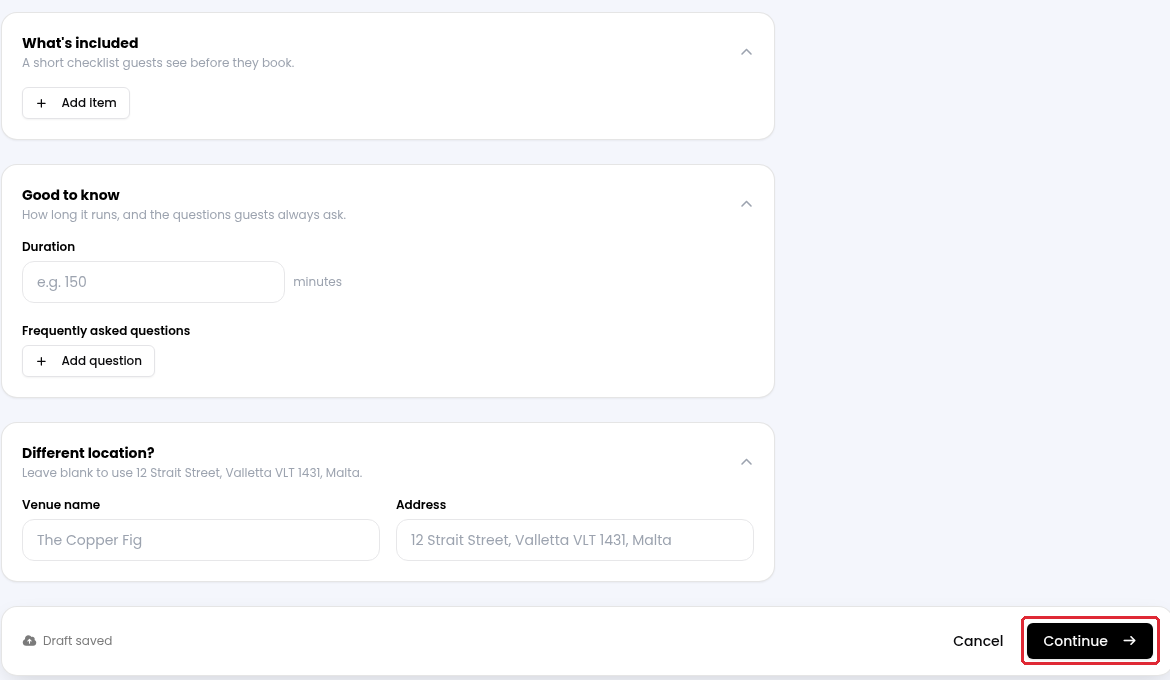
4. Scroll down and expand What’s included to add checklist items. Under Good to know, add the Duration and Frequently asked questions. For another venue, expand Different location? and enter the Venue name and Address; leave these blank to use your restaurant’s address. Click on Continue.
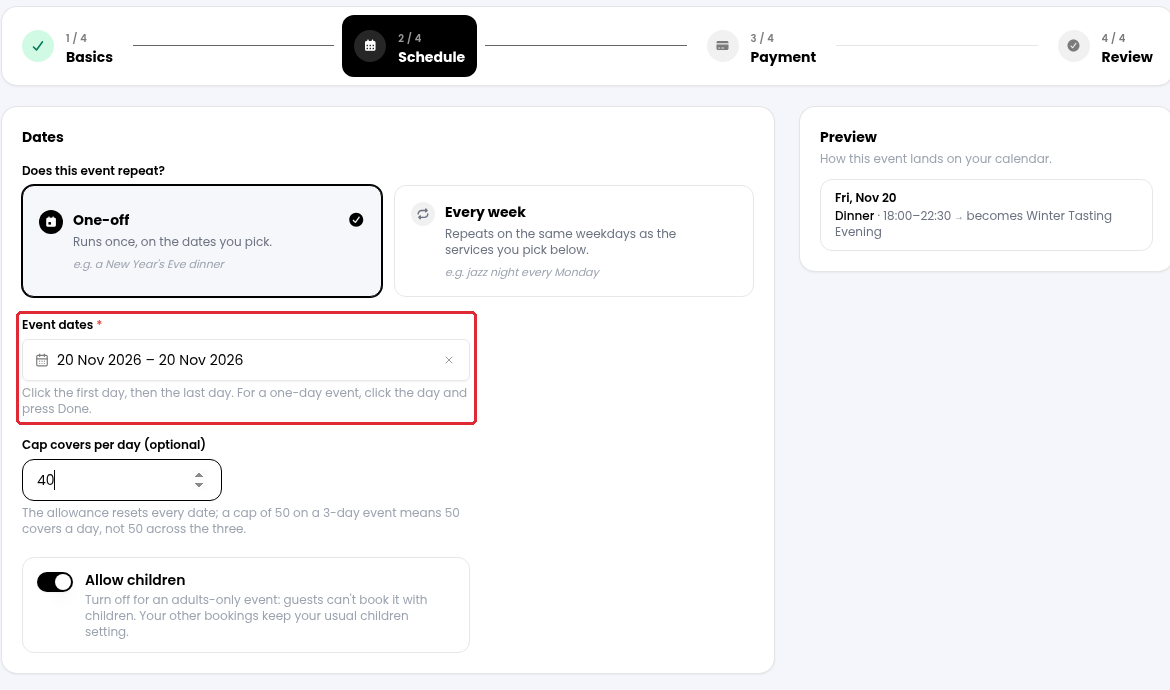
5. In Schedule, choose One-off or Every week. For a one-off event, select the first and last Event dates, then click on Done. For one day, select that day and click on Done. For a weekly event, set the First date and Last date, or choose No end date.
For a seated event, optionally enter Cap covers per day (optional). The cap resets on each event date, not across the whole date range. Use Allow children to decide whether guests can include children.
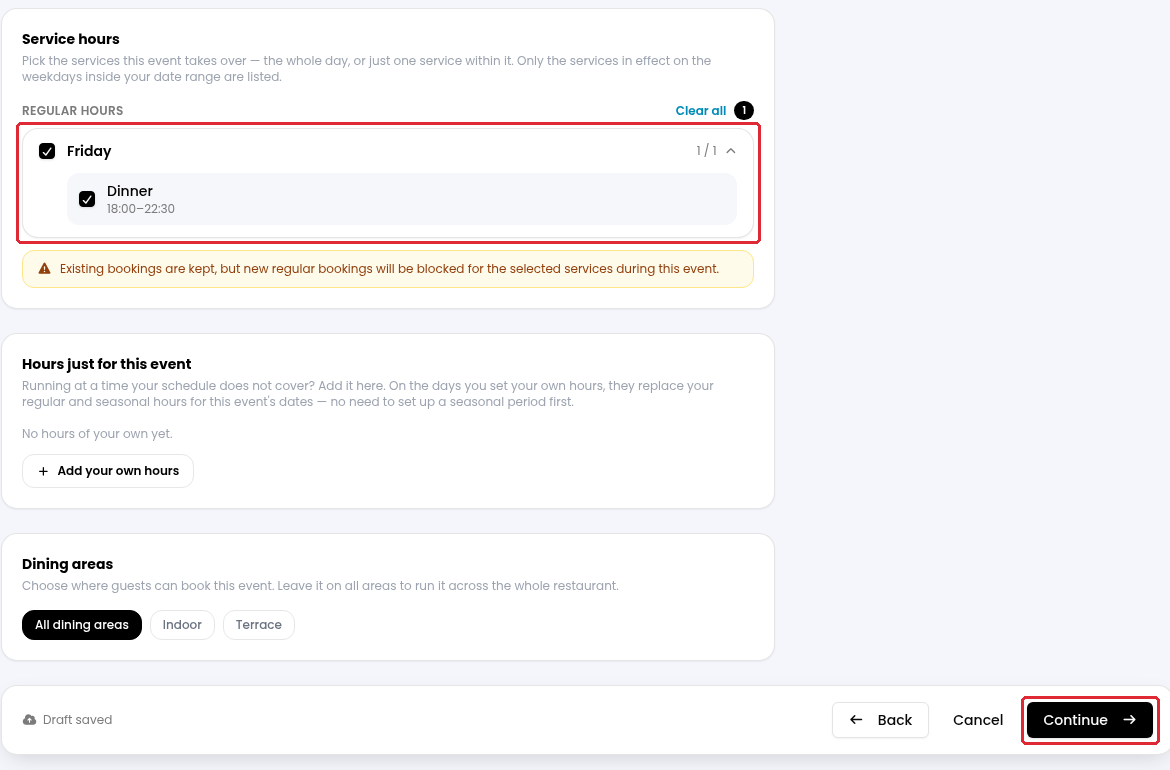
6. For seated or mixed events, expand the relevant weekdays under Service hours and select the services the event will take over. Existing bookings are kept, but new regular bookings are blocked for those selected services while the event runs.
If the event needs different hours, use Hours just for this event → Add your own hours. On those days, the event’s own hours replace regular and seasonal hours for its dates. Under Dining areas, keep All dining areas or select the areas guests can book. For weekly events, review the repeating weekdays and any Skipped dates.
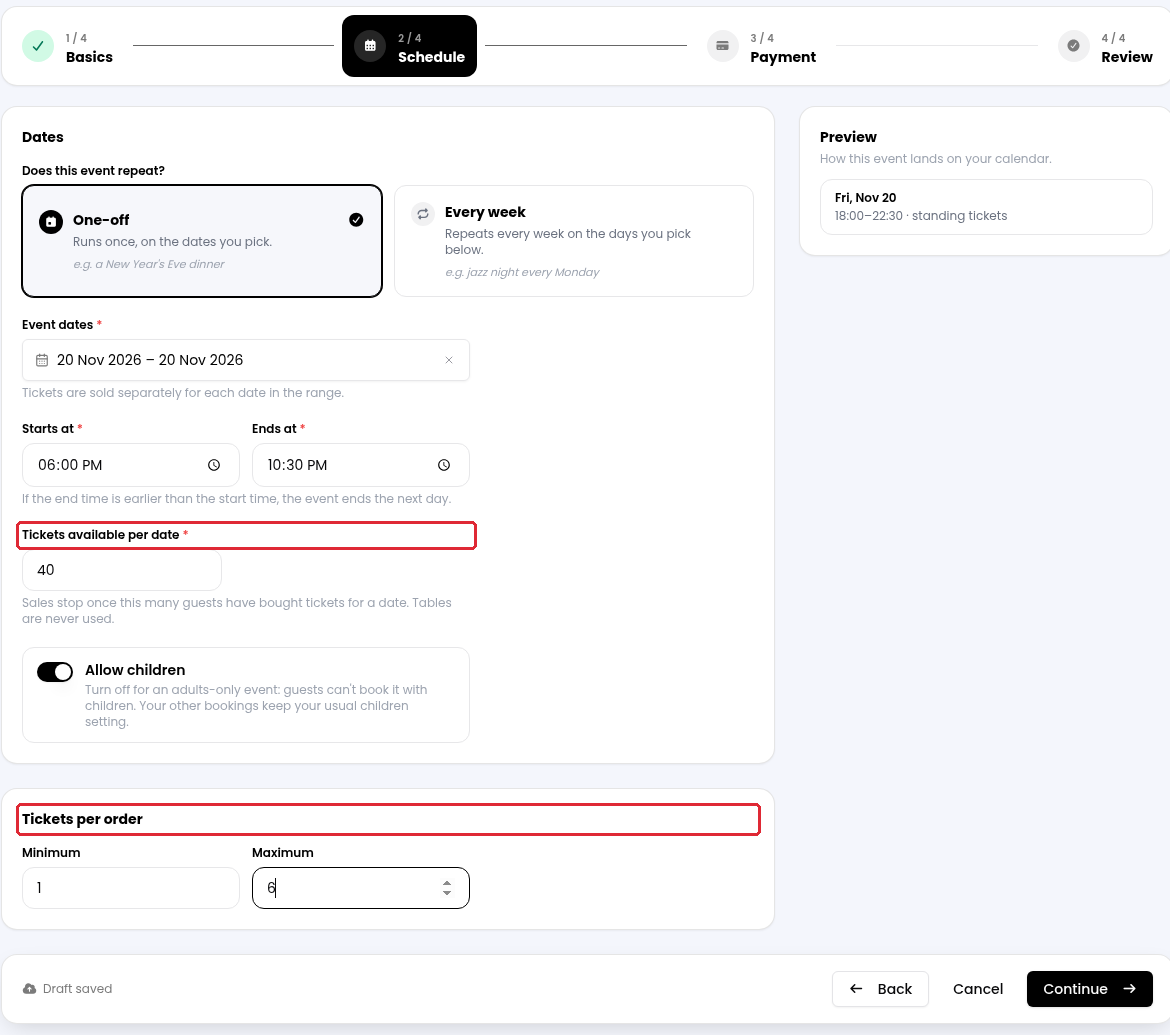
7. For a Standing event, set Starts at, Ends at and Tickets available per date. Under Tickets per order, set the Minimum and Maximum guests can reserve in one order. Ticket availability resets for each date and does not use tables.
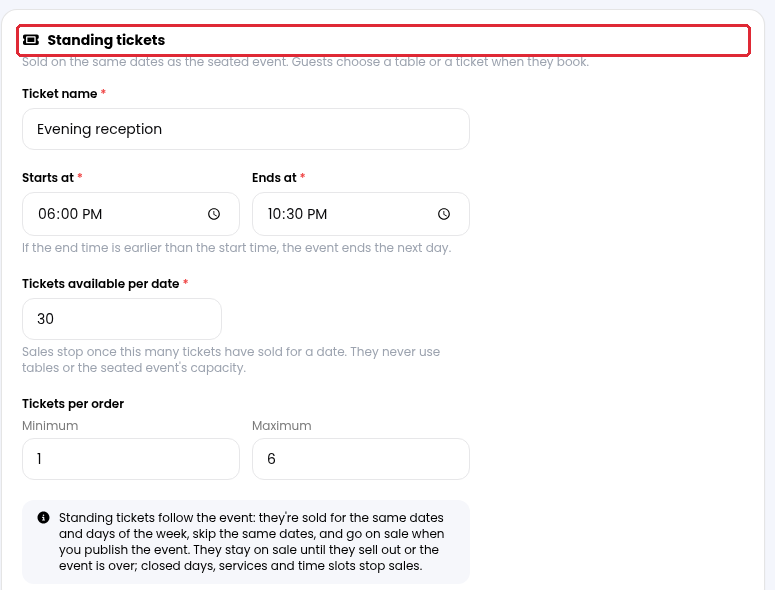
8. For Seated + standing, configure the seated services and cover cap, then scroll down to Standing tickets. Enter the Ticket name, times, tickets available per date and order limits. The standing allocation is separate from seated capacity and follows the same event dates. Click on Continue after completing the schedule.
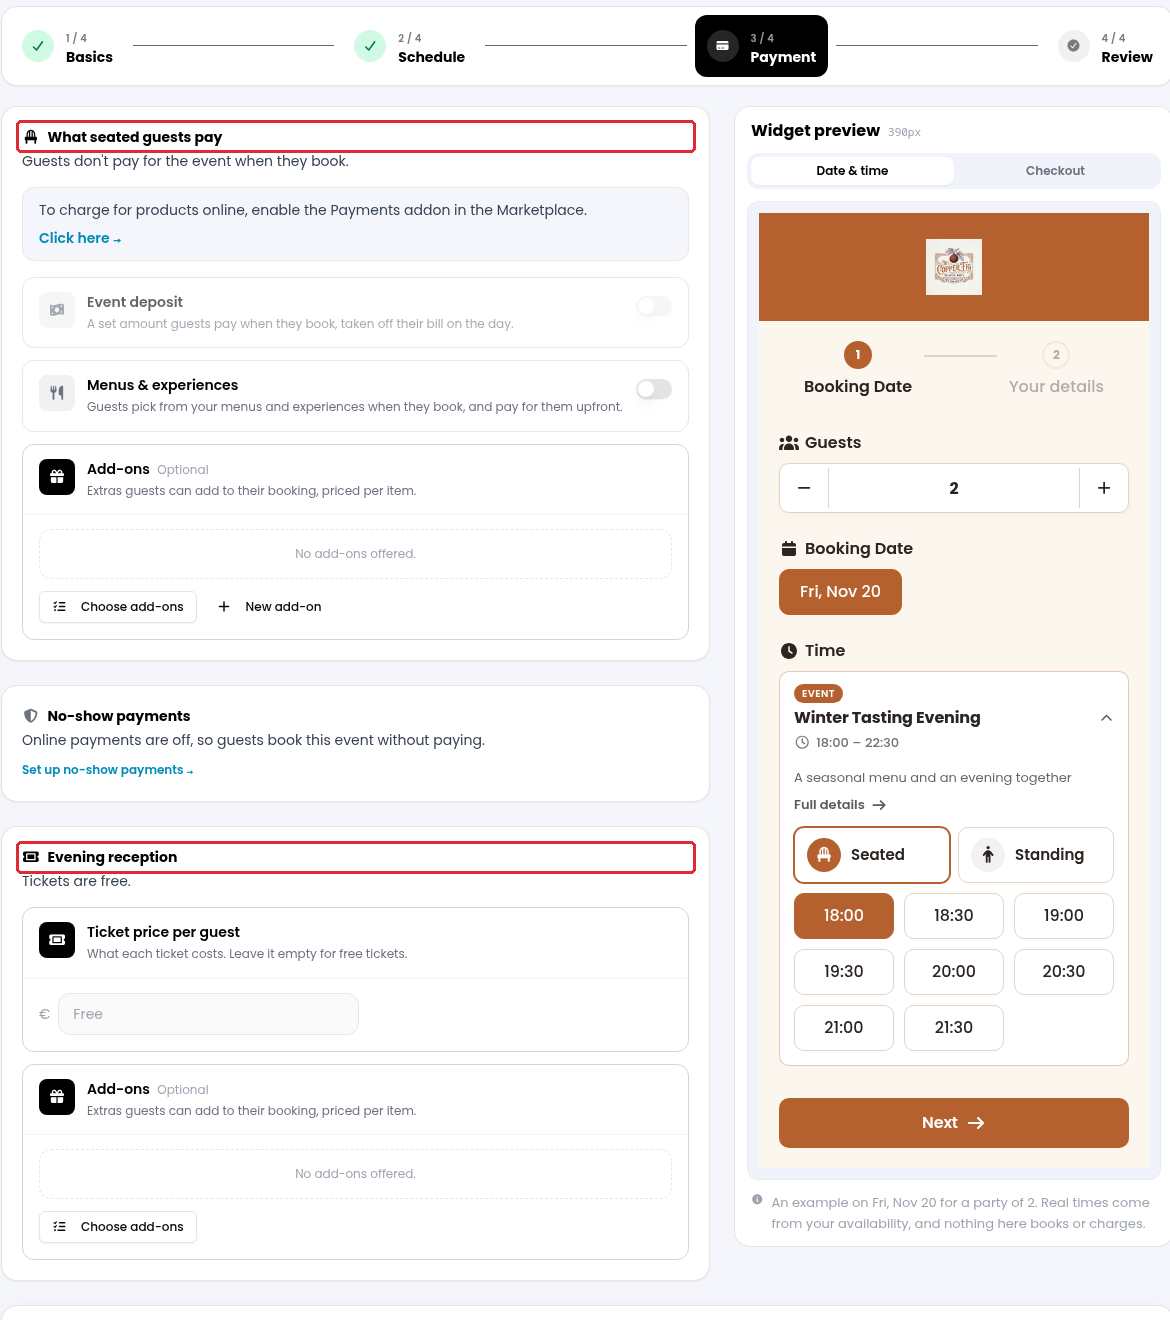
9. In Payment, review what guests will pay. For seated guests, Event deposit is an amount paid when booking and deducted from their bill; Menus & experiences lets guests choose items to pay for upfront. Standing events use Ticket price per guest; leave the price empty for free tickets. Mixed events have separate seated and standing sections.
Online payments must be enabled before you can collect event payments. When they are off, guests book without paying and the charging controls are unavailable, as shown below. Where seated deposit settings offer a per-table option, this charges once per table rather than once per cover. Event deposits, tickets and product payments are not the same as card-only verification; review the separate No-show payments rule too.
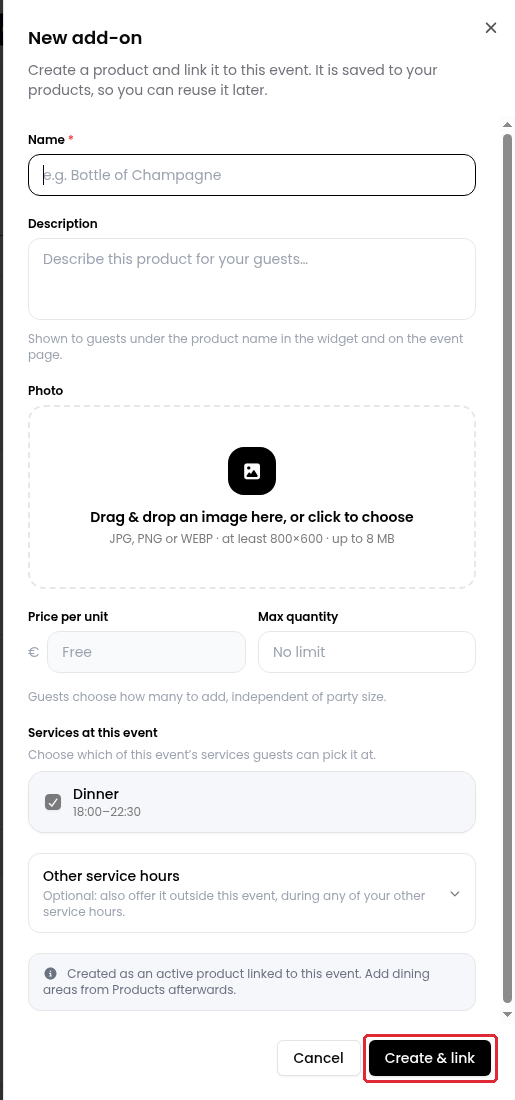
10. To offer an existing extra, click on Choose add-ons. To create one in the event, click on New add-on, complete its Name, Description, optional Photo, Price per unit and Max quantity. Check Services at this event, then click on Create & link. This saves a reusable product as well as linking it to the event.
For menus or experiences, prepare the product through Services & Events → Menus & Add-ons → Add Product. Choose its Type, complete its details, pricing, guest limits and Linked Service Hours, then click on Create Product. Return to the event’s Payment tab to choose the relevant products when those controls are available.
Experience means an activity booked for the whole party and priced per guest. Menu means a set menu chosen in advance and priced per guest. Add-on means an optional extra priced per item, with quantities independent of the number of guests. Review the product’s Single Select and Force Select settings rather than assuming every product is compulsory. Click on Continue when the event’s payment and product choices are ready.
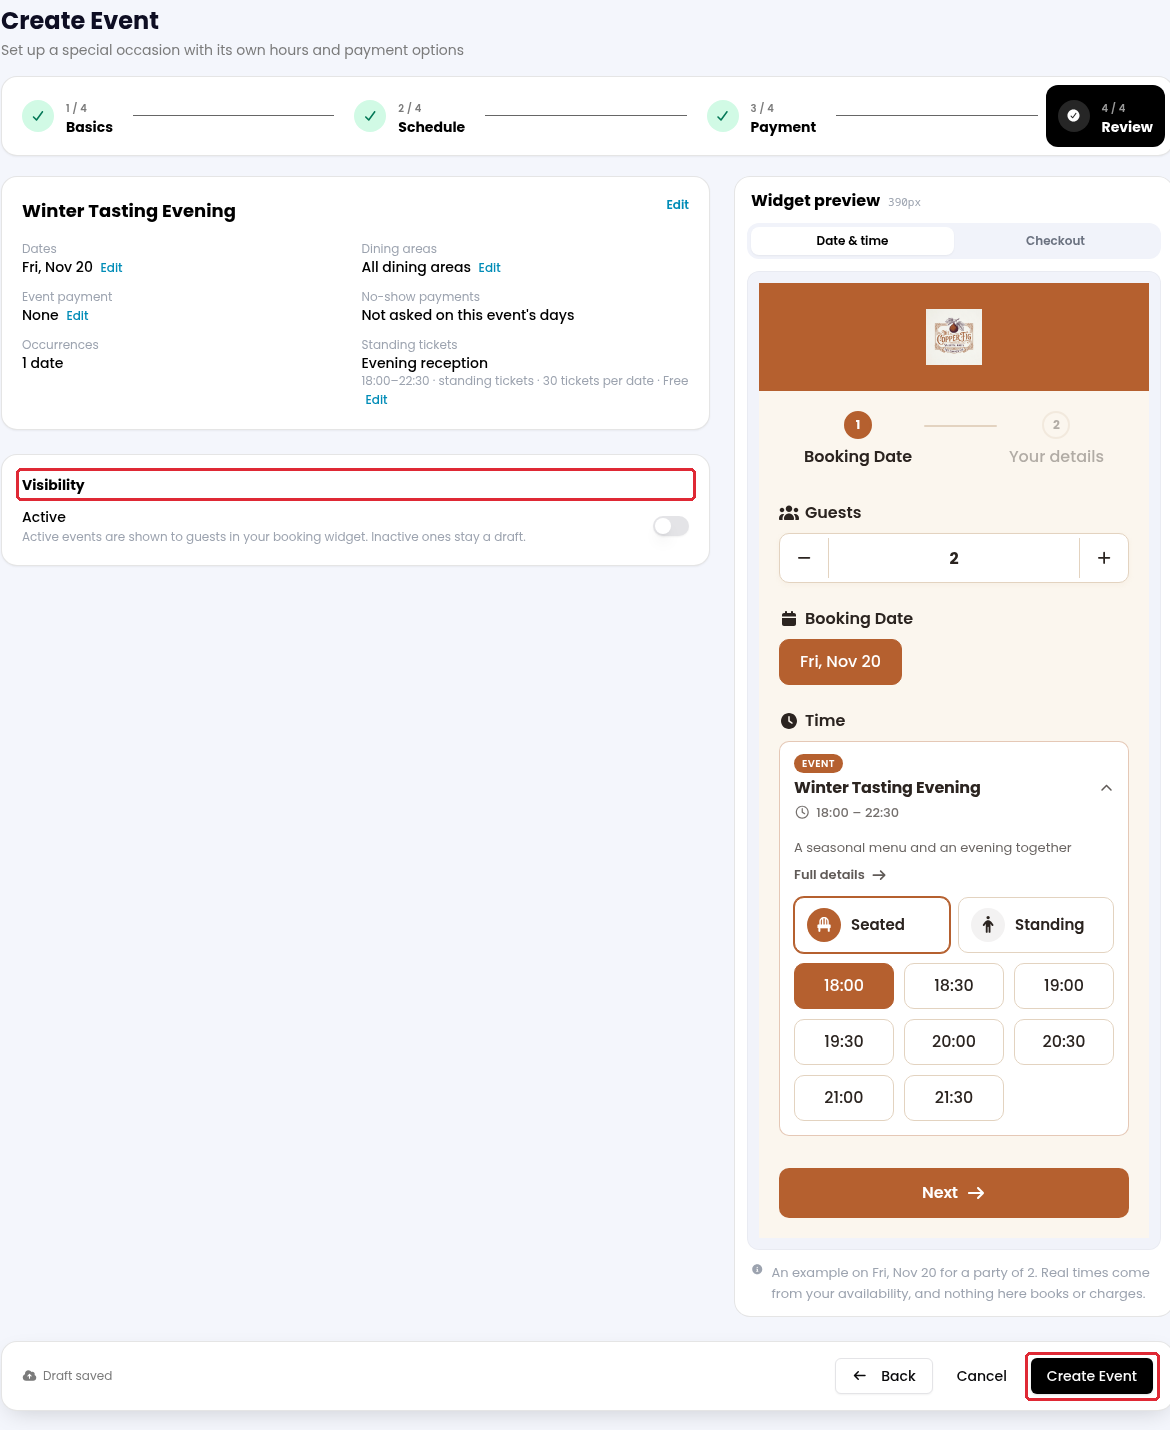
11. In Review, check the dates, dining areas, event payments, no-show rule and any standing tickets. Use Edit beside a summary to correct it. Check the Widget preview as well.
Under Visibility, turn on Active only when the event should be shown to guests. Leave it off to keep the event inactive. Click on Create Event to finish. The example below leaves visibility off. Draft progress is saved as you work; Cancel does not necessarily discard it.
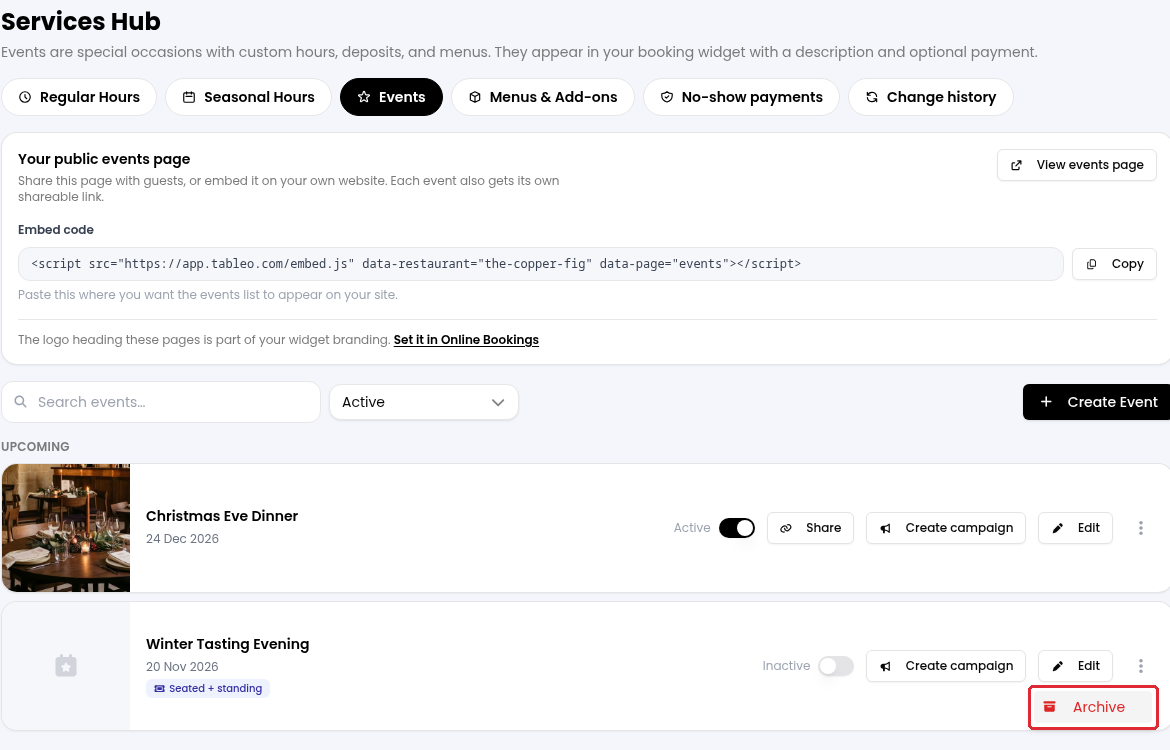
12. Return to Events to manage the event. Use its switch to activate or deactivate it, Edit to change it, and Share to copy the link for an active event. Open the three-dot Actions menu and choose Archive to remove an event from the current list and booking widget; confirm Archive in the dialog. Archived events can be restored.
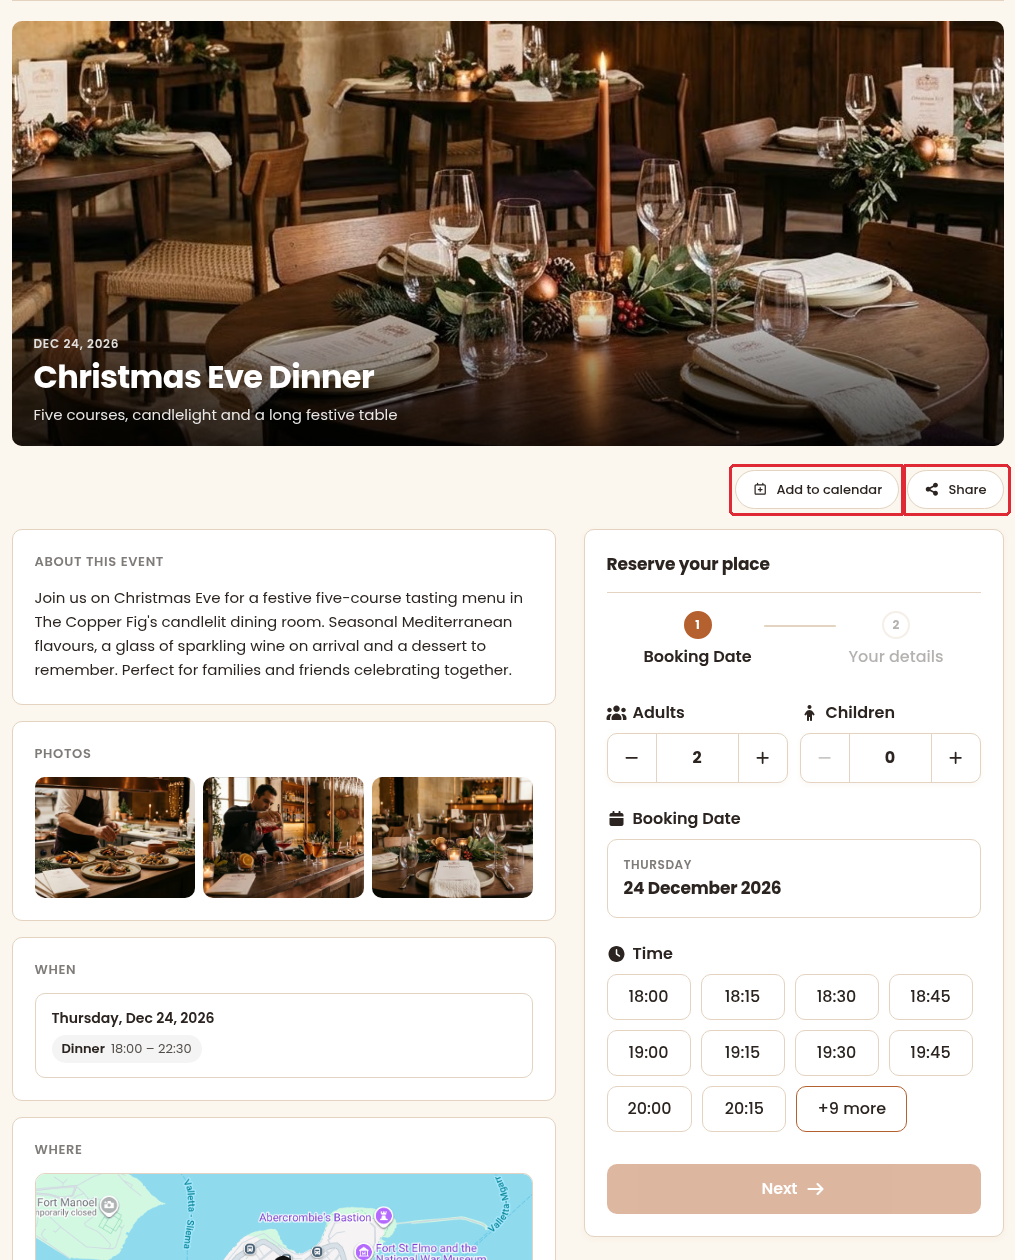
13. To check an active event’s guest-facing page, open Edit → Review → View public page. Guests can see the event information, choose a booking time, use Add to calendar or Share. The example below shows an existing active event.
While we strive to ensure the accuracy and currency of the information in our knowledge base, some articles may contain minor discrepancies due to the constant evolution of our services and products.
Was this article helpful?
That’s Great!
Thank you for your feedback
Sorry! We couldn't be helpful
Thank you for your feedback
Feedback sent
We appreciate your effort and will try to fix the article