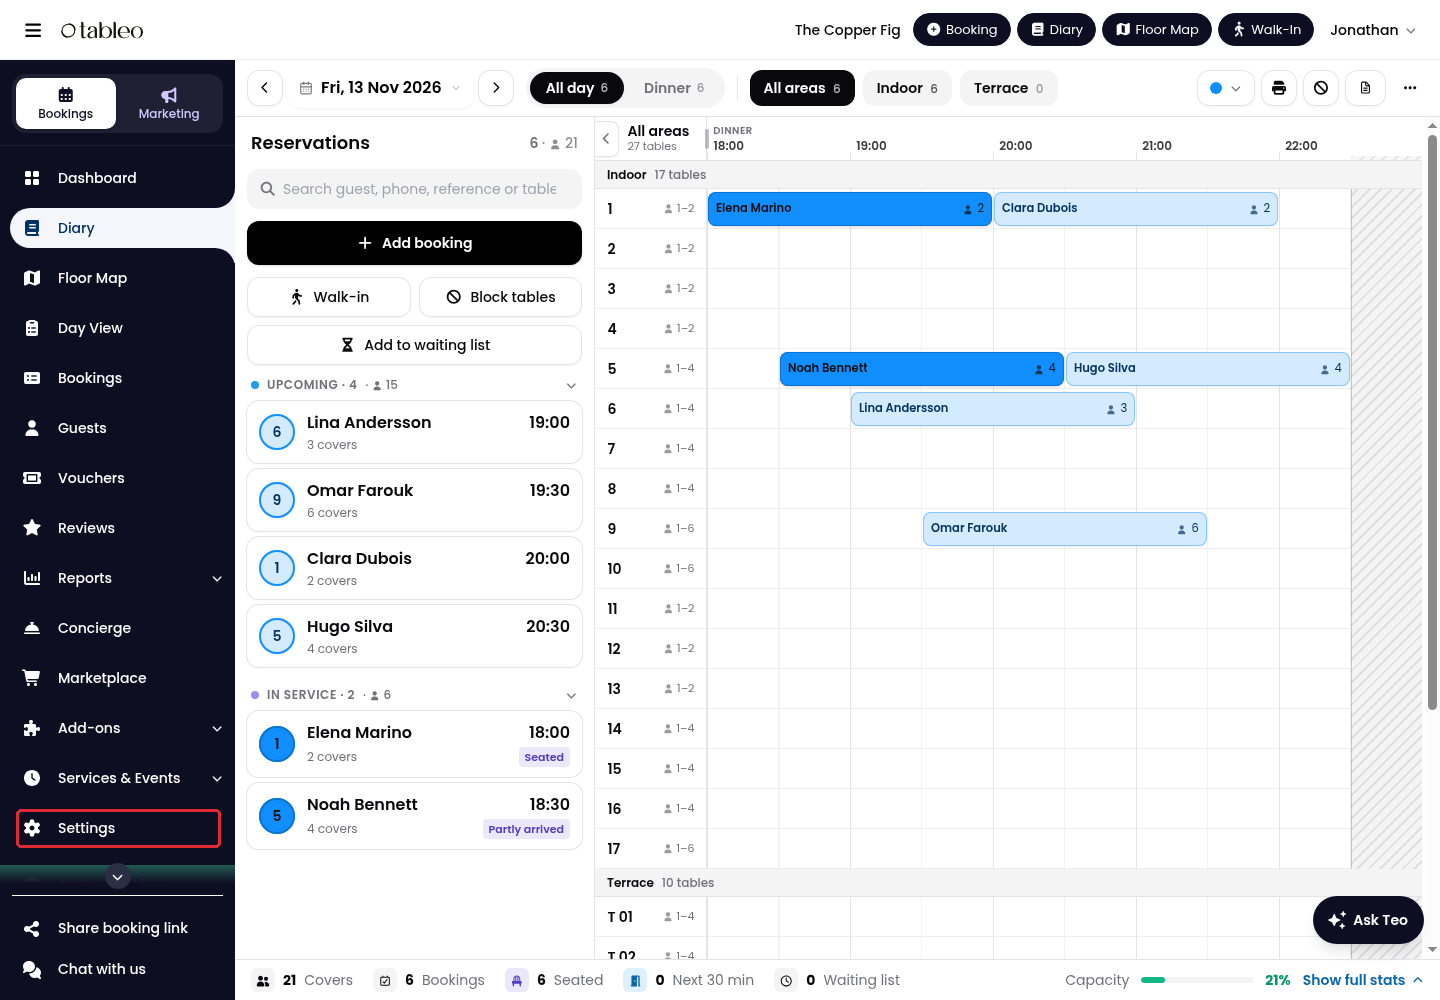
1. Click on Settings in the side menu.
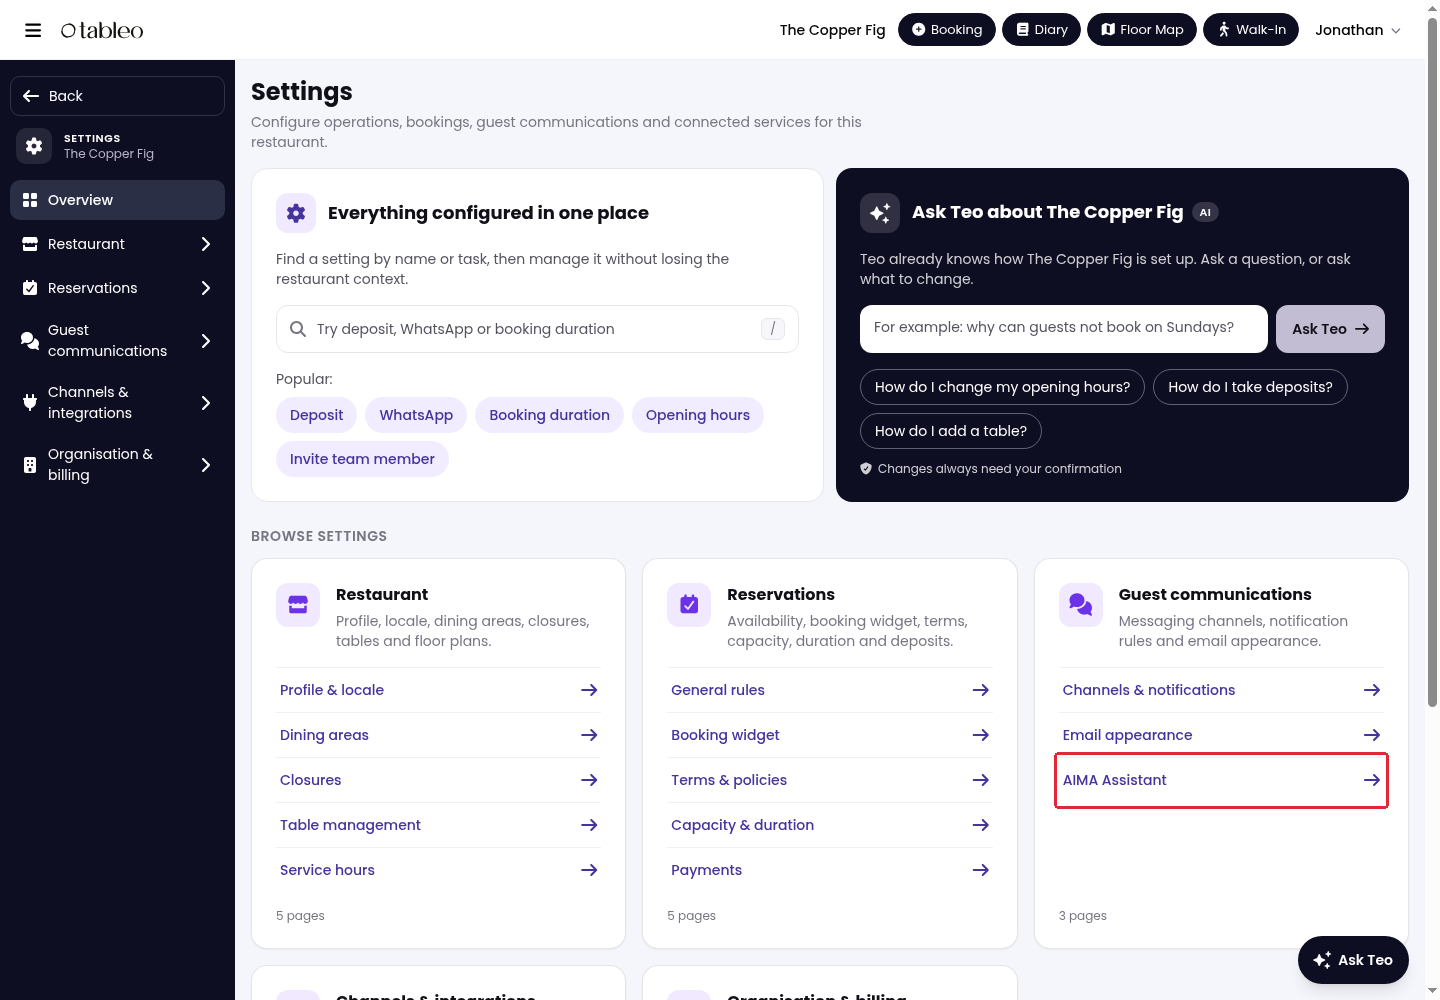
2. Under Guest communications, open AIMA Assistant.
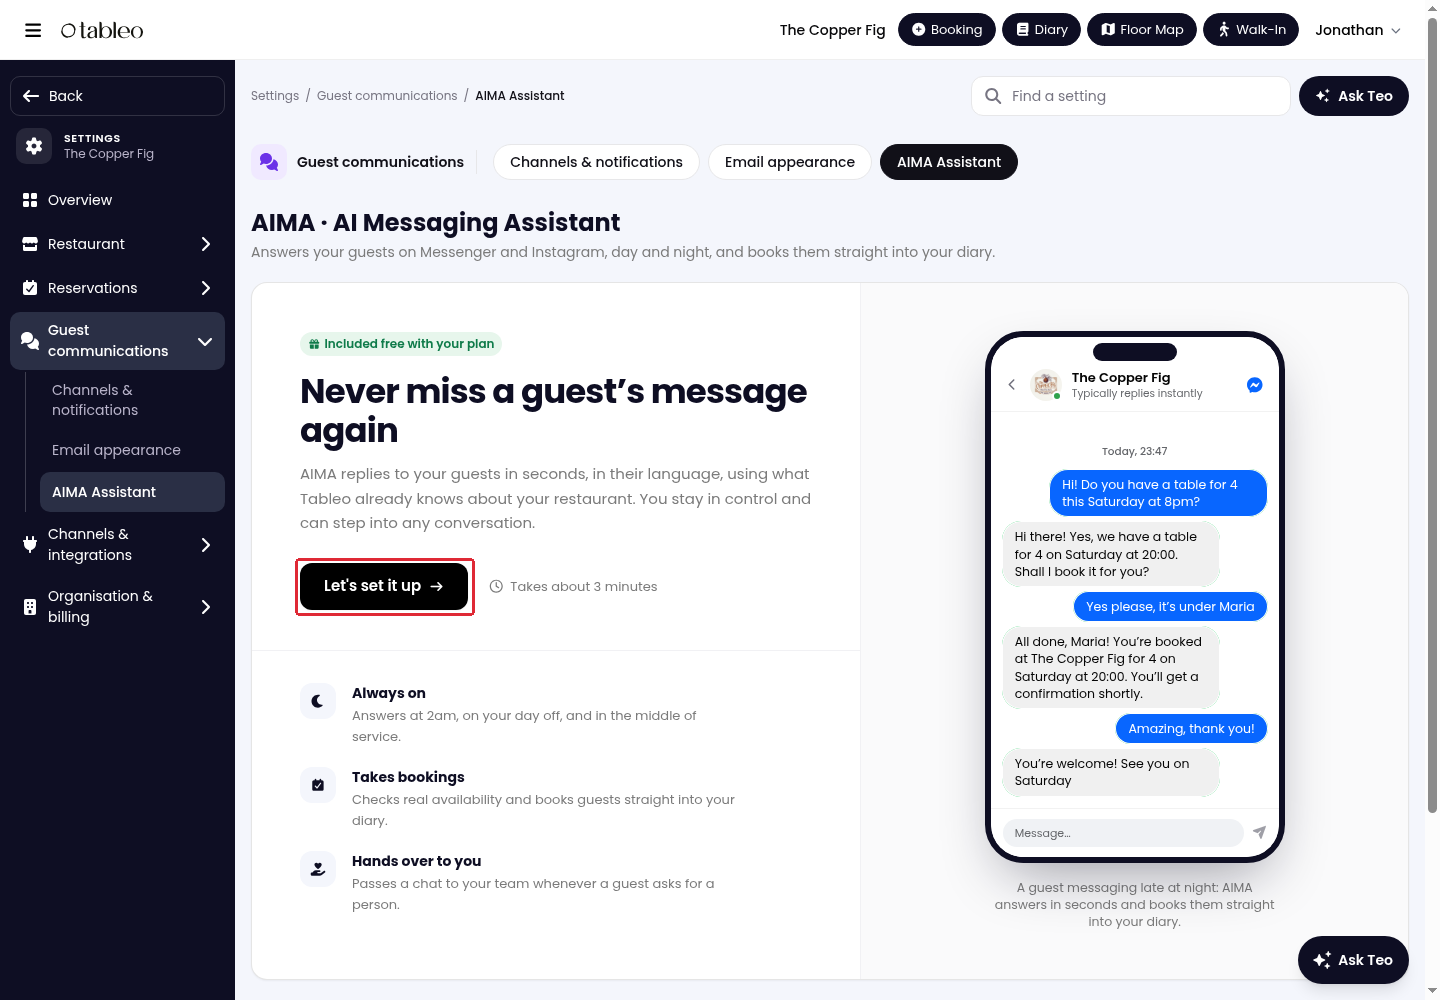
3. Click on Let’s set it up.
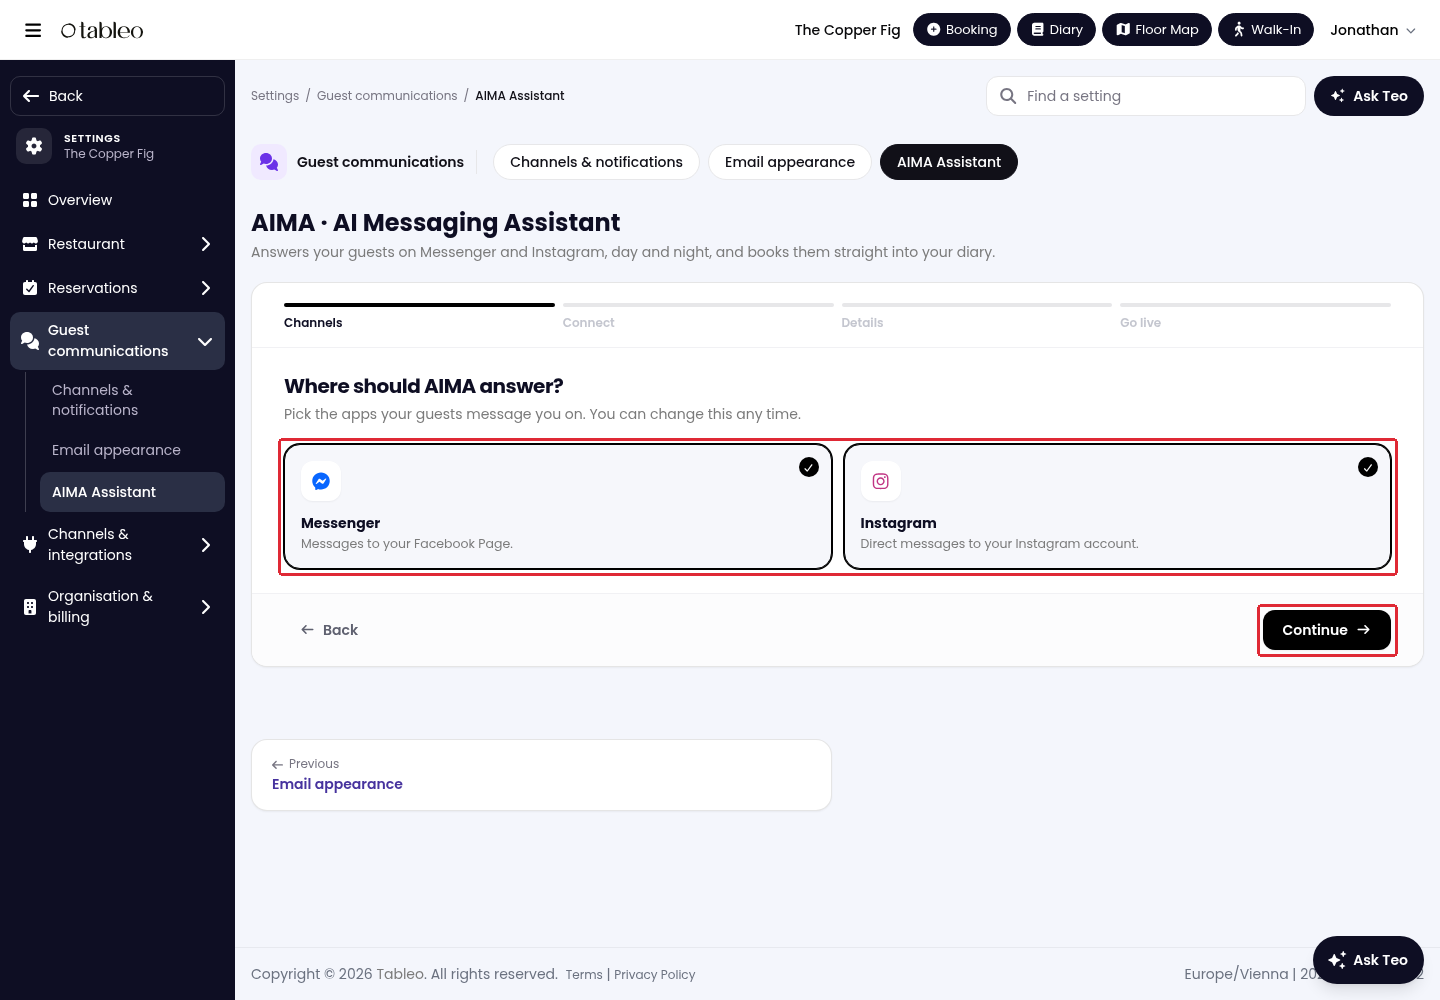
4. Choose Messenger, Instagram, or both, then click on Continue.
5. Make sure you can manage the restaurant’s Facebook Page, then click on Continue with Facebook. When Facebook asks which Pages to share, select your restaurant’s Page, even if you manage it through Meta Business Suite. Keep every requested permission enabled so AIMA can read and reply to messages.
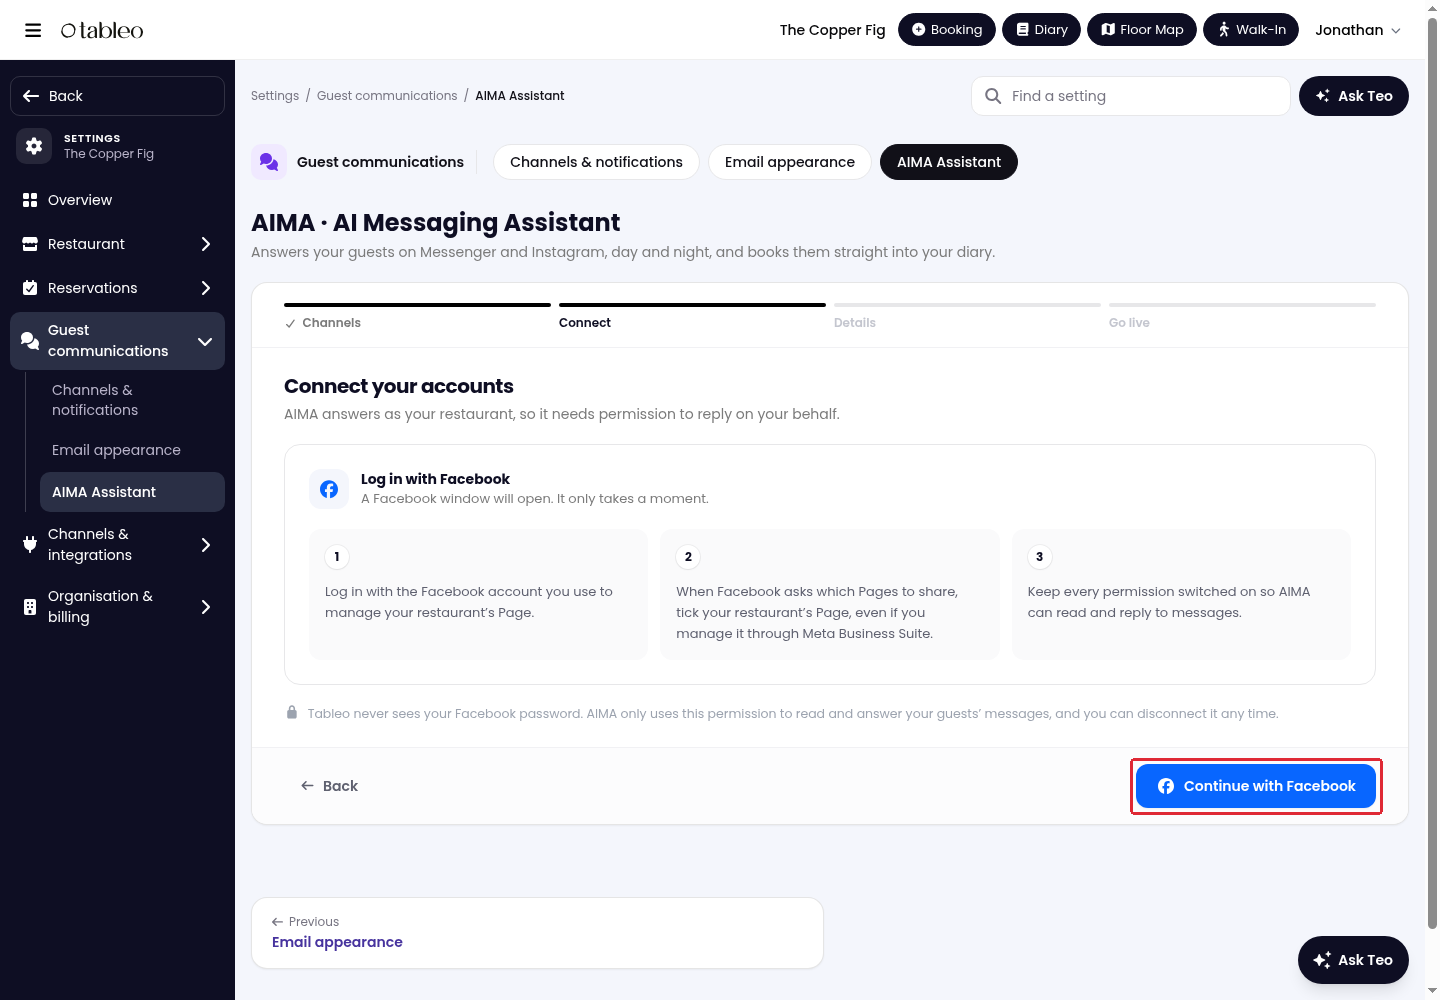
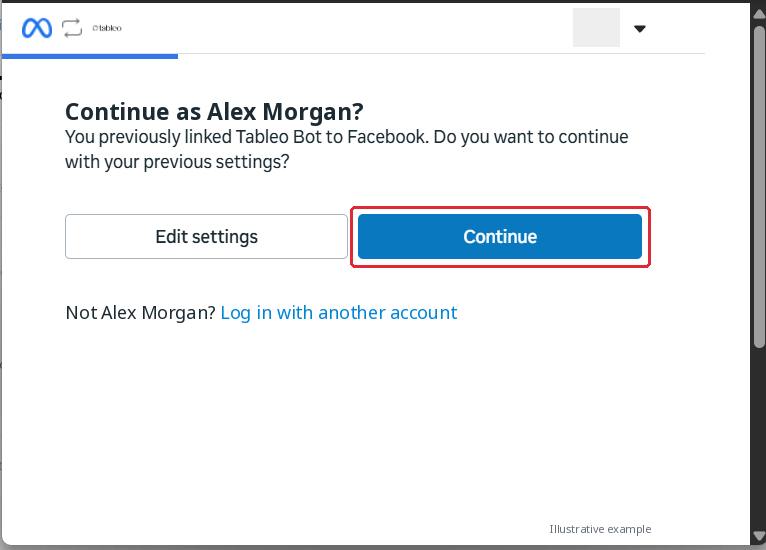
6. Continue with the Facebook account that has access to manage your business Page. If Facebook shows a previously linked account, review it before clicking on Continue.
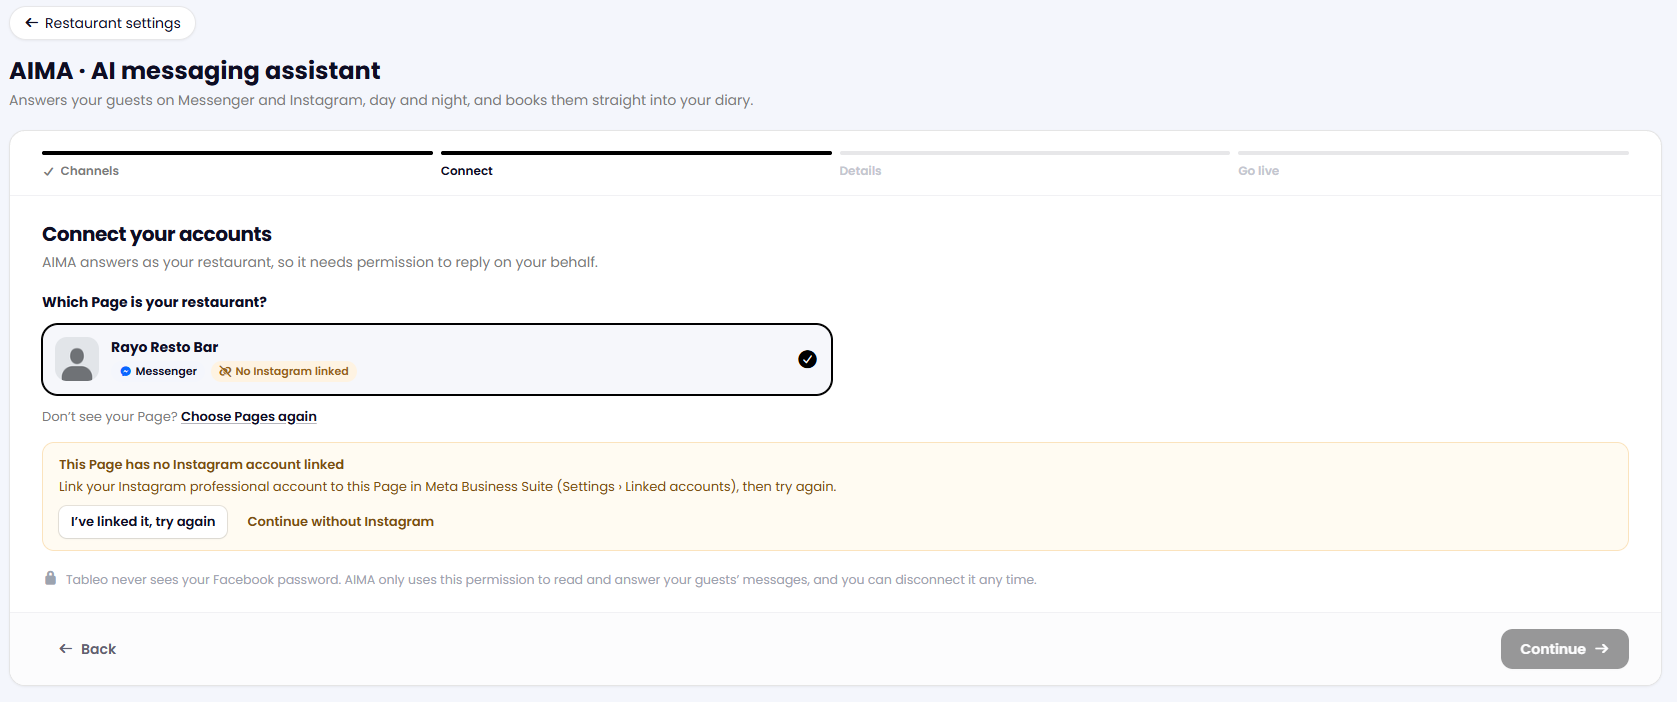
7. Select your restaurant’s business Page. If no Instagram account is linked and you want to proceed without Instagram, choose Continue without Instagram. Then click on Continue.
8. Review the information AIMA has imported from Tableo. To correct a restaurant detail, hover over the field and click on Edit in Tableo.
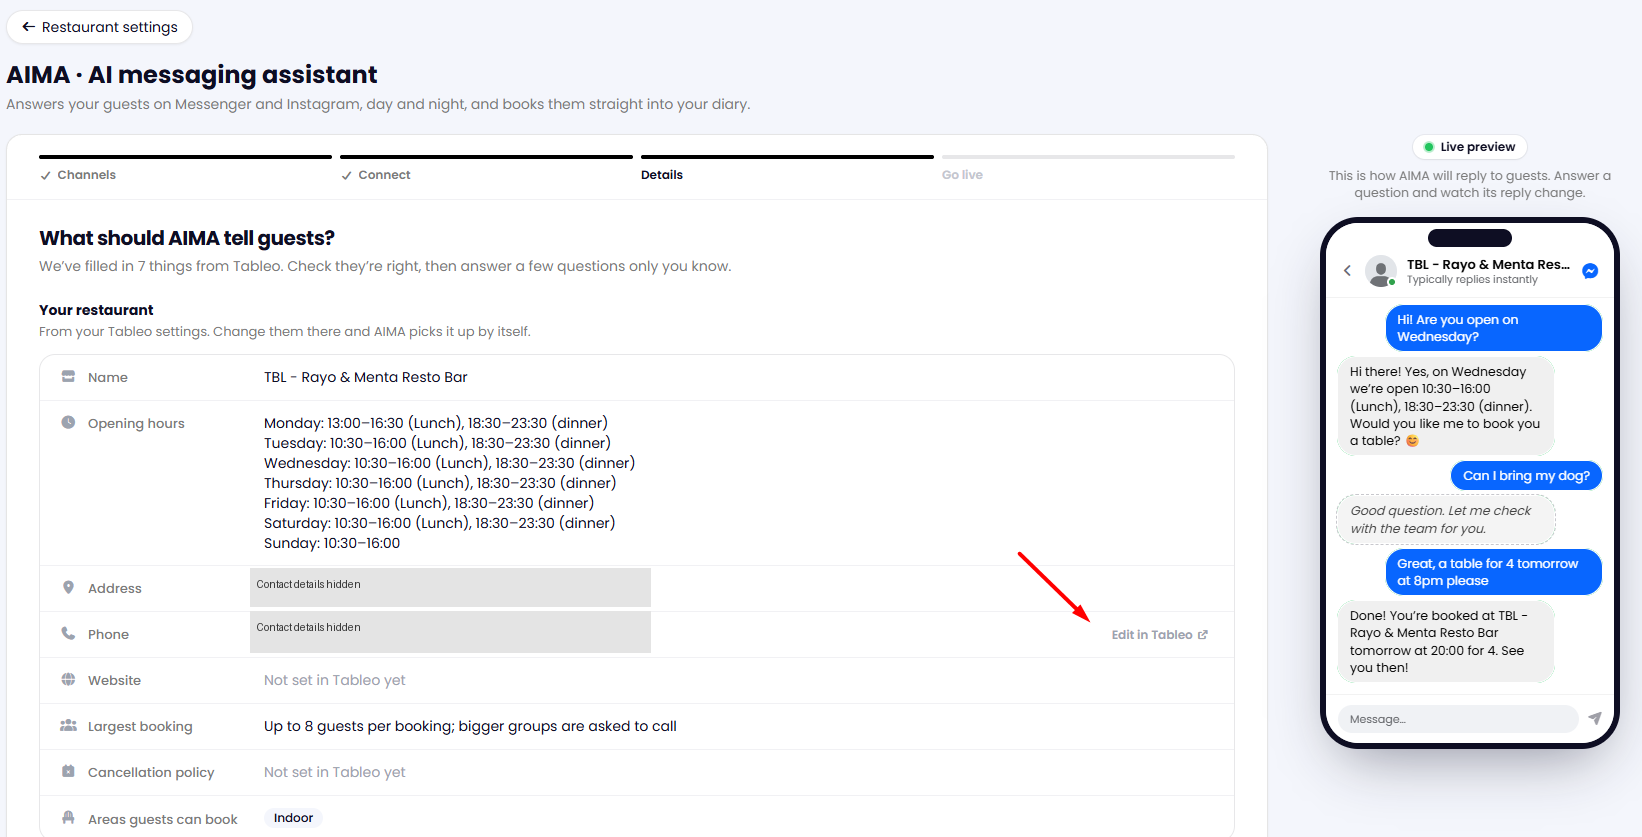
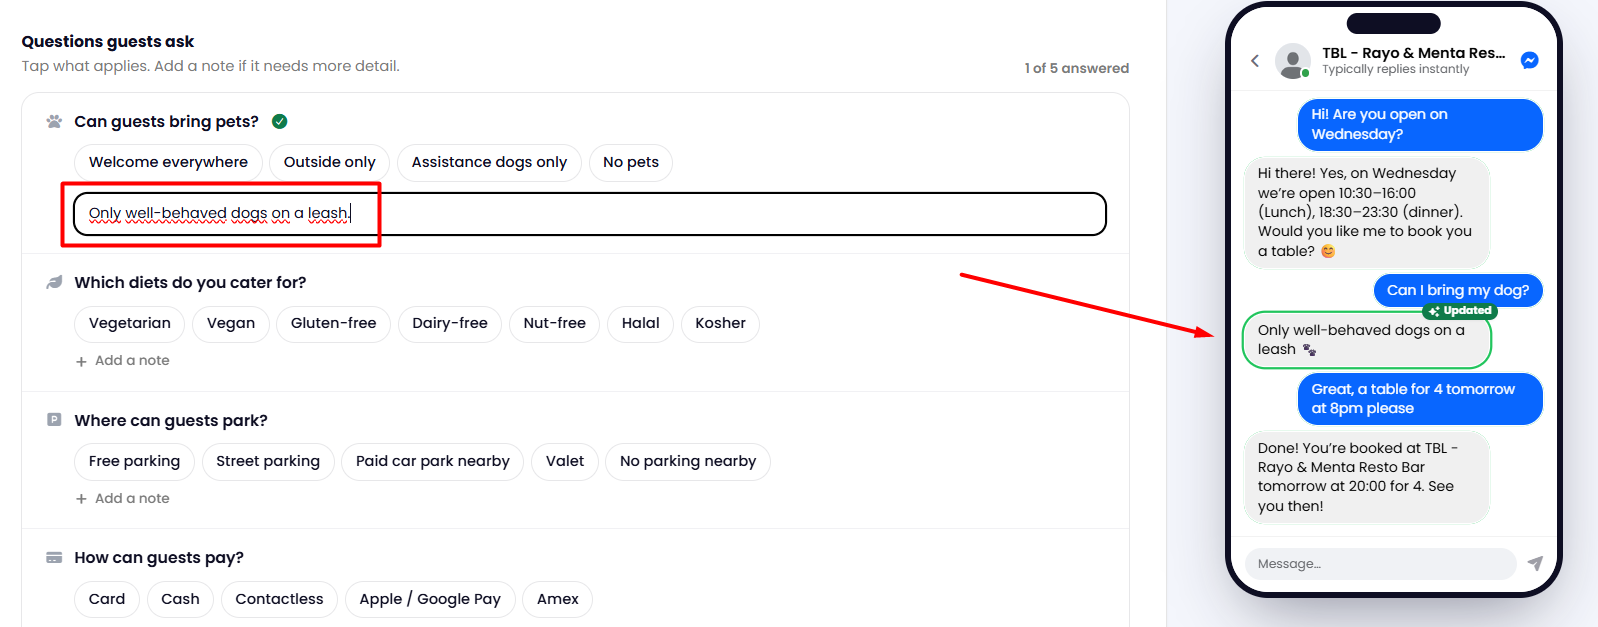
9. Scroll down and add useful information using the available tags and custom notes.
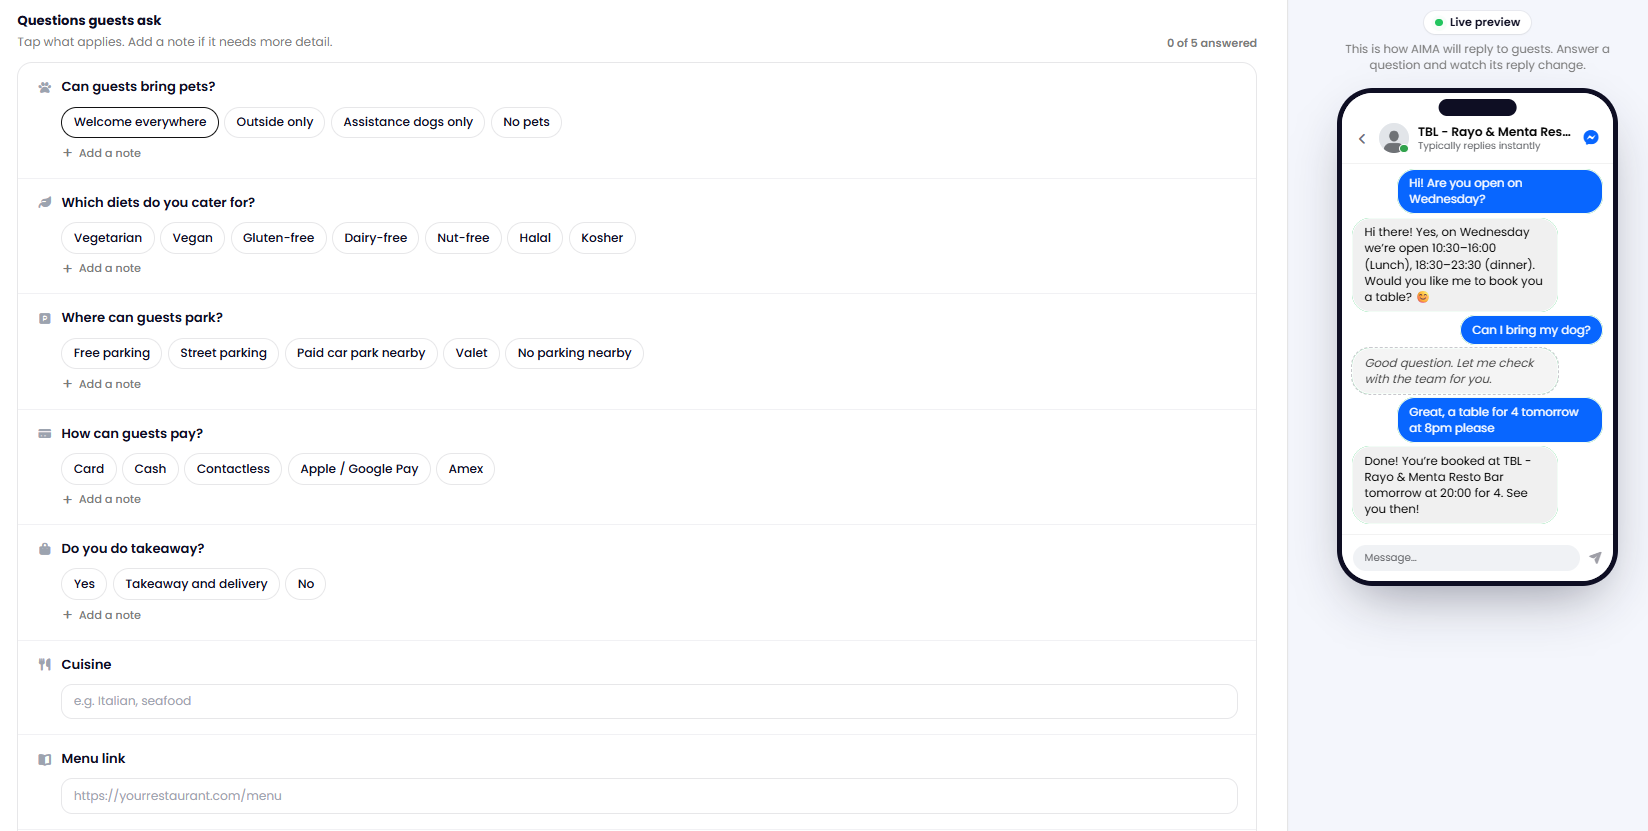
Use Live preview on the right to review how the selected tags and notes affect replies.
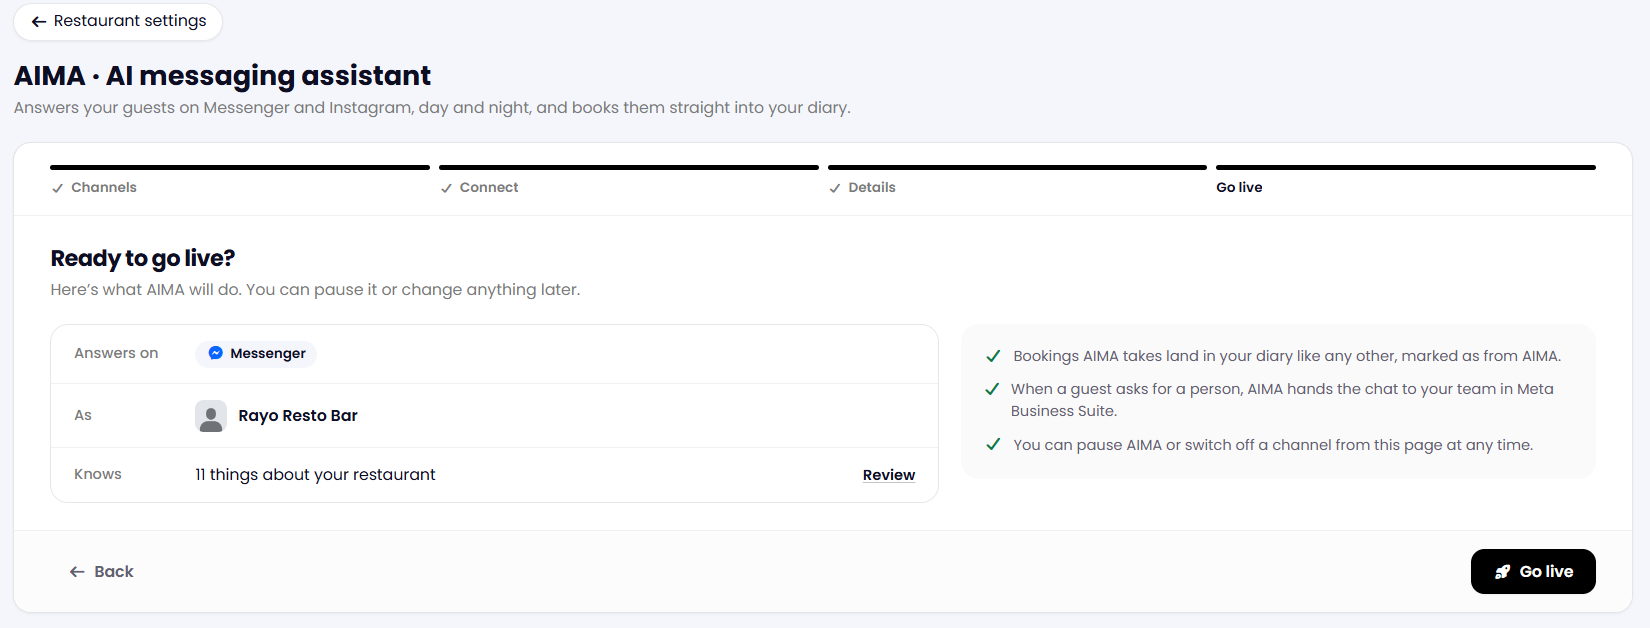
10. Review the setup, then click on Go live when you are ready to activate AIMA.
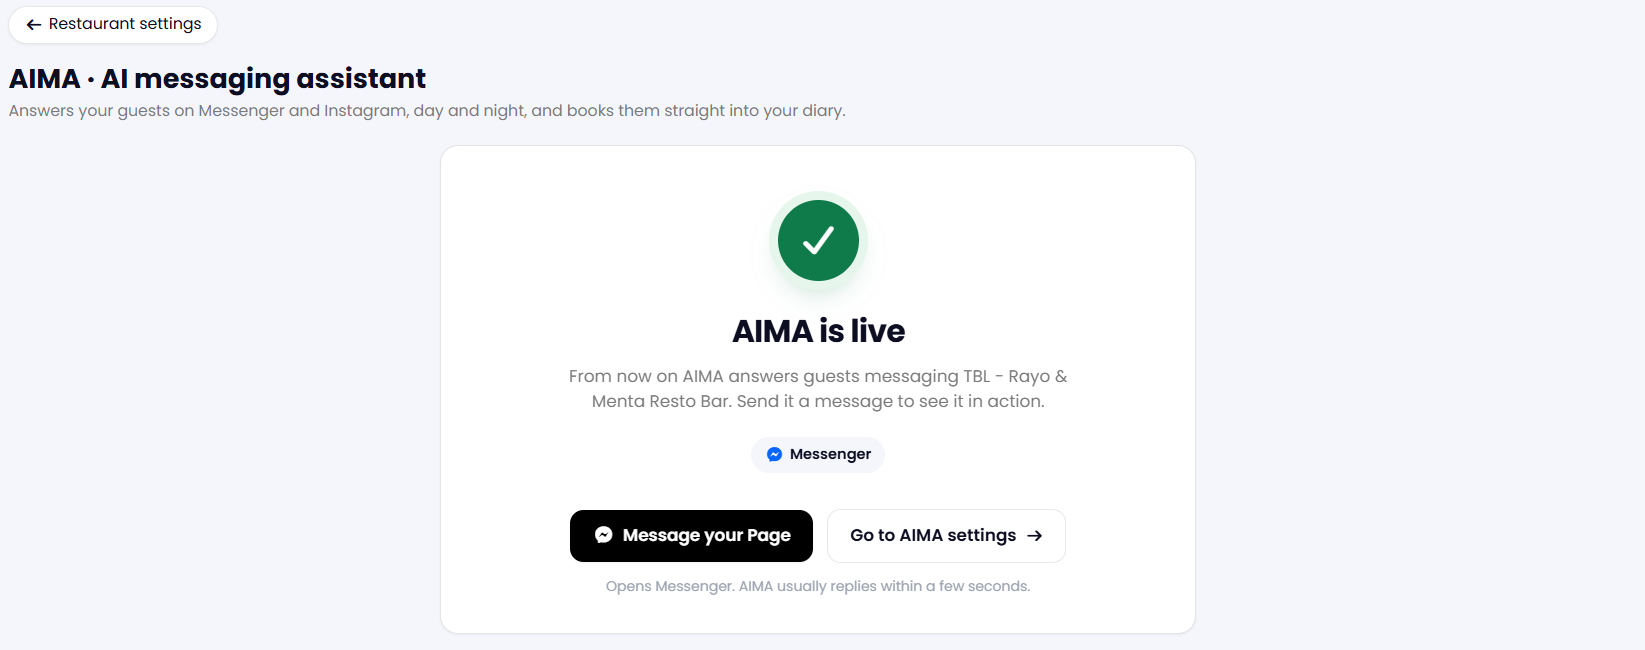
11. After activation, use Message your Page to try the assistant or Go to AIMA settings to manage it.
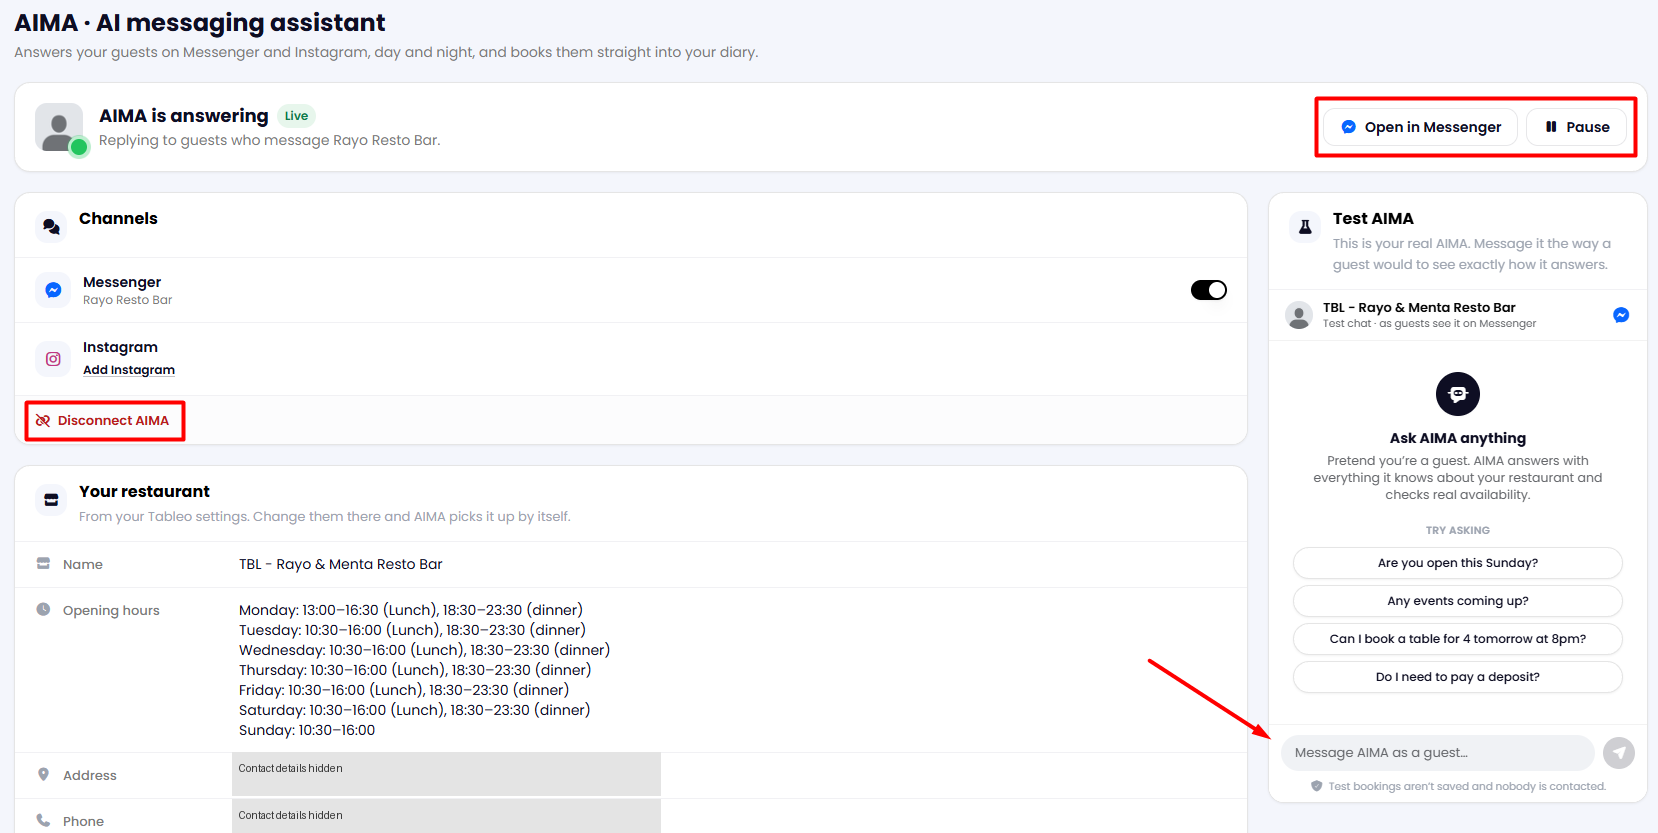
12. In AIMA settings, use Open in Messenger or the Test AIMA panel to test replies. Use Pause to pause the assistant or Disconnect AIMA to disconnect it.
While we strive to ensure the accuracy and currency of the information in our knowledge base, some articles may contain minor discrepancies due to the constant evolution of our services and products.
Was this article helpful?
That’s Great!
Thank you for your feedback
Sorry! We couldn't be helpful
Thank you for your feedback
Feedback sent
We appreciate your effort and will try to fix the article
