The floor map is the screen to keep open during service. It shows today's tables and bookings on your restaurant layout, so you can seat guests, move them between tables, add walk-ins and block tables without leaving the page.
To open it, click Floor Map in the top bar.

Finding your way around the floor map:
1. Top bar: use the arrows and the date picker to change the day (the Today link brings you back). Next to the date you will see the service being viewed and one tab per dining area, each showing how many tables are seated out of the total.
2. Reservations panel (left): all bookings for the day, grouped as Arriving, Upcoming, Seated, Finished and Cancelled. Use the arrow on the panel's edge to collapse it.
3. The map (right): each table shows its name and either its next booking (time and guests) or FREE. Tables joined for one booking are linked by a purple line. Use the + and – buttons to zoom.
4. Toolbar icons (top right): Print, Stop bookings, Notes, Activity (a log of everything done on the floor map today, including undos), Edit floor plan, and the "..." menu.
5. Bottom bar: guests seated, seats free, bookings in the next 30 minutes, waiting list and occupancy. Click Show full stats for a breakdown per dining area.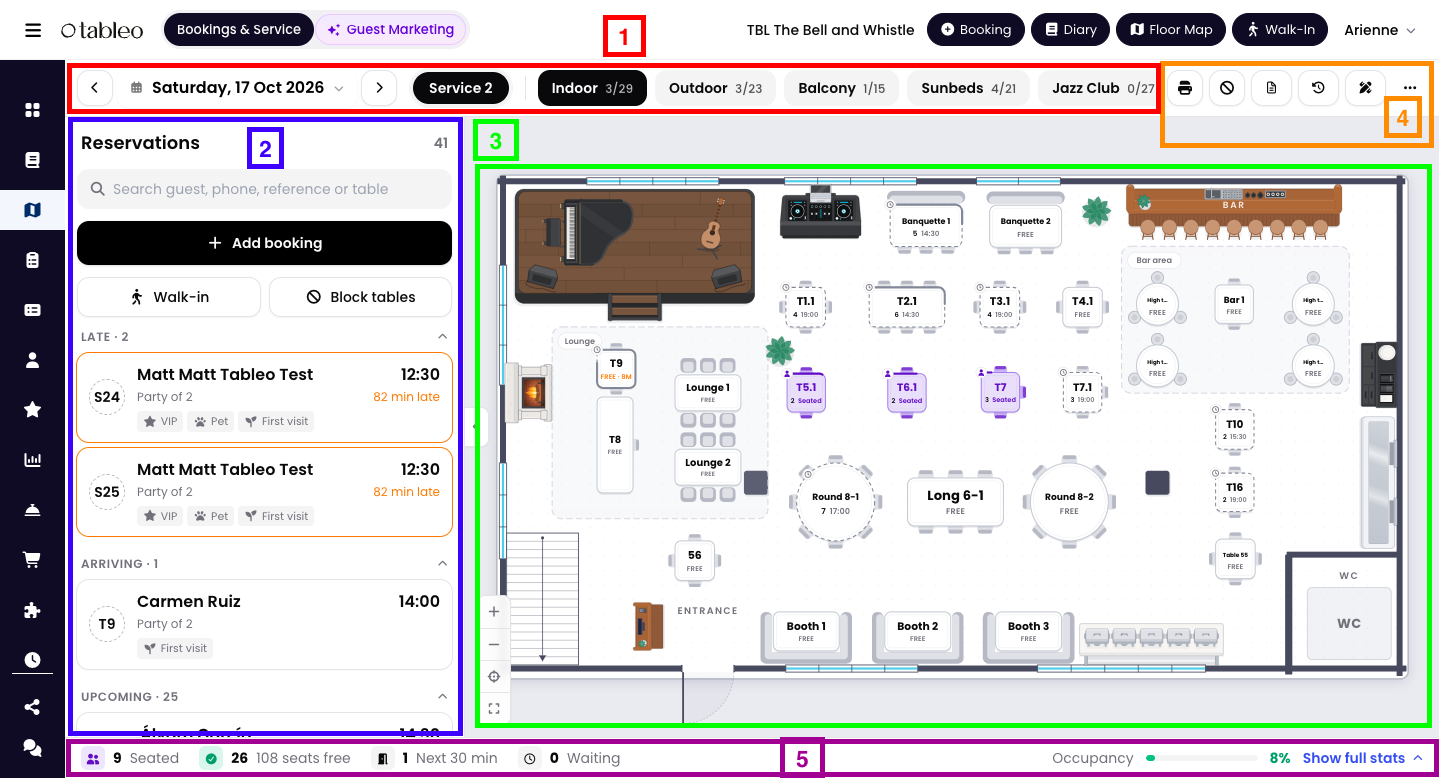
How to find a booking:
Type in the search box at the top of the Reservations panel. You can search by guest name, phone number, booking reference or table. Results for today appear first, and bookings on other days appear under Other dates.
How to open a booking:
Click a booking card in the list, or click its table on the map. The map switches to the right dining area and highlights the table, and the left panel shows the booking: name, status, time, reference, phone and email; Guests, Table and Duration (or a running timer once seated); the staff note; quick changes for adults, children and length of stay; the guest's history (visits, no-shows, cancellations, spend); and where the booking came from, who created it and its reconfirmation status.
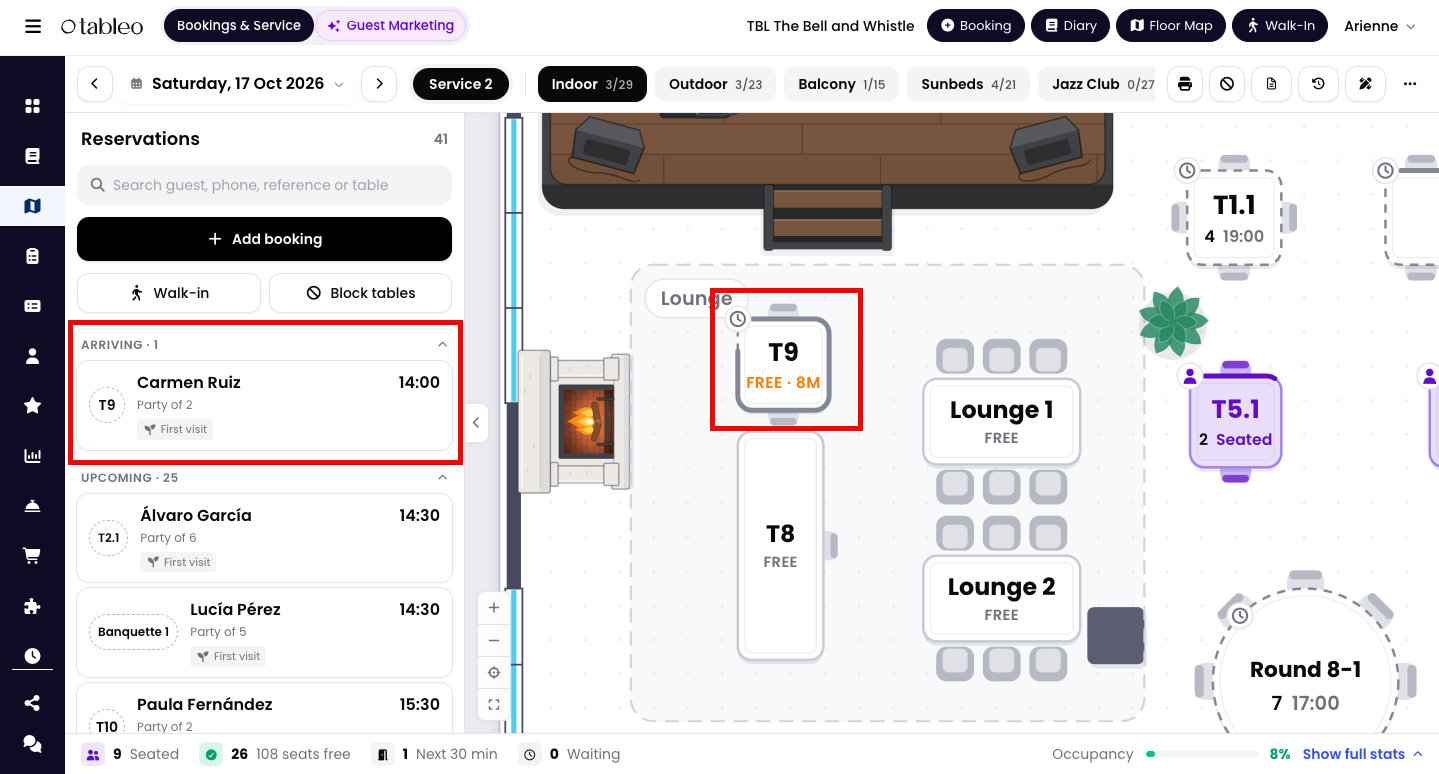
How to seat and finish a booking:
1. Click the booking.
2. Click Seat. The booking moves to Seated and a message at the bottom of the screen confirms it and offers Undo.
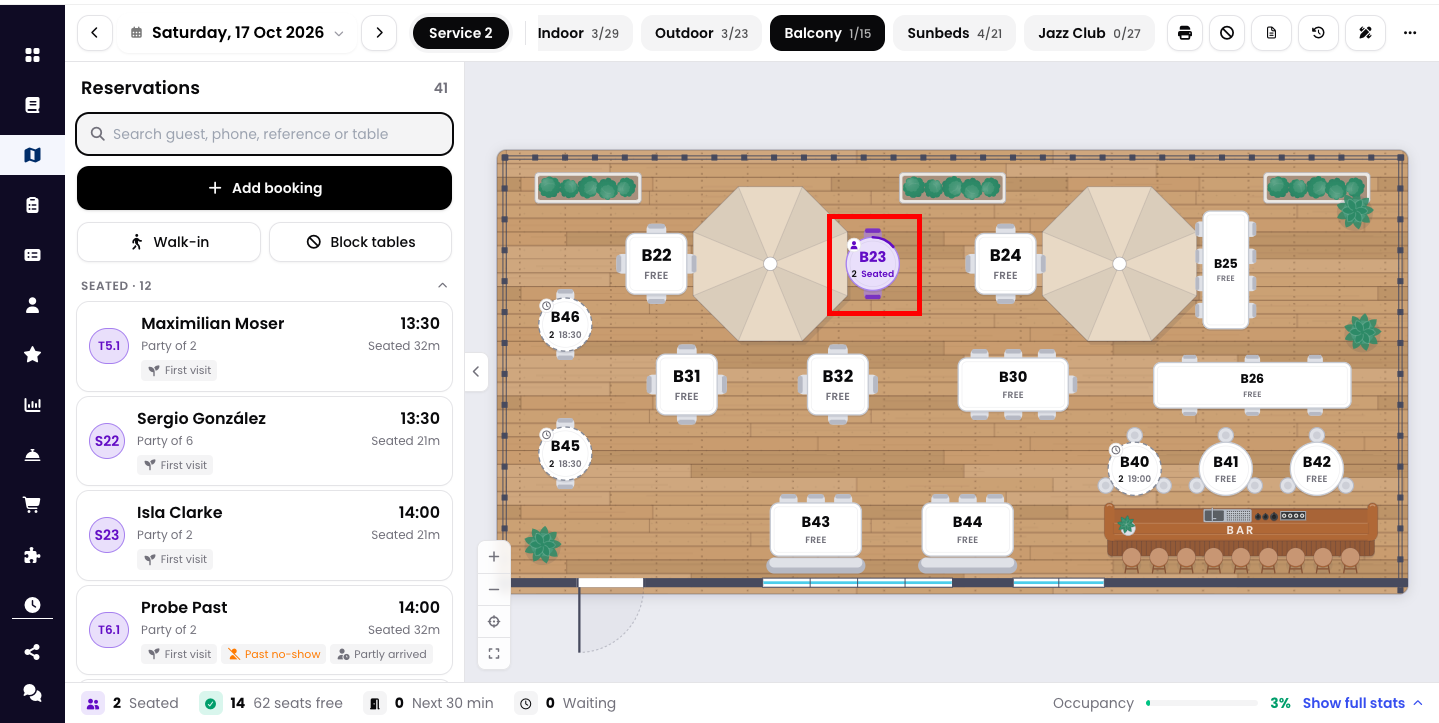
3. When the guests leave, open the booking and click Finish. The table becomes free again.
If only part of the party has arrived, click Partly arrived instead, and then All arrived when the rest join.
What you can do with a booking:
The buttons you see depend on the booking's status.
- Arriving or upcoming: Seat, Partly arrived, Running late, Move table, Add a table, Unassign table, Edit booking, No-show, Cancel booking.
- Partly arrived: All arrived, Move table, Add a table, Finish, Undo seating, Edit booking.
- Seated: Finish, Move table, Add a table, Undo seating, Edit booking, Open booking.
- Finished: Edit booking, Open booking.
- Cancelled: Open booking.
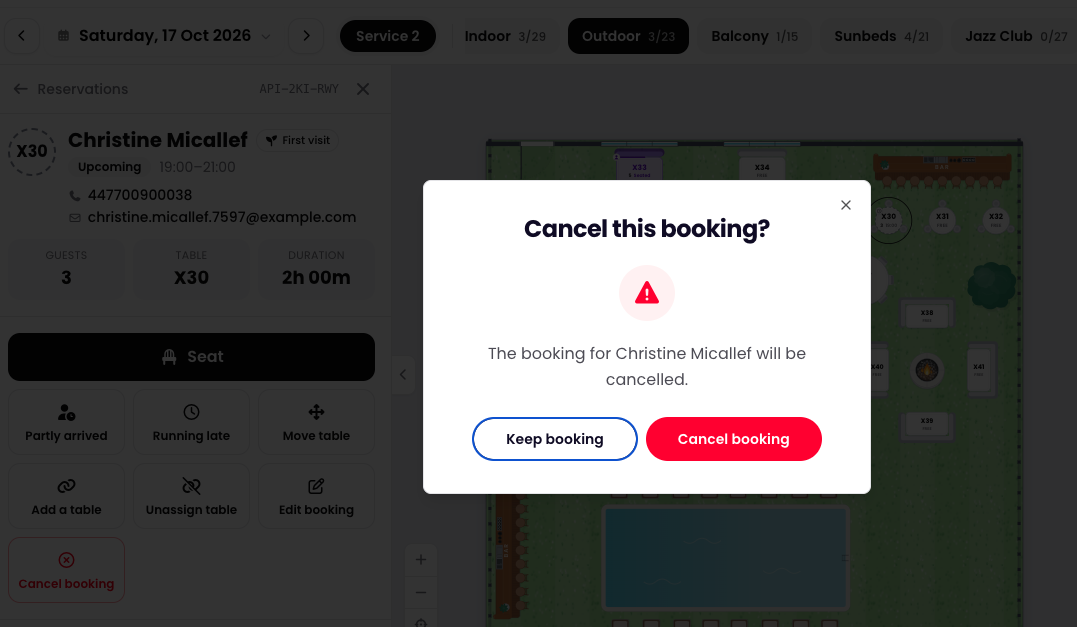
Almost every action shows an Undo message at the bottom of the screen for a few seconds. Cancel booking asks you to confirm first. No-show and Unassign table do not, so use Undo straight away if you press them by mistake.
How to move a booking to another table:
1. Click the booking and choose Move table.
2. A banner reads "Choose a table for [guest]". Click the table you want.
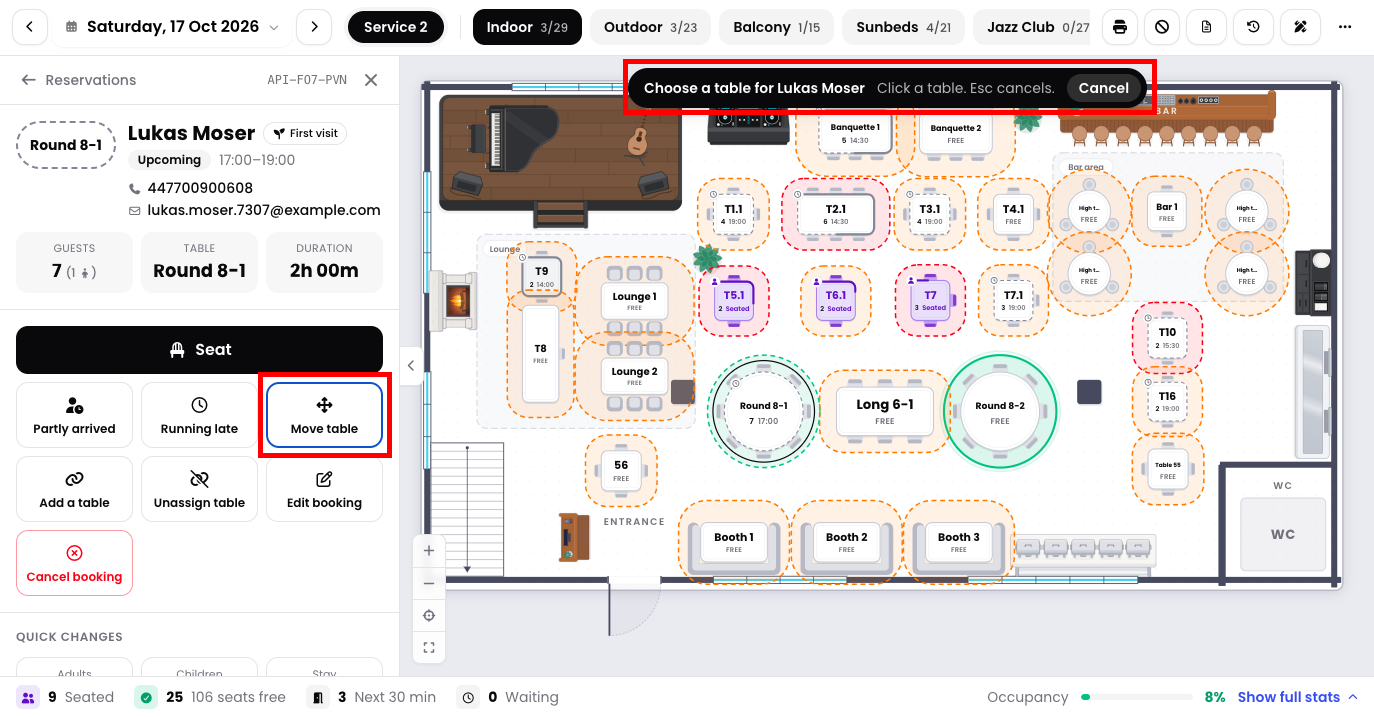
Tables are outlined to help you choose. Green means the table is available and a good fit. Orange is a warning: the table has an upcoming booking, or it is too small. You can still pick it, and the floor map tells you if there are more guests than seats. Press Esc or click Cancel to leave without moving.
Shortcut: drag a seated table on the map and drop it onto another table to move the booking.
How to add a table to a booking:
For a larger party, open the booking, click Add a table, then click the extra table on the map. The tables are linked by a purple line and the booking card says "joined with ...". To take a table away from an upcoming booking, use Unassign table.
How to seat a walk-in:
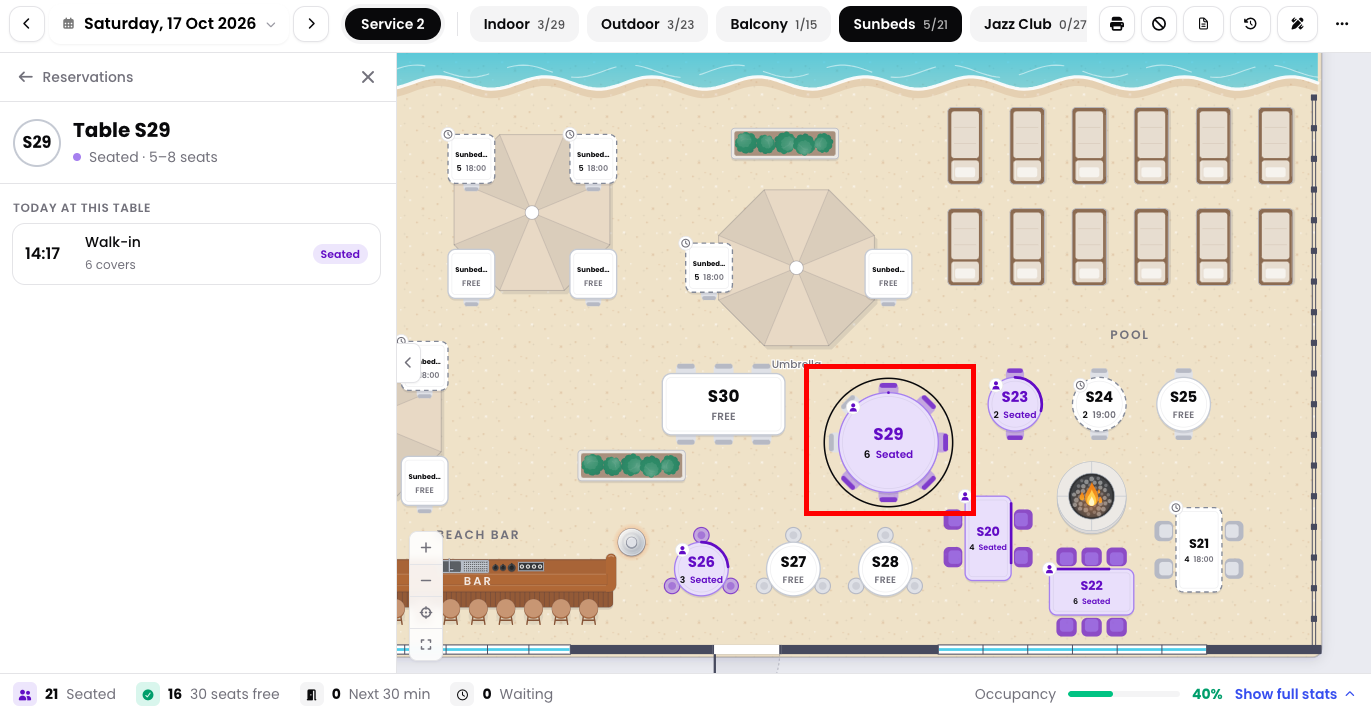
1. Click a table that shows FREE to open its panel (it also shows how long the table is free for).
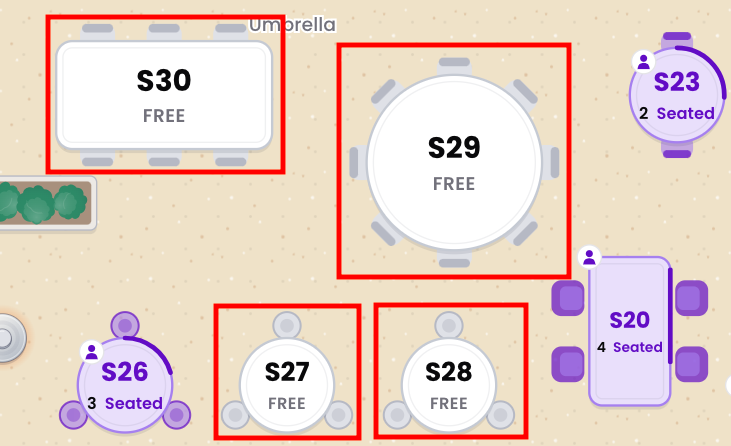
2. Click Walk-in.
3. Choose the number of guests (1 to 8, or type a bigger number). The party is seated straight away.
How to add a booking from the floor map:
1. Click Add booking at the top of the Reservations panel (or click a free table and choose Add booking to start with that table already chosen).
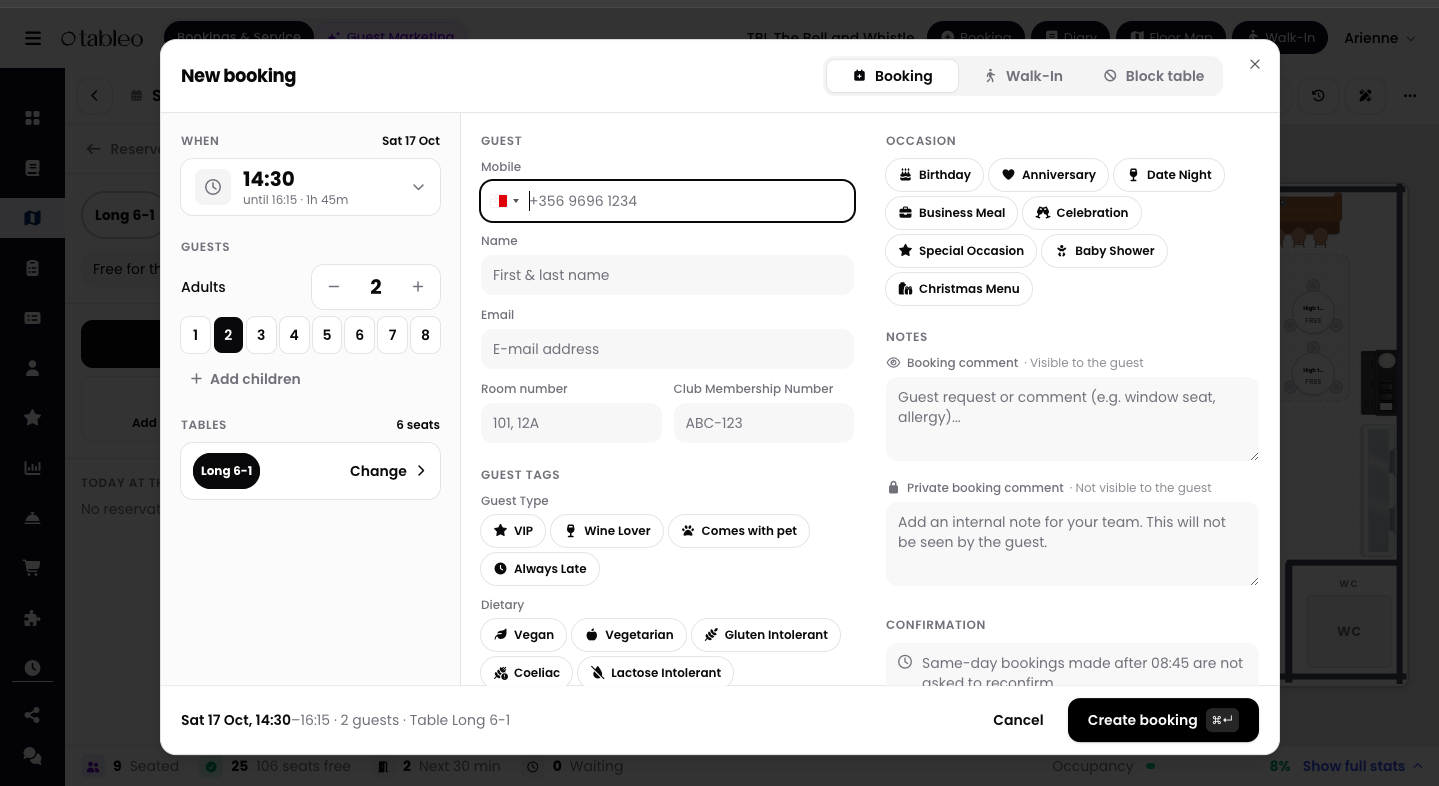
2. Check the time and set the number of guests. Add children with + Add children if needed.
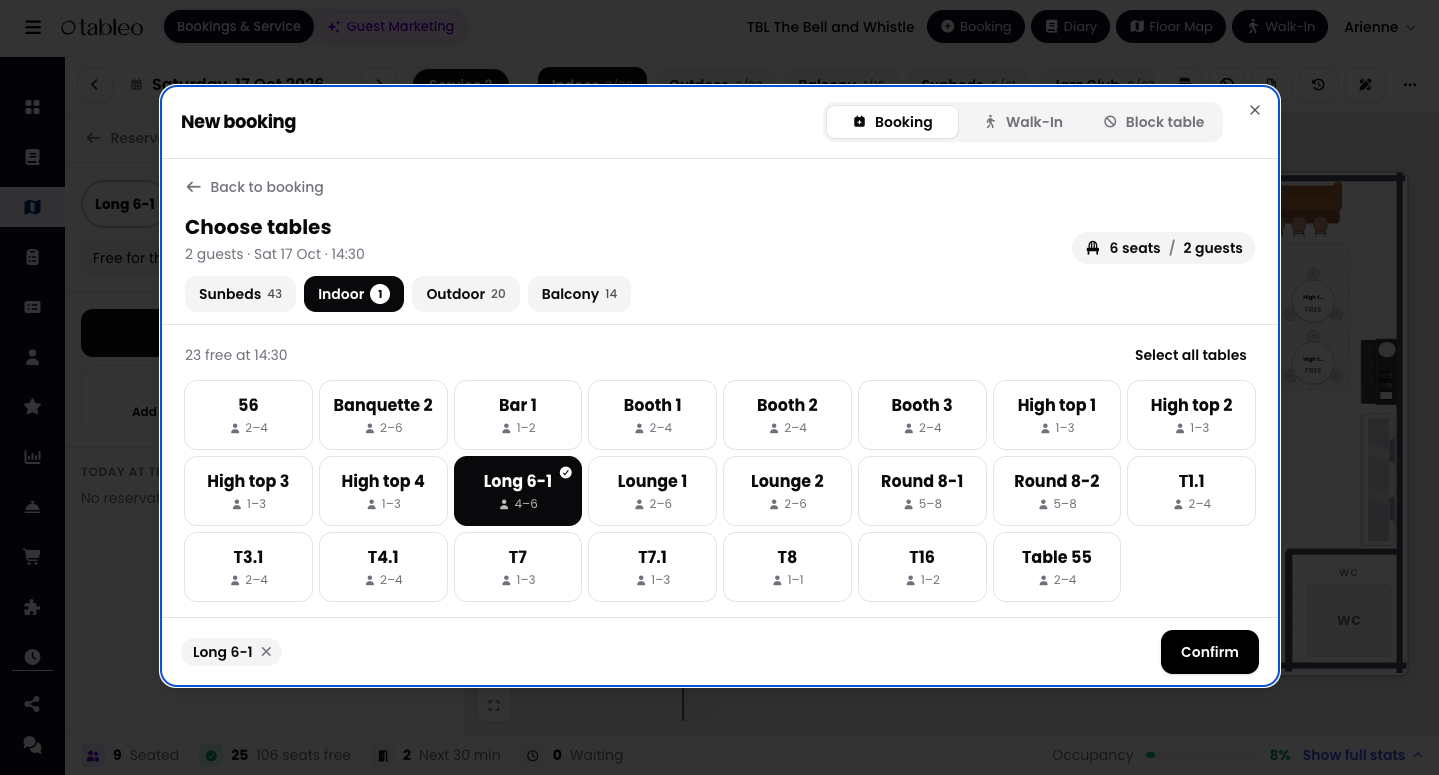
3. Under Tables, click Choose tables, pick one or more tables and click Confirm. A table is required: without one, you will see "Please select at least one table for the booking".
4. Enter the guest's mobile number, name and email. You can also add guest tags, an occasion and notes (the first note is visible to the guest, the second is for staff only).
5. Click Create booking (or press Ctrl+Enter).
How to block a table:
For the rest of the day: click the free table and choose Block until close. The table shows "Blocked until..." and an Unblock button.
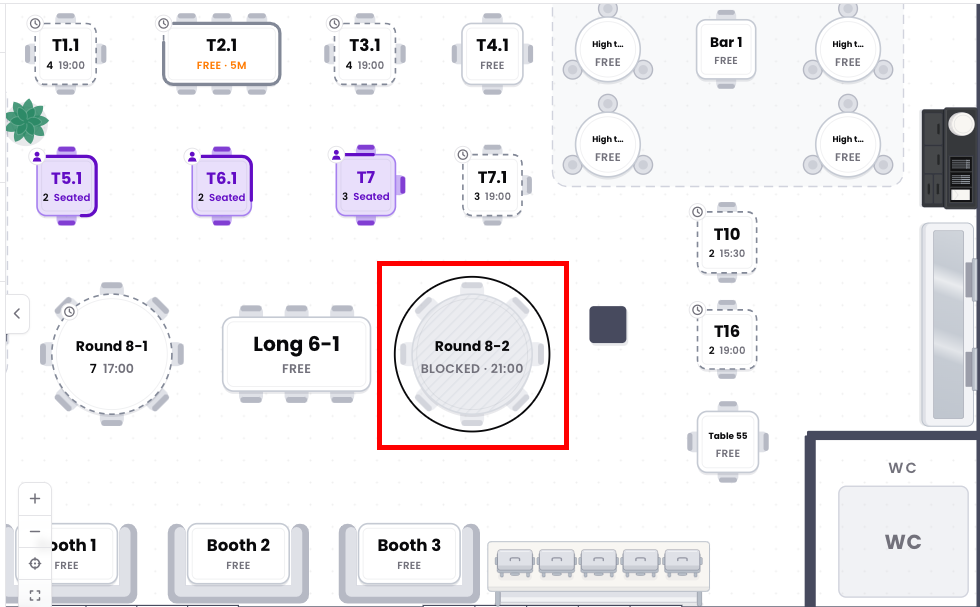
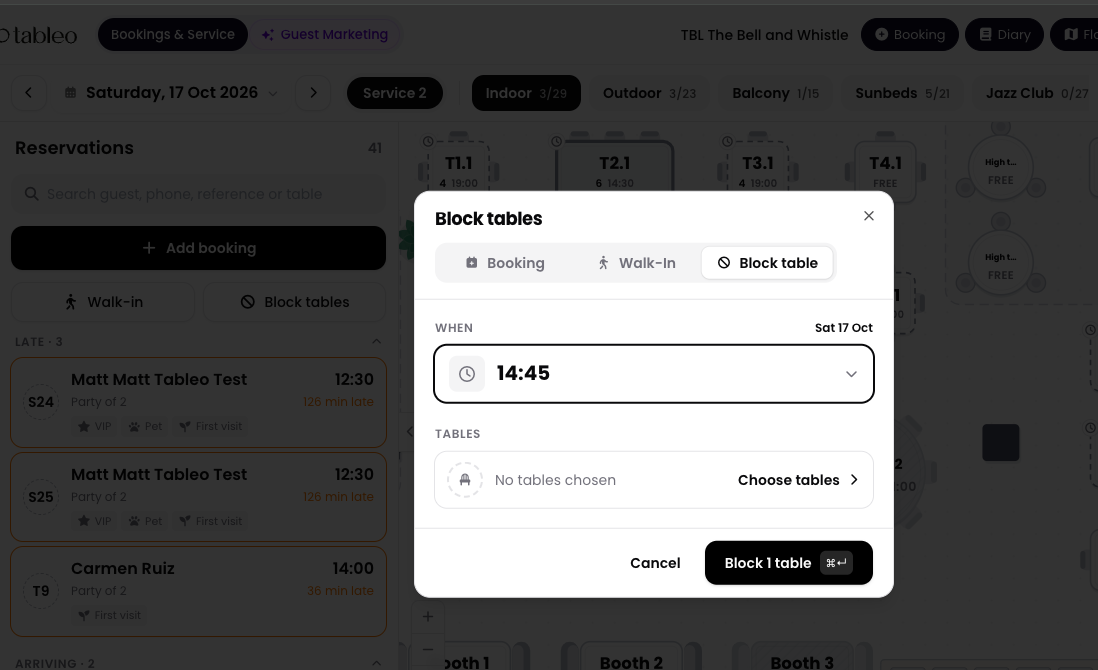
Note: a block made for a time slot does not appear in the Reservations list or in the table's panel. To see or remove it, open the Diary, where it shows as "Table Blocked" and can be cancelled (you will be asked to confirm).
How to close off online bookings:
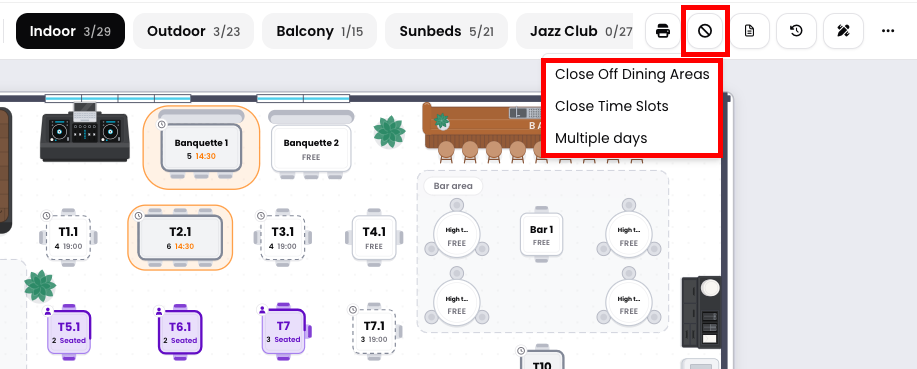
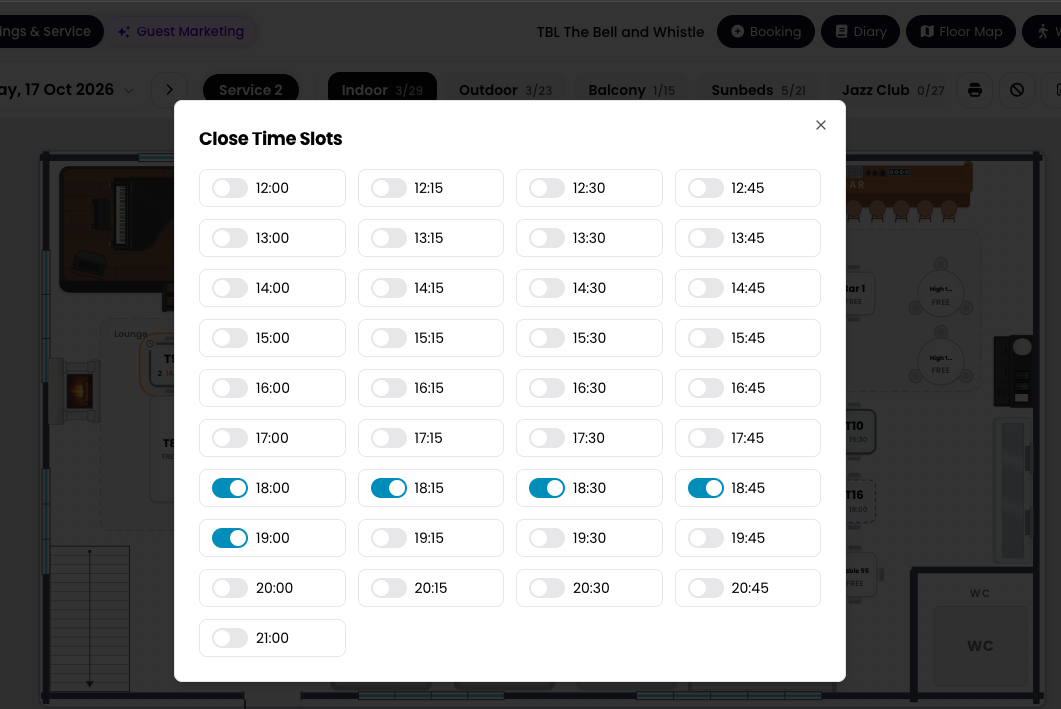
The Stop bookings icon in the toolbar works exactly like in the Diary and Dashboard, with Close Off Dining Areas, Close Time Slots and Multiple days. Guests cannot book the closed areas or times online, but your team can still add bookings manually.
How to print:
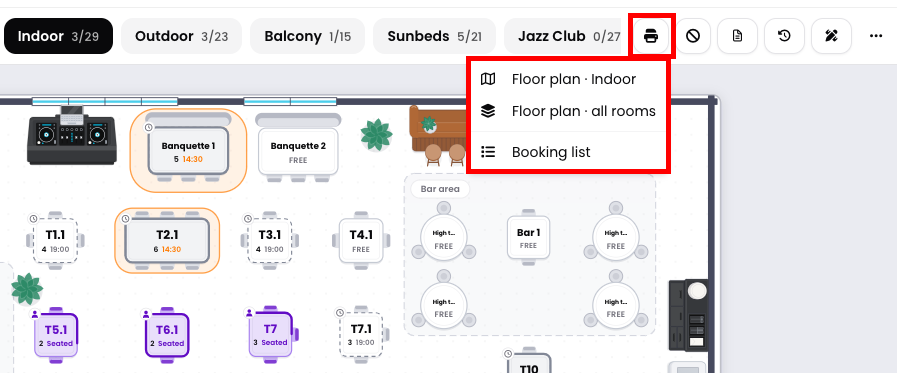
The Print icon offers the floor plan of the current dining area, the floor plan of all rooms, or the booking list.
How to leave a note for the team:
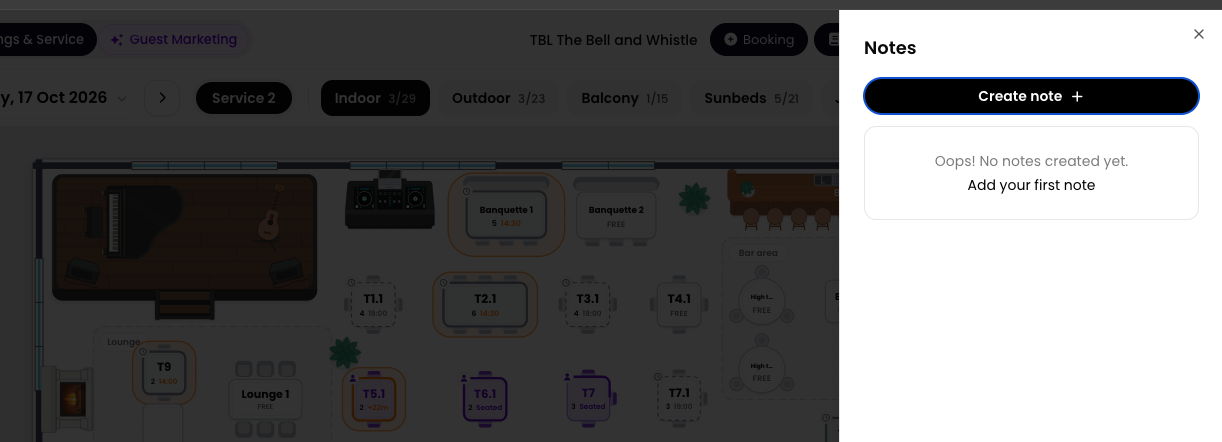
The Notes icon opens the same-day notes you see in the Diary. Click Create note + to add one.
How to edit a booking in full:
Edit booking opens the complete edit page, where you can change the date, time, channel, status, guest details and comments, and add a PDF document. This takes you away from the floor map; click Floor Map in the top bar to return. Open Booking opens the booking's details page, including its history.
Good to know:
- If a booking is seated without a table (this happens when you press Seat on a booking with no table), use Move table to assign one.
- The numbers in the bottom bar are for information only and cannot be clicked to filter the map.
- To change how the floor looks (tables, walls, rooms), see "How to edit and design the floor map?".
While we strive to ensure the accuracy and currency of the information in our knowledgebase, some articles may contain minor discrepancies due to the constant evolution of our services and products.
Was this article helpful?
That’s Great!
Thank you for your feedback
Sorry! We couldn't be helpful
Thank you for your feedback
Feedback sent
We appreciate your effort and will try to fix the article