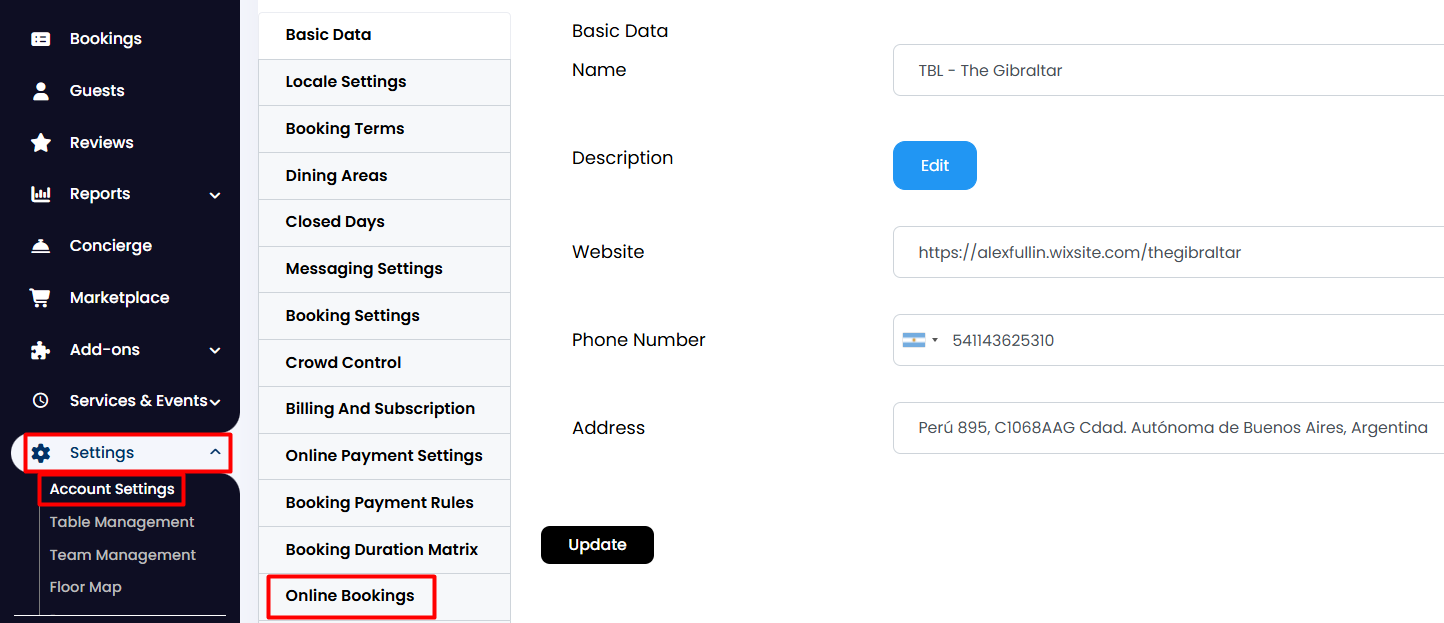
1. To create and customize your online widget, go from the side menu to Settings > Account Settings > Online Bookings.
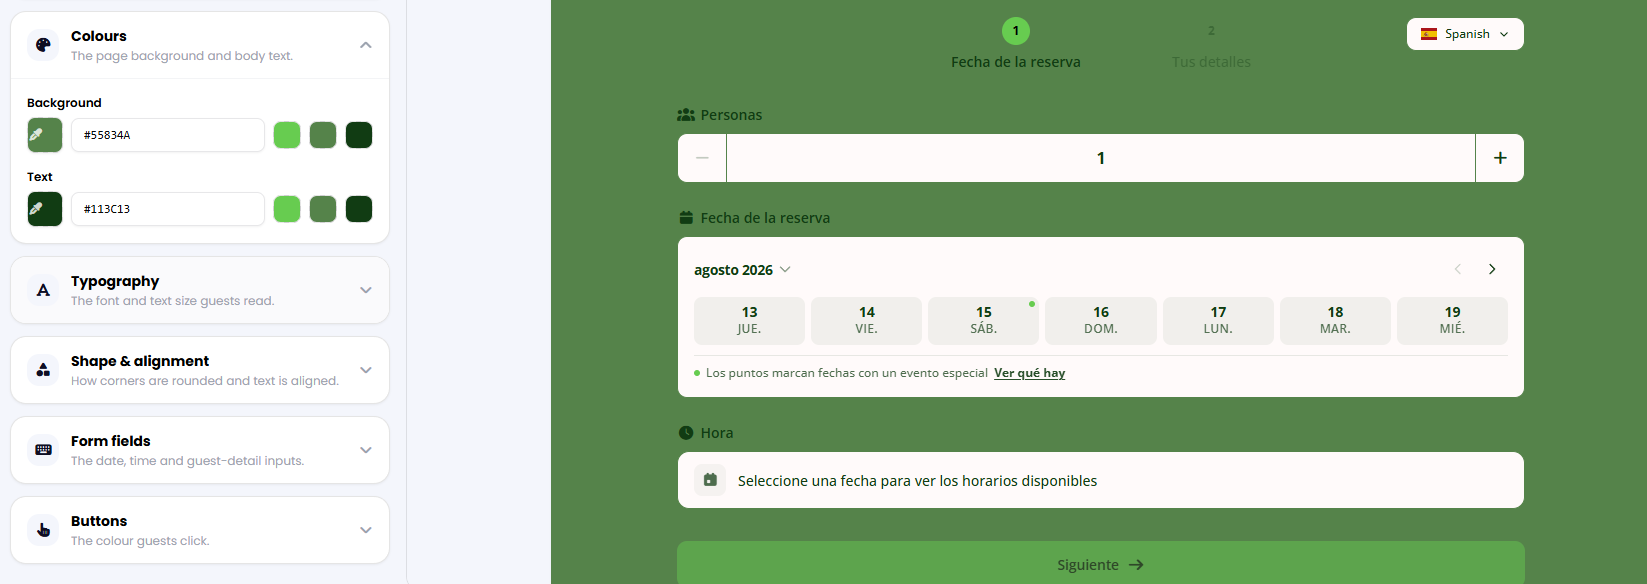
2. From here, you can customise the booking form to match your brand by adjusting colours, fonts, and styling such as borders, shadows, and more using the customization tools on the left side.
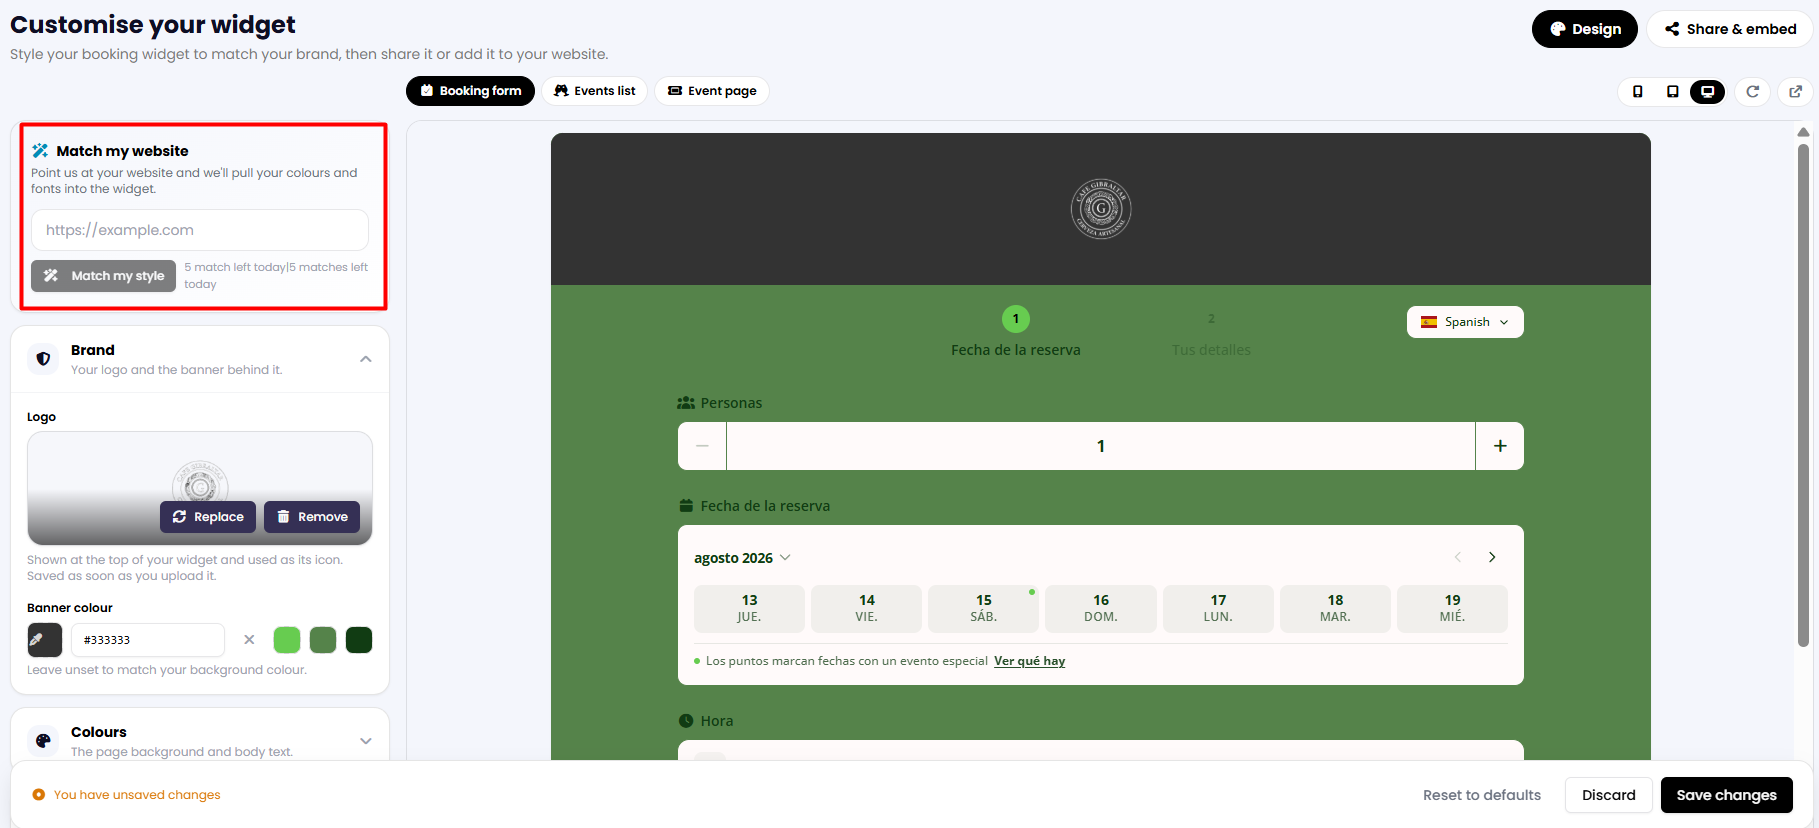
You can also choose to match your website's design by entering your website's URL in the Match my website option at the top-left part of the screen.
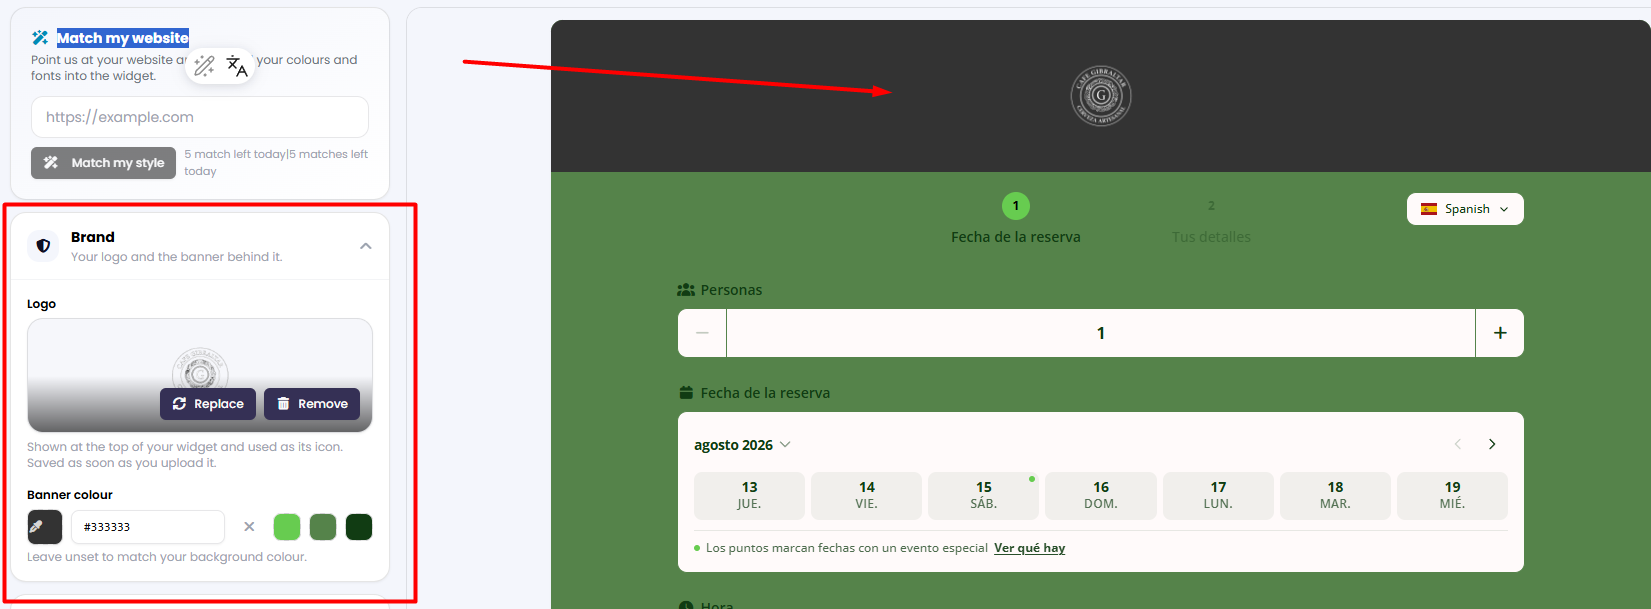
3. Additionally, you can add your restaurant logo to the widget's banner. Ideally, it would look better if you remove your logo's background first.
4. At the top right corner of the screen, you can switch between desktop, tablet, and mobile views to preview how your widget will look on each type of device. Also, by clicking on the rightmost icon, you will open the widget in a new tab.

5. Once you are done, click on the Save Changes button below. If the new design does not convince you, just click on the Discard button next to it.

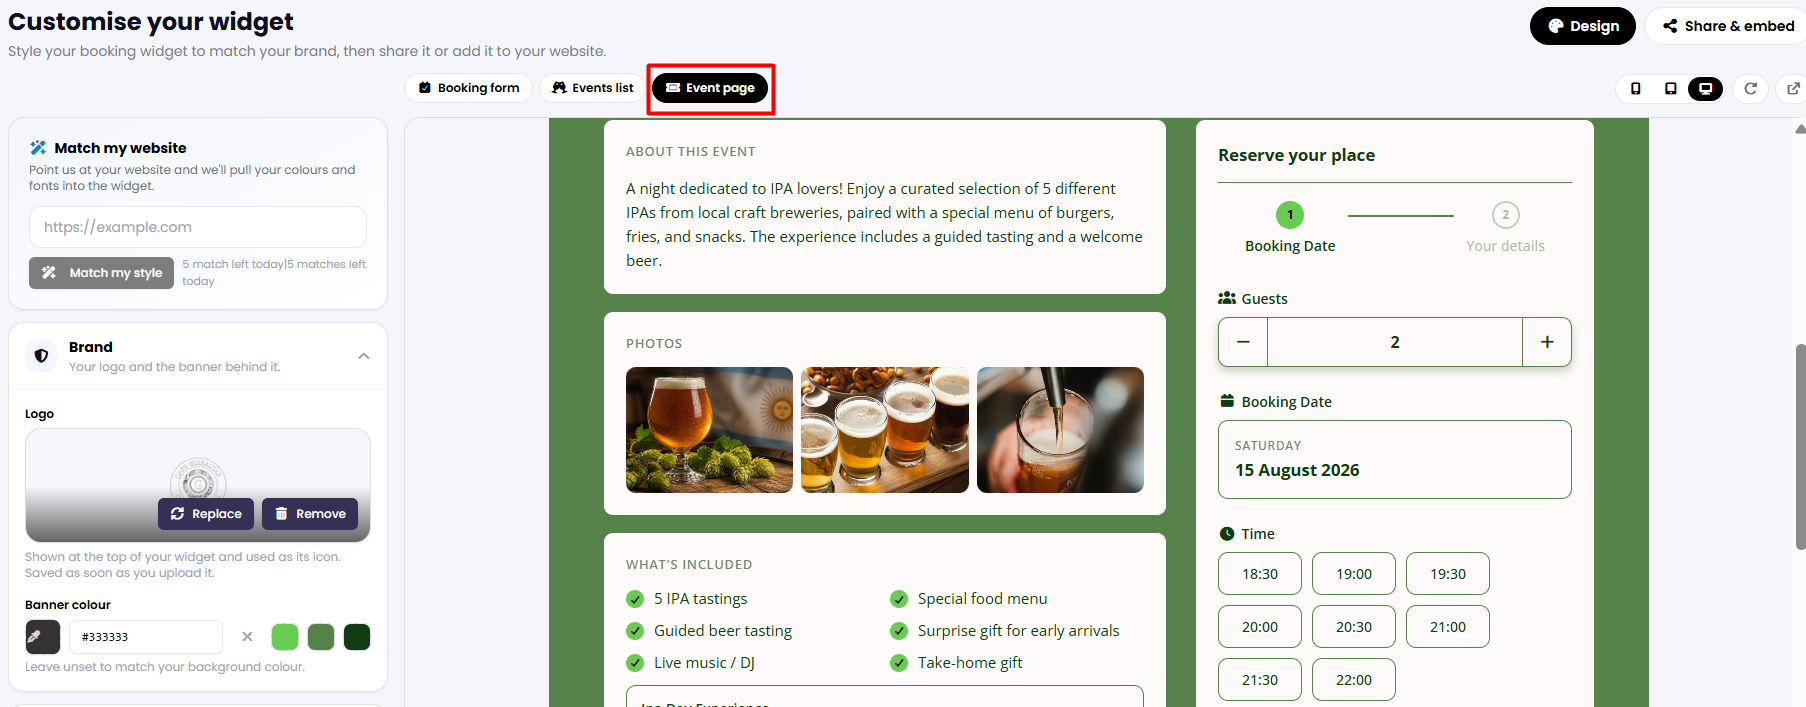
6. From here, you can also preview your Event list and Event page to see how they appear in your widget. Simply click on the corresponding option at the top of the widget. Please note that any changes made to your booking form will also apply to your Event list and Event page. 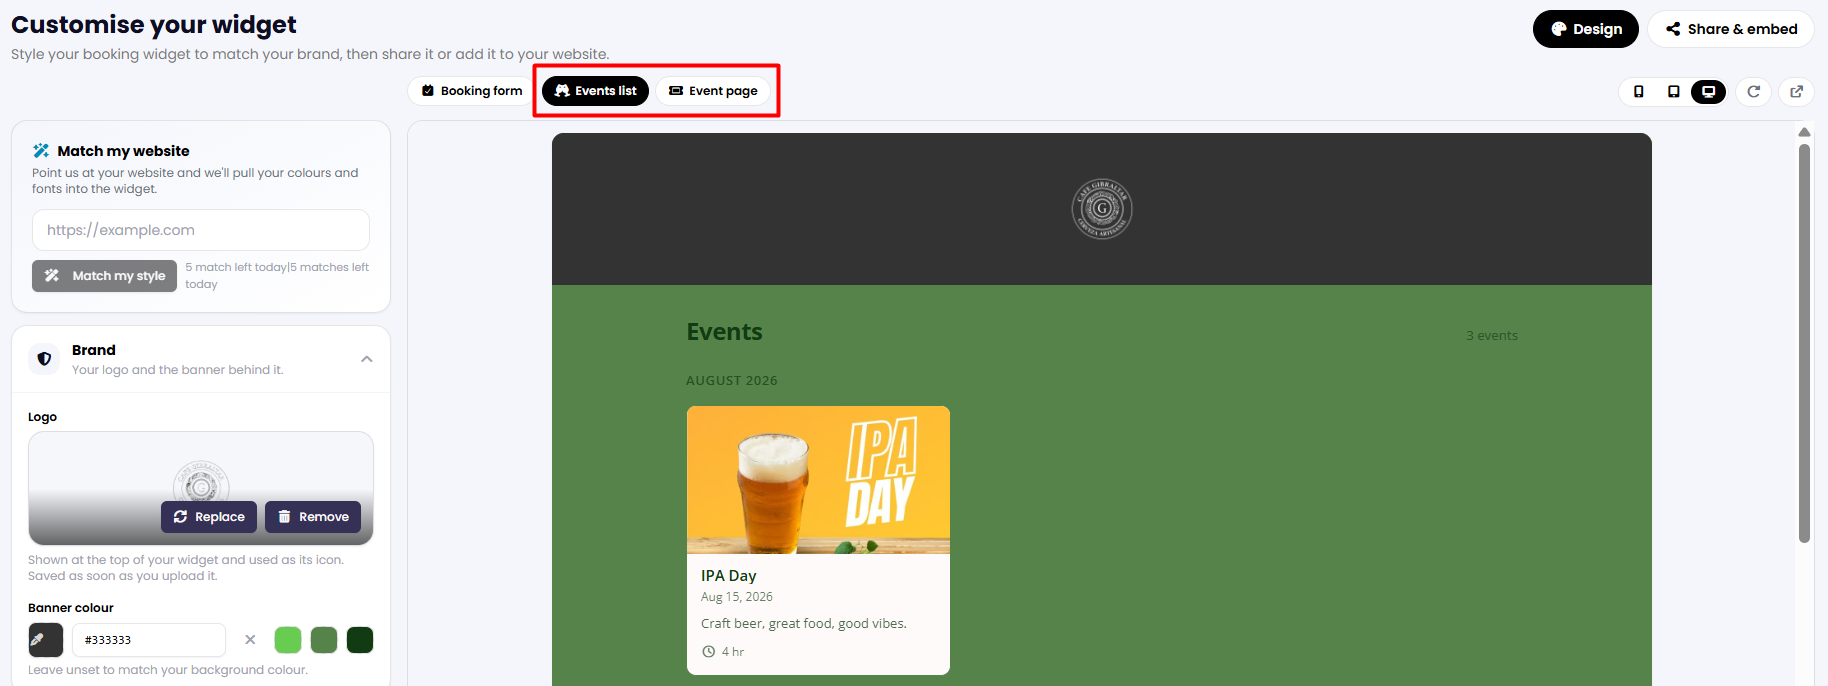
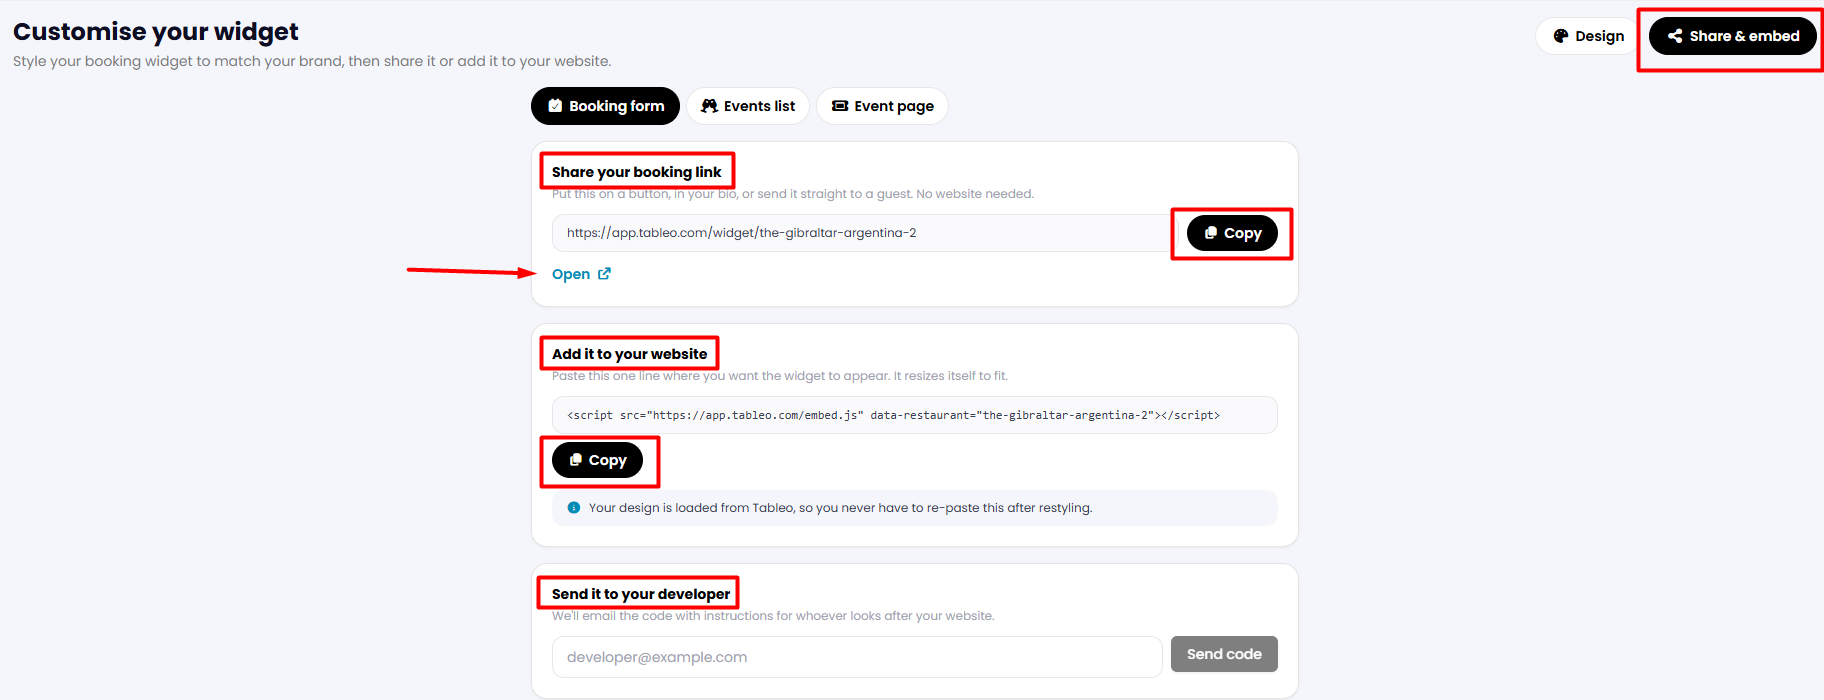
7. To share your widget's link, click on the Share & embed button in the top-right corner. From there, you can open and copy your URL, copy the code to add it to your website, or simply email it to your developer.
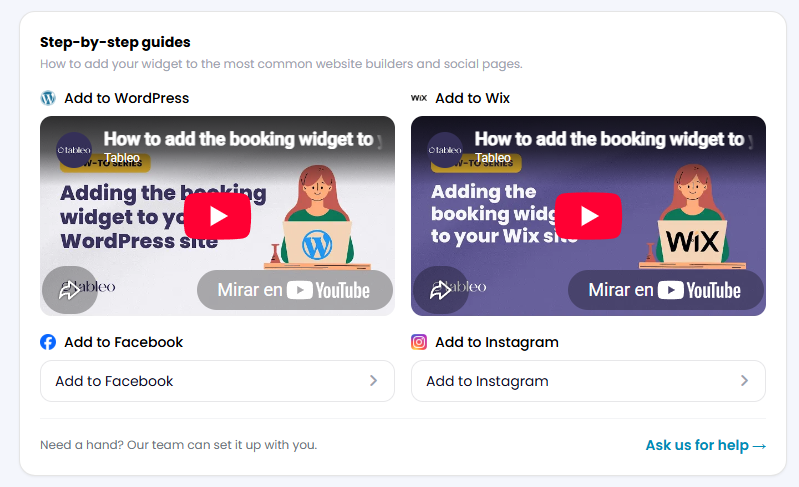
If you scroll down, you will find a step-by-step guide to help you add your widget link to your WordPress and Wix sites.
Was this article helpful?
That’s Great!
Thank you for your feedback
Sorry! We couldn't be helpful
Thank you for your feedback
Feedback sent
We appreciate your effort and will try to fix the article