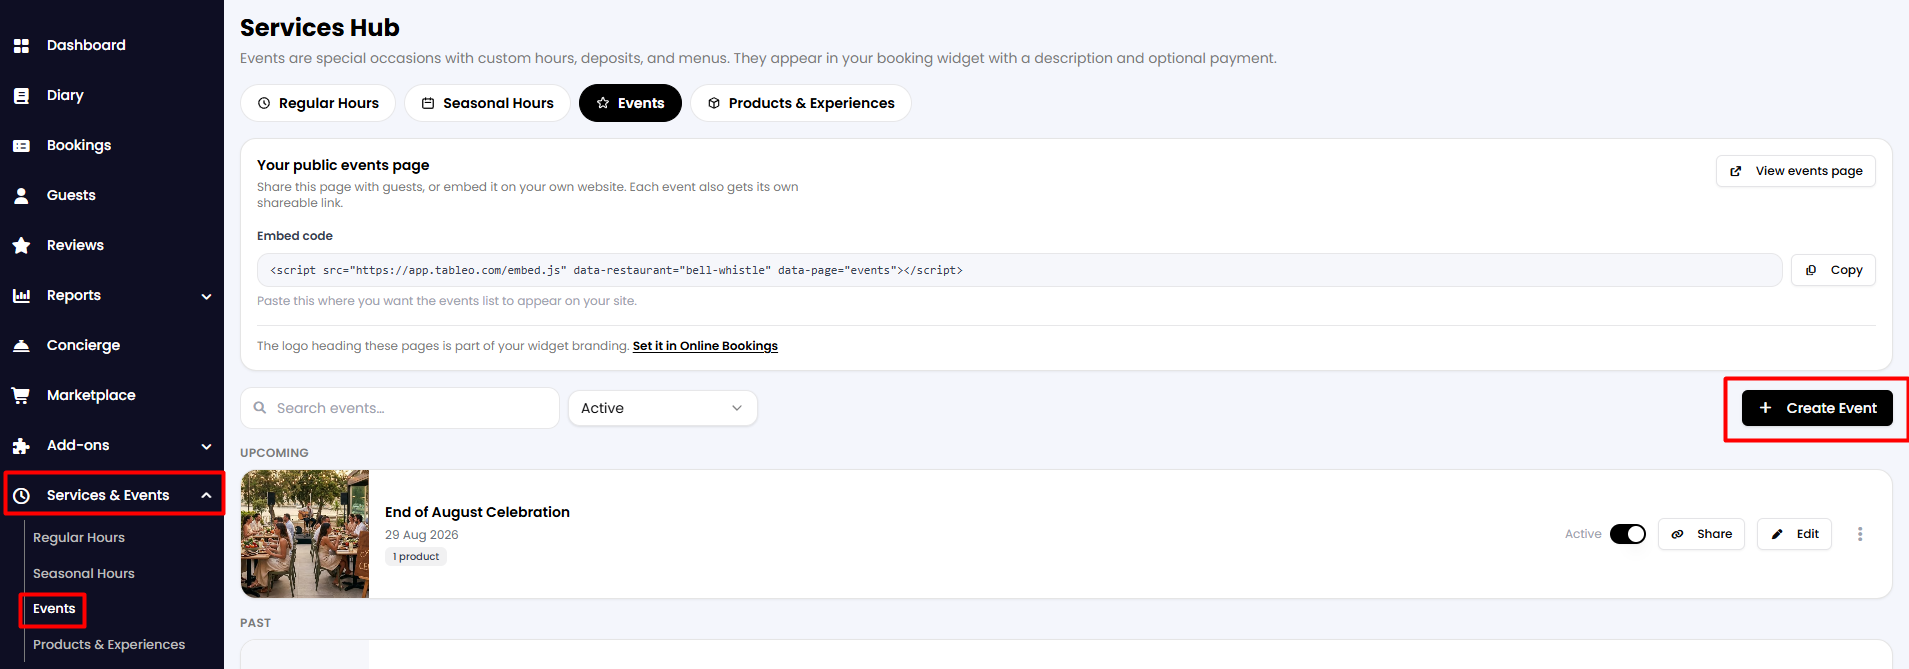
1. From your side menu, go to Service & Events > Events.
2. Then click the button in the middle-right of the screen + Create Event.
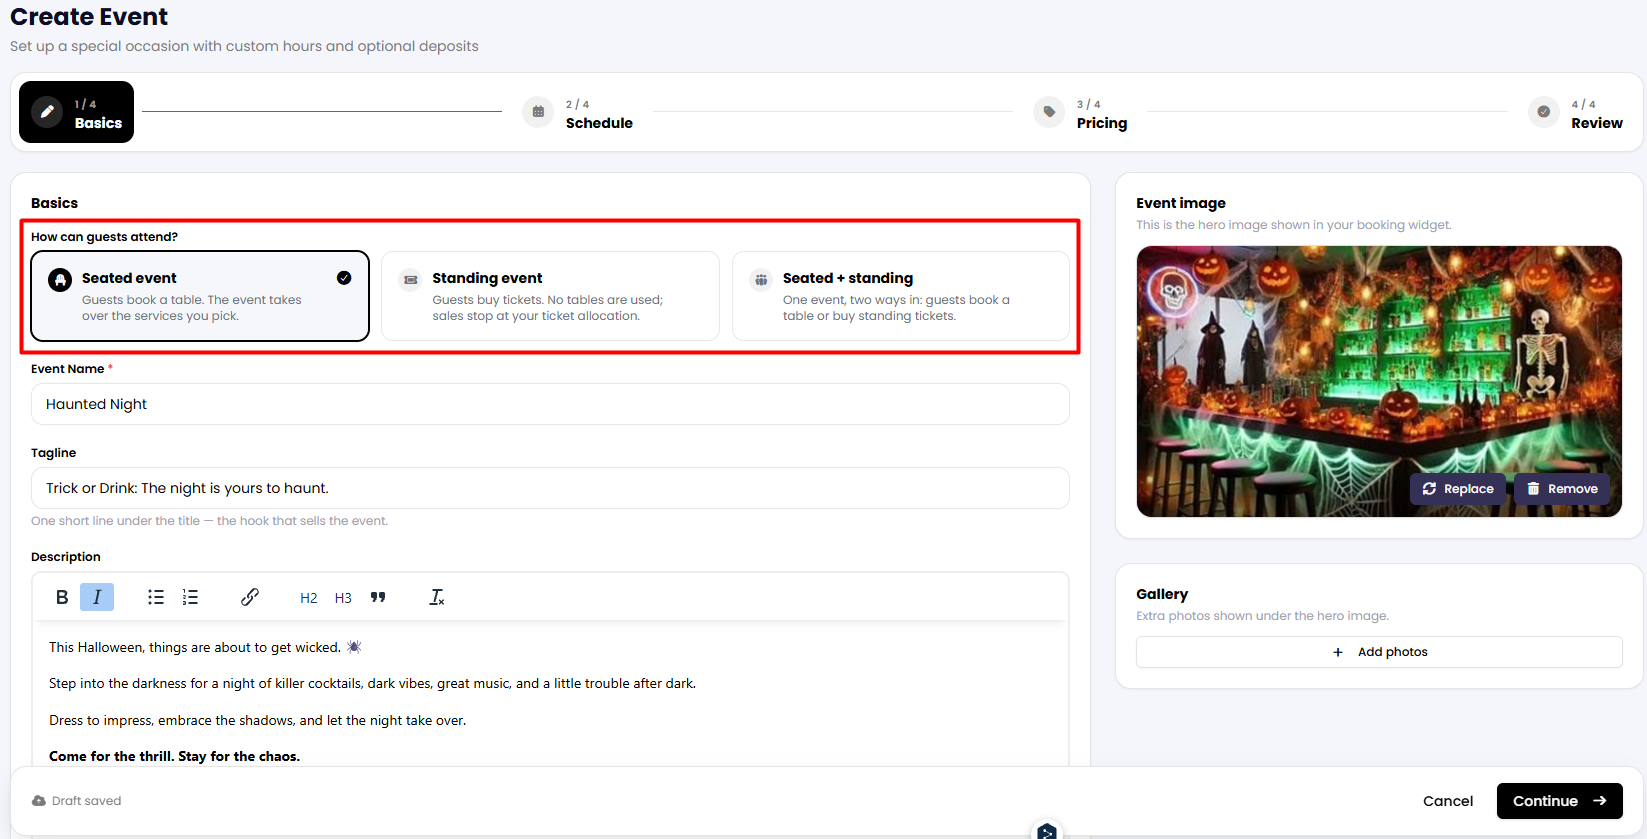
3. From here, you can enter the basic details of your event, including its name, tagline, and description. You can also add an event image to display in the booking widget and upload additional photos to the gallery.
In this step, you can also select the event type: Seated event, Standing event, or Seated + standing event. The options available in the following steps will depend on the event type you choose.
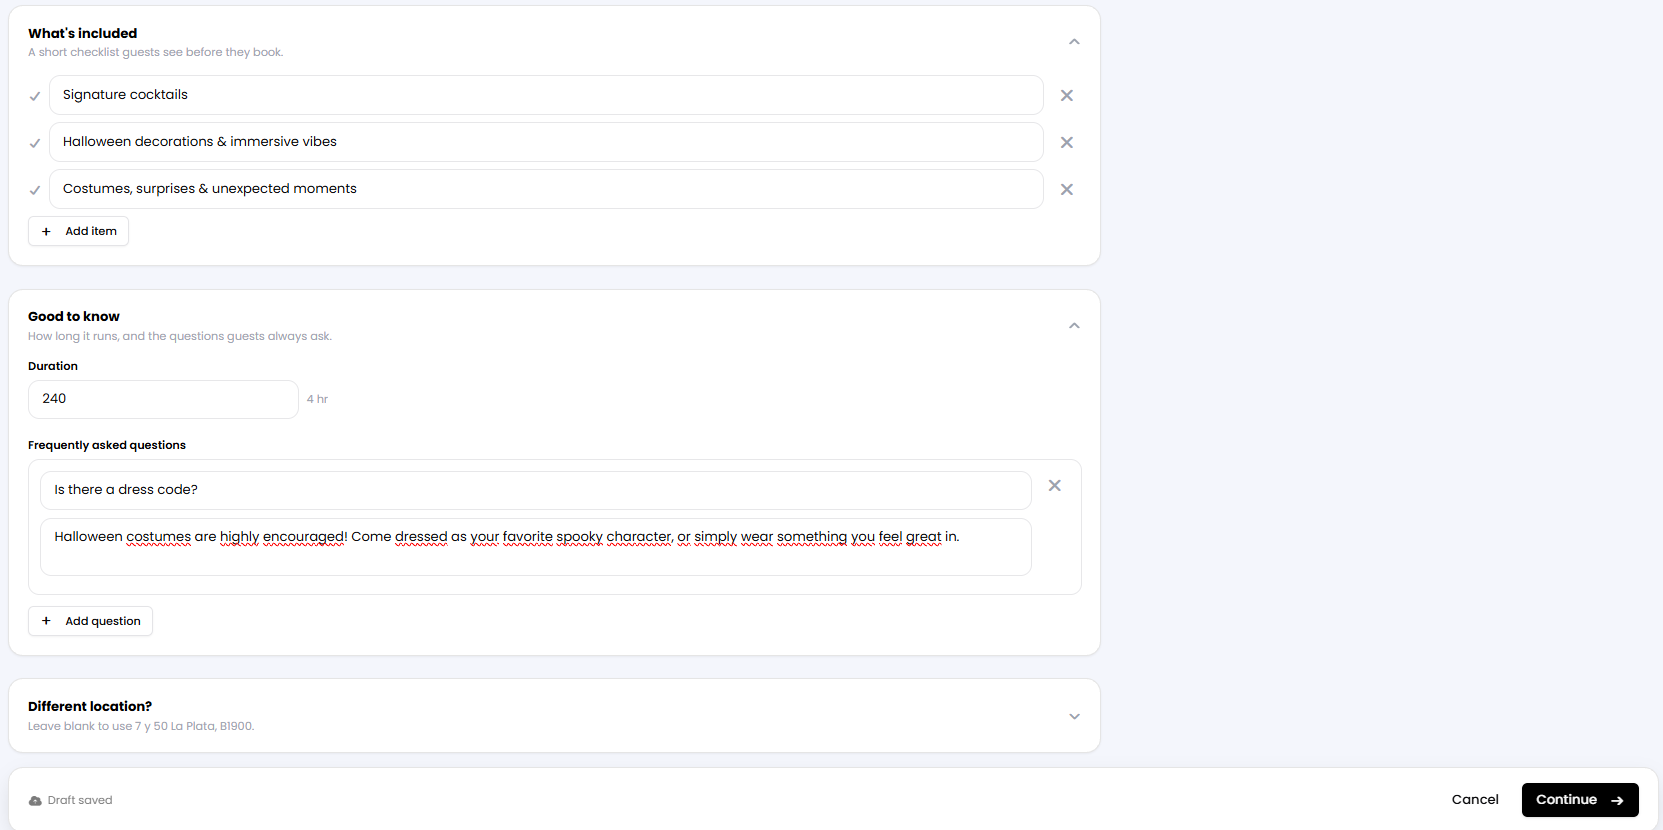
4. If you scroll down, you will find more fields to complete additional information. You can show a checklist of items included in the event, customize your own FAQ section, and even indicate if the location of the event matches your restaurant’s address. Once finished, click on the Continue button below.
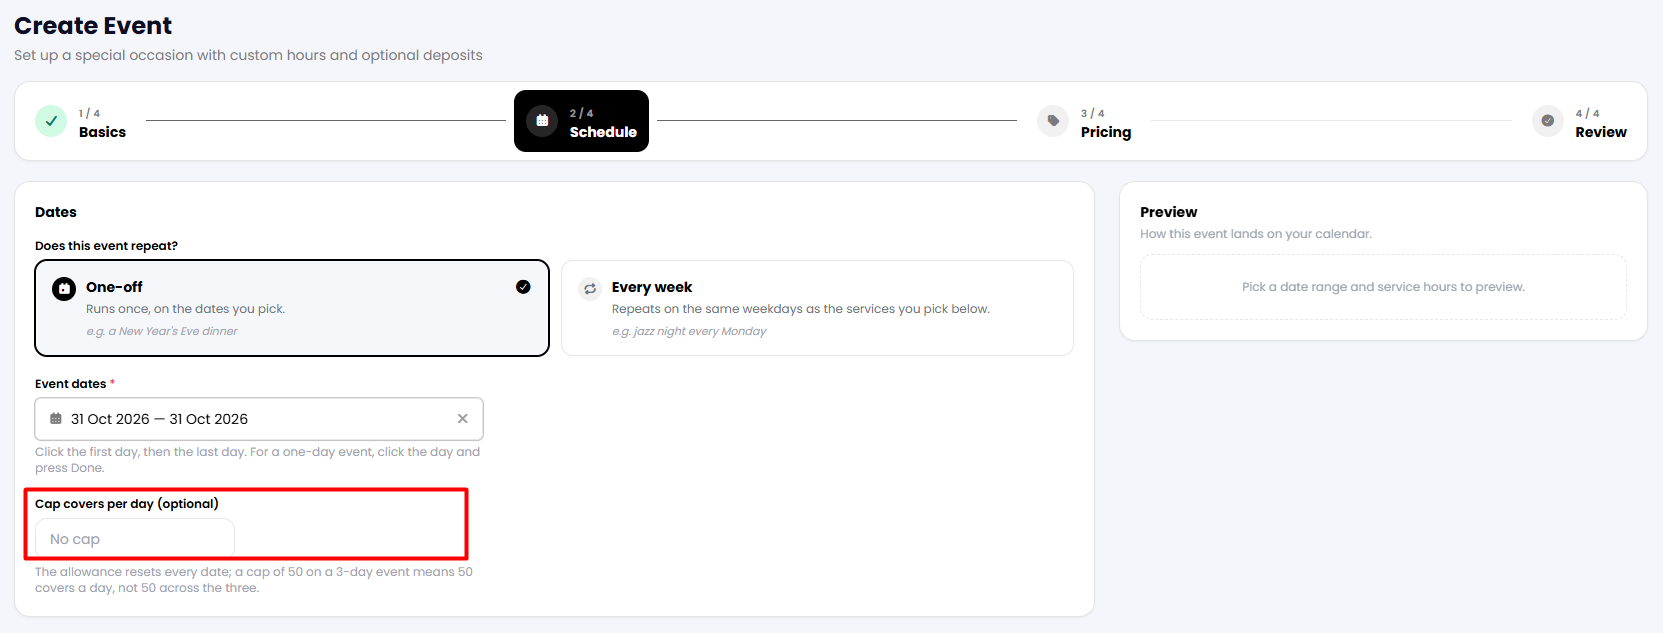
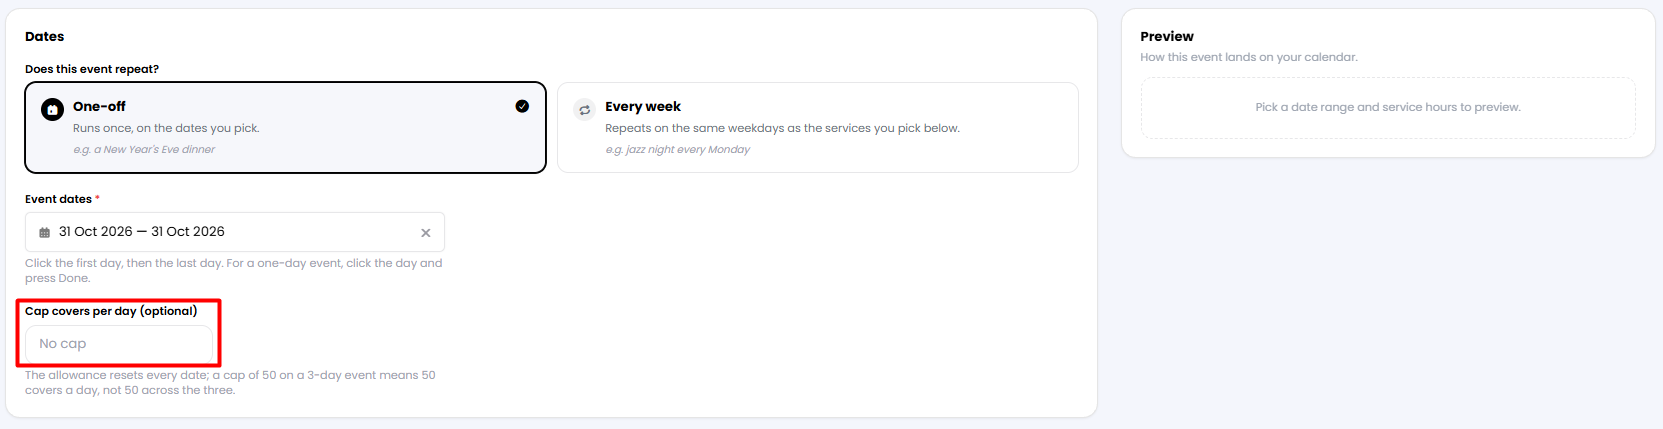
5. The next step is to choose the date of the event. It can either be a one-time event or be set to be repeated in the future.
- Seated event: You can optionally set a maximum number of covers for that event.
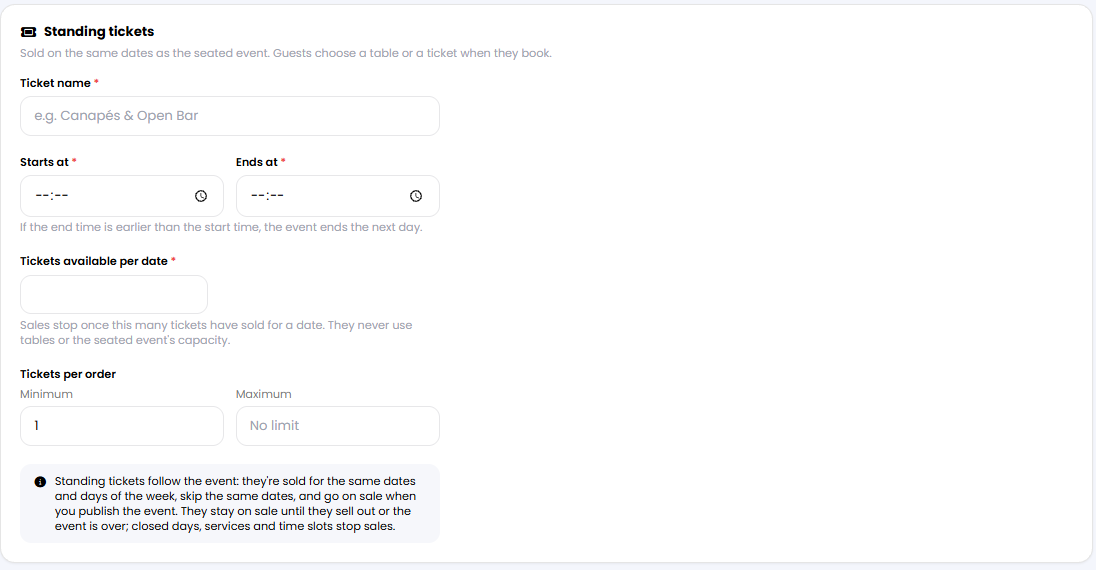
- Standing event: You can set the total number of tickets available for the event, as well as the minimum and maximum number of tickets that can be purchased per order (under a single reservation).
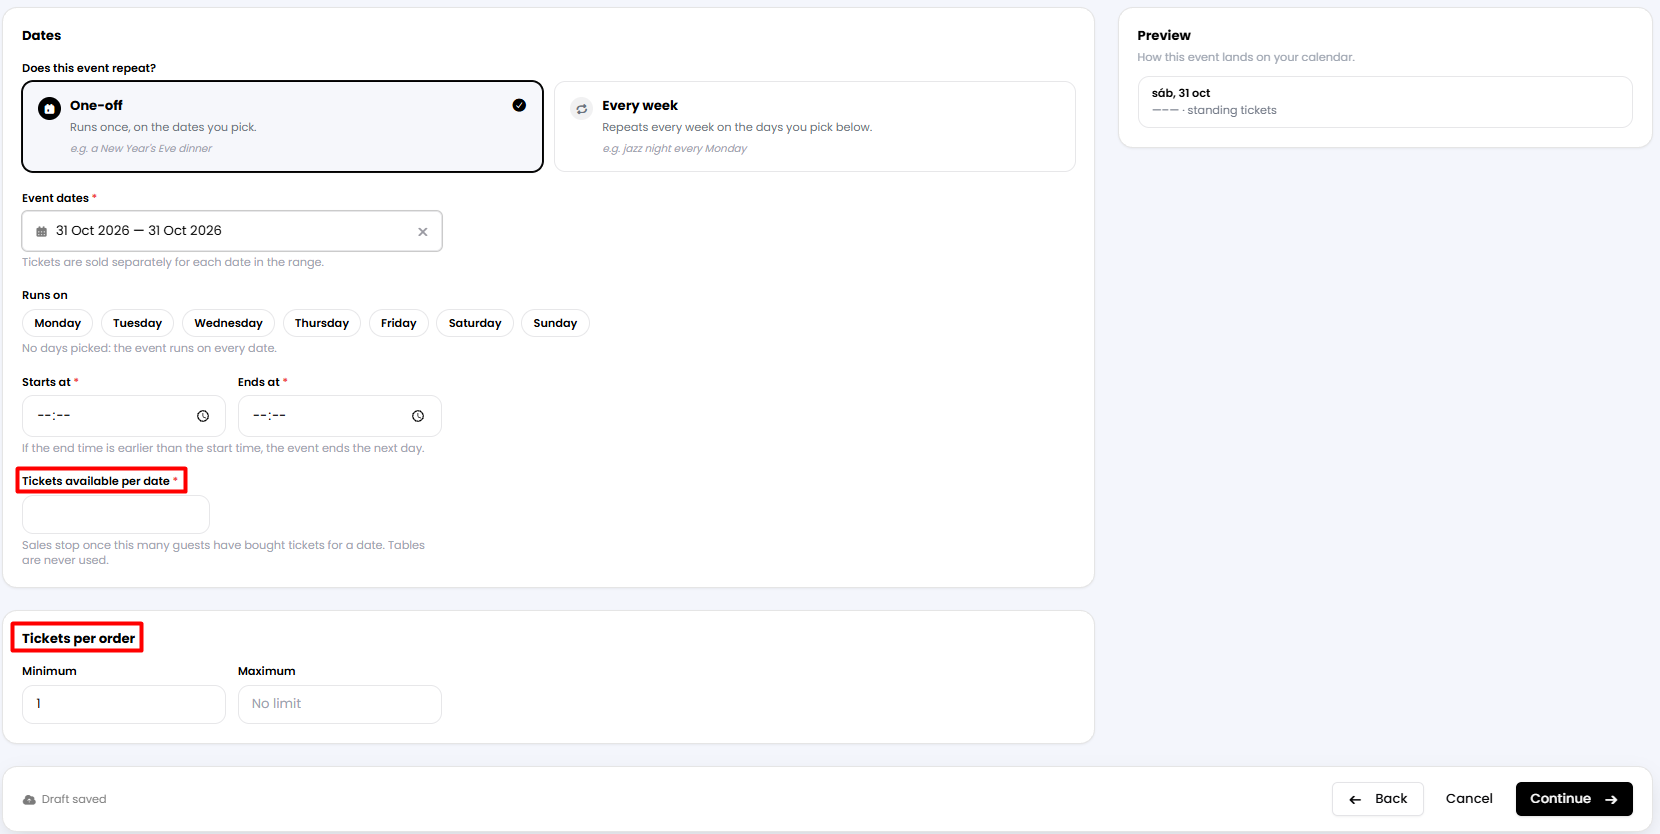
- Seated + standing event: You can optionally set a maximum number of covers for the seated capacity, and also set the number of tickets that will be sold for the standing capacity of your event.
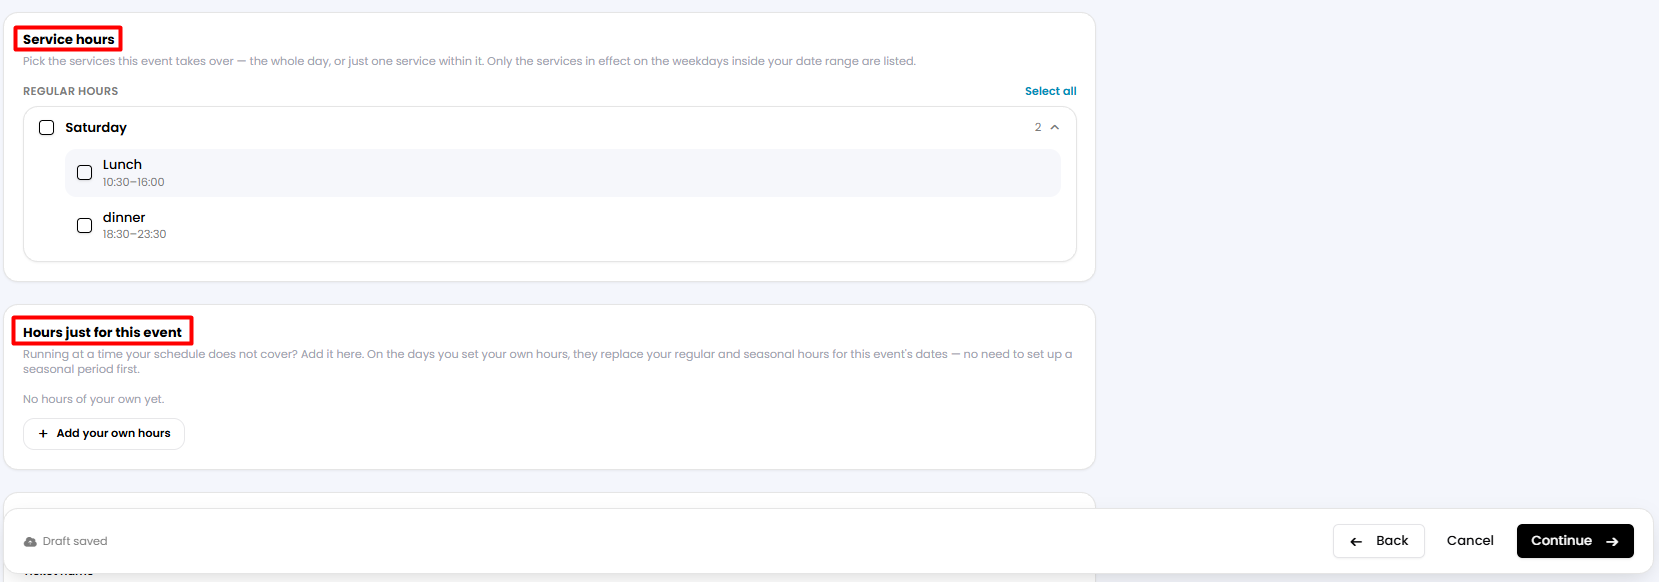
Then, choose which days and service hours your event would be linked to. Once finished, click on the Continue button below.
6. In the third step, you can set your Payment Strategy to charge guests for deposits or to collect product payments.
Note: Events currently only allow No charge, Deposit/Ticket, or Linked products. There is no option to collect card details for verification purposes only, without taking a deposit or payment for products.
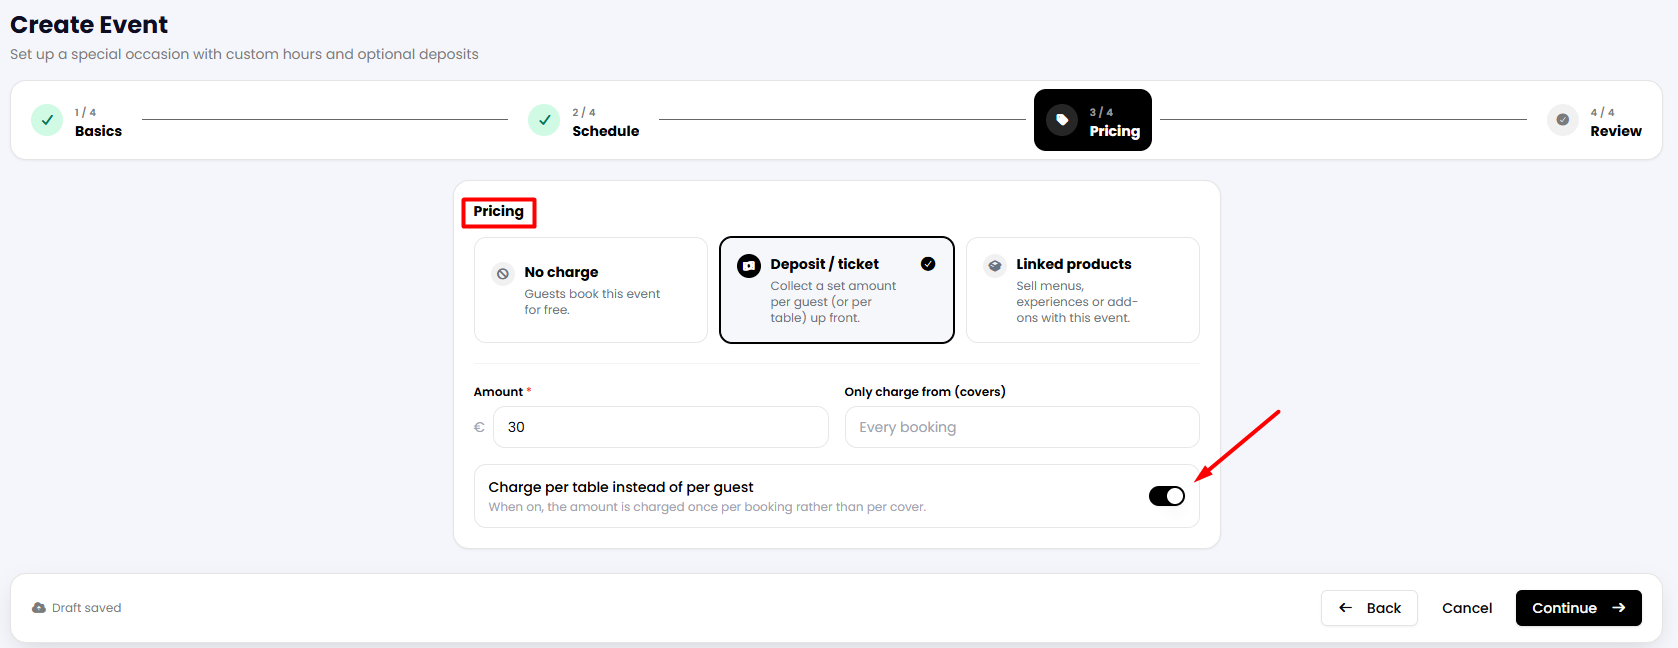
- Seated event: You can decide whether you will charge a deposit or not, or offer products to your guests. By enabling the toggle below, you can make deposits per table and not per cover.
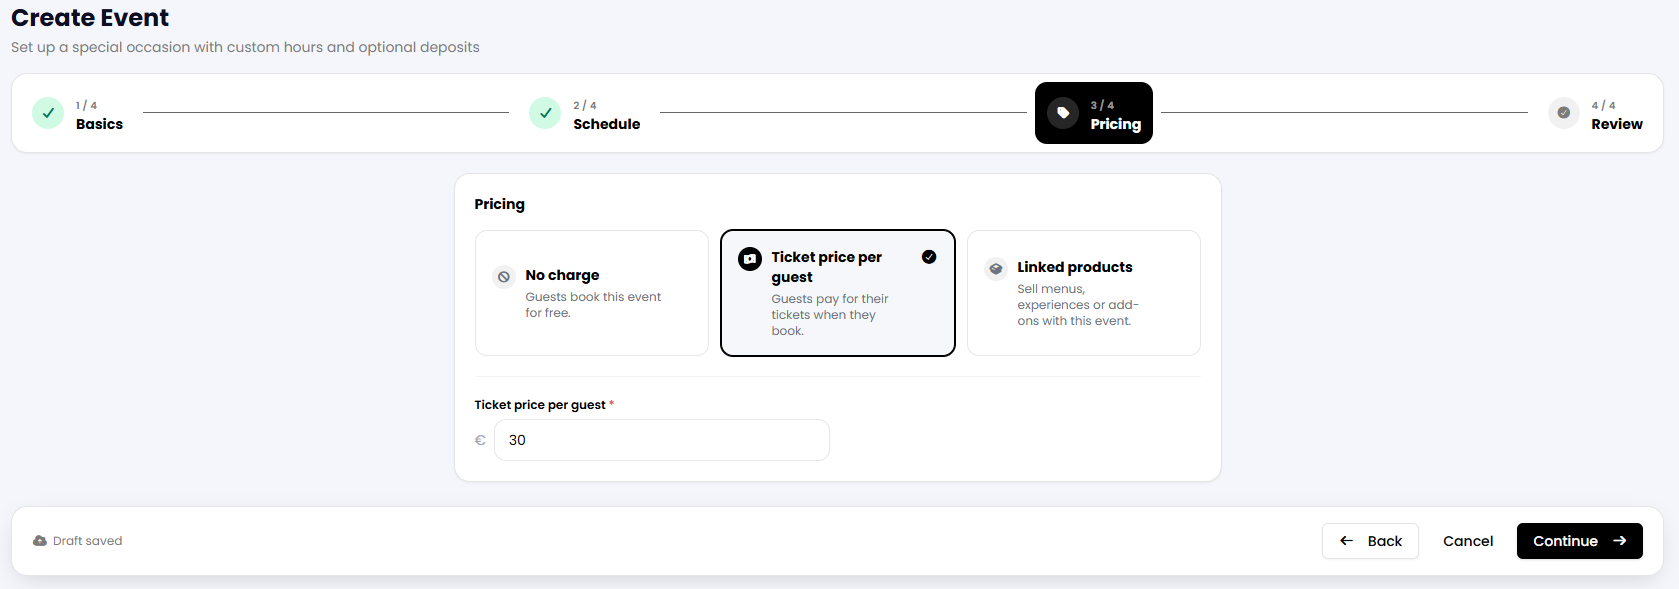
- Standing event: You can decide whether you will charge a deposit or not, or offer products to your guests. Charges are per person.
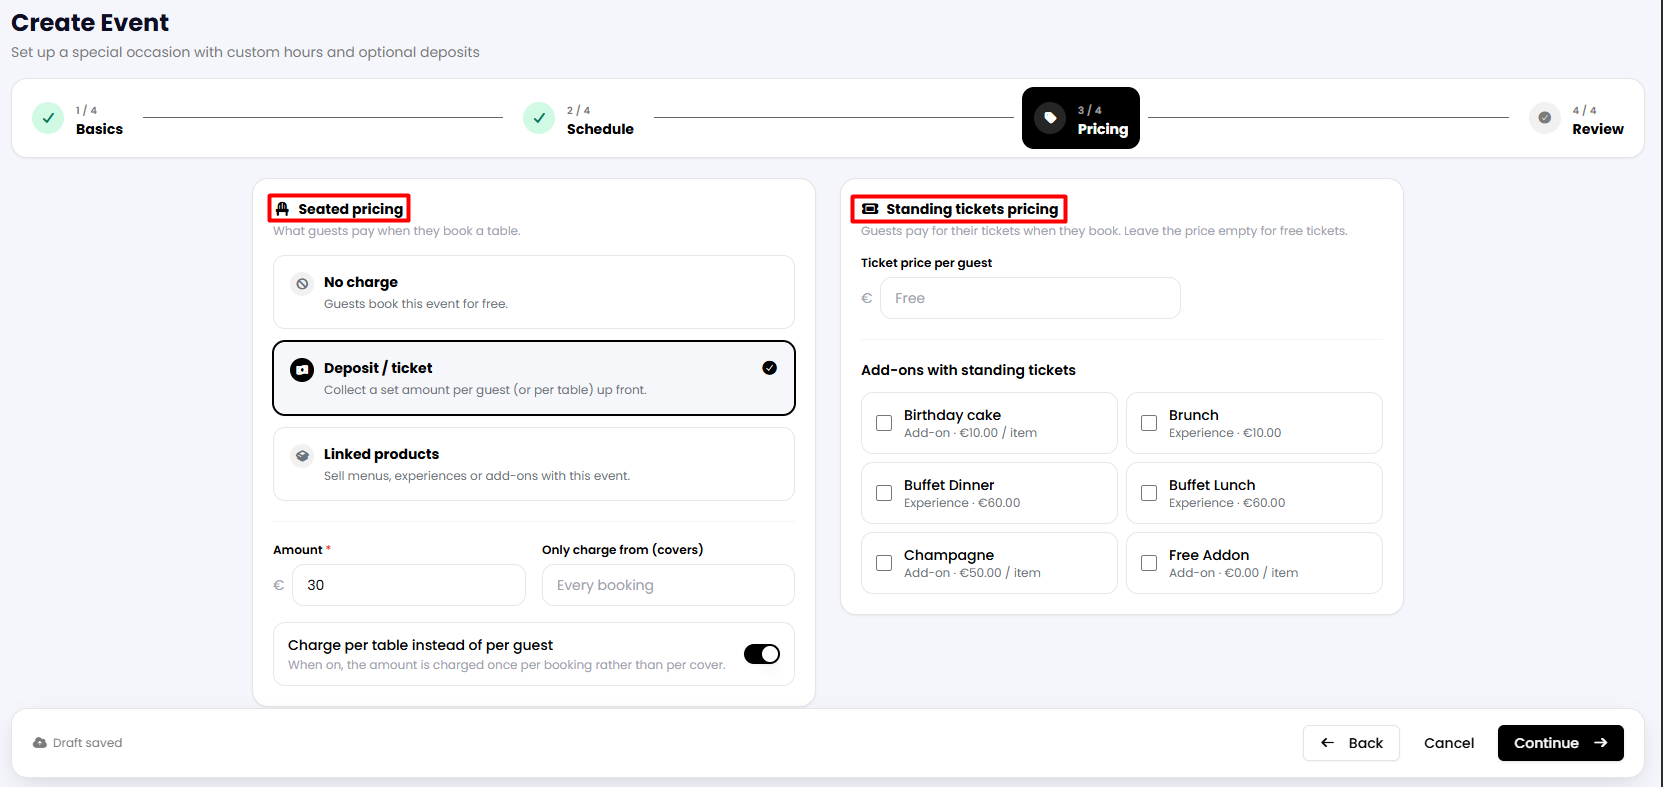
- Seated + standing event: You can combine both options and set the pricing for seated guests on the left and standing guests on the right.
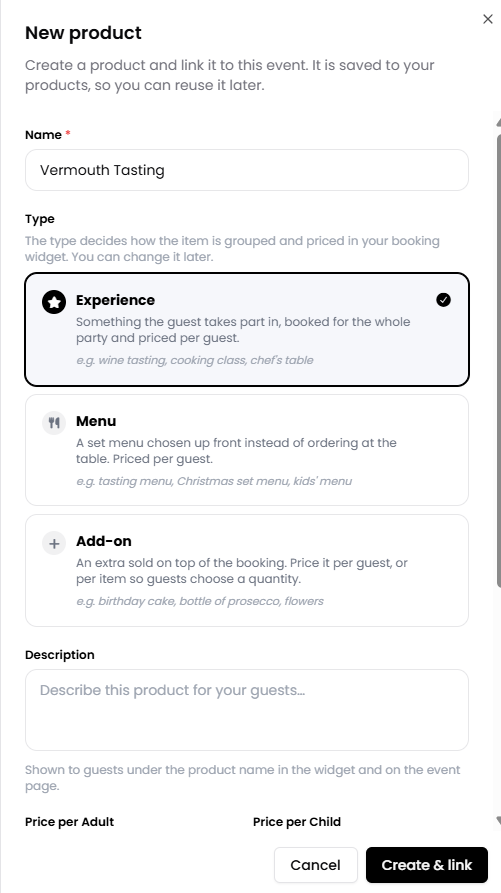
Additionally, you can decide to link an existing product to your event or to create a new one. You can do so by clicking on the + New product button on the screen.
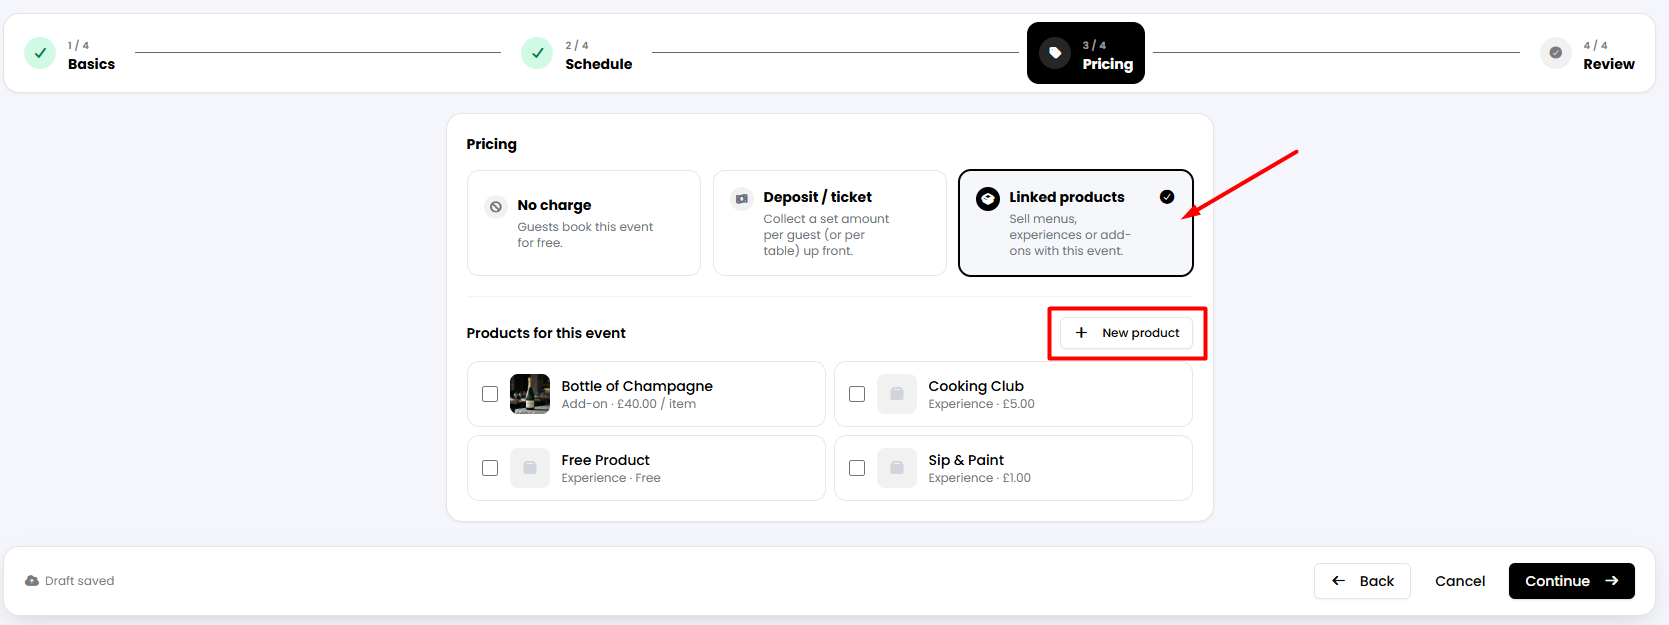
A new tab will appear where you can enter the details of your new product, choose its type and, if desired, set the price and the minimum and maximum number of guests.
Experience: Something that guests take part in, booked for the whole party, and price per guest (It would be mandatory and has to match the number of guests when booking).
Menu: A set menu chosen up instead of ordering at the table. Price per guest (It would be mandatory and has to match the number of guests when booking).
Add-on: An extra sold on top of the booking. Price it per guest or per item so guests choose a quantity (It is not mandatory, and it does not necessarily have to match the number of guests when booking).
Once finished, click on the Create & Link button below. Then click Continue in the lower right corner of the screen.
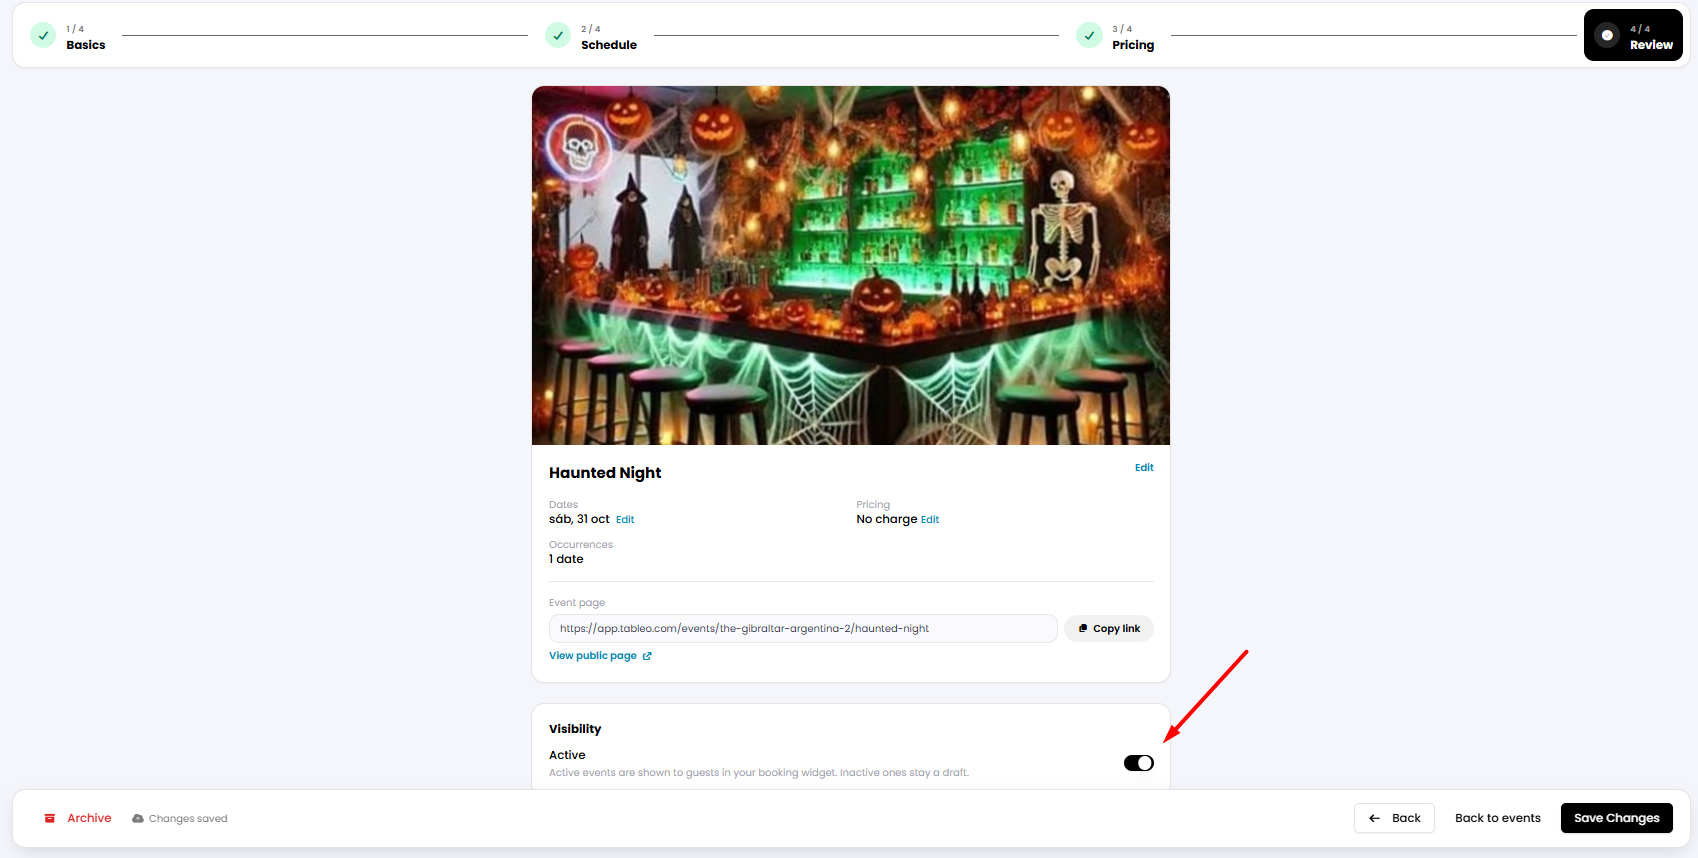
7. The final tab will show a review of your event. To launch it live, ensure that the Visibility toggle is enabled. If you do not want your event to be active for the moment, just click on it to disable it.
If everything looks correct, click on the Create Event button below.
8. Once your event is created, you will be able to see it in the main Events screen. From there, you will be able to activate/deactivate it, copy the event’s link by clicking on Share, and Edit it. By clicking on the three dots on the right, more options will appear that will allow you to go to the events page and archive it.

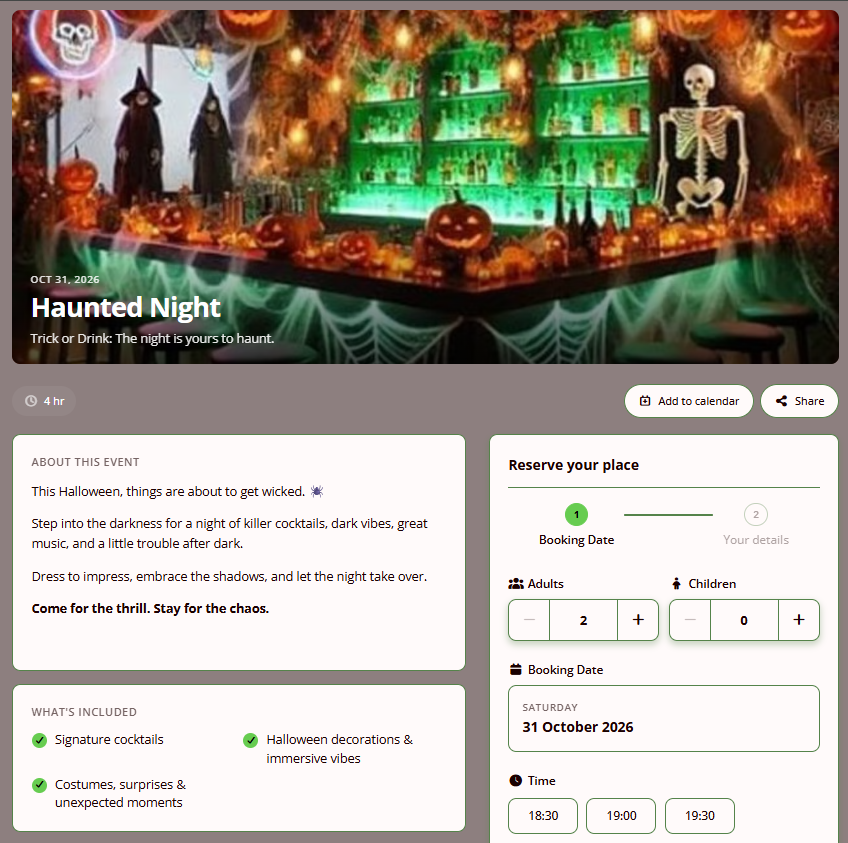
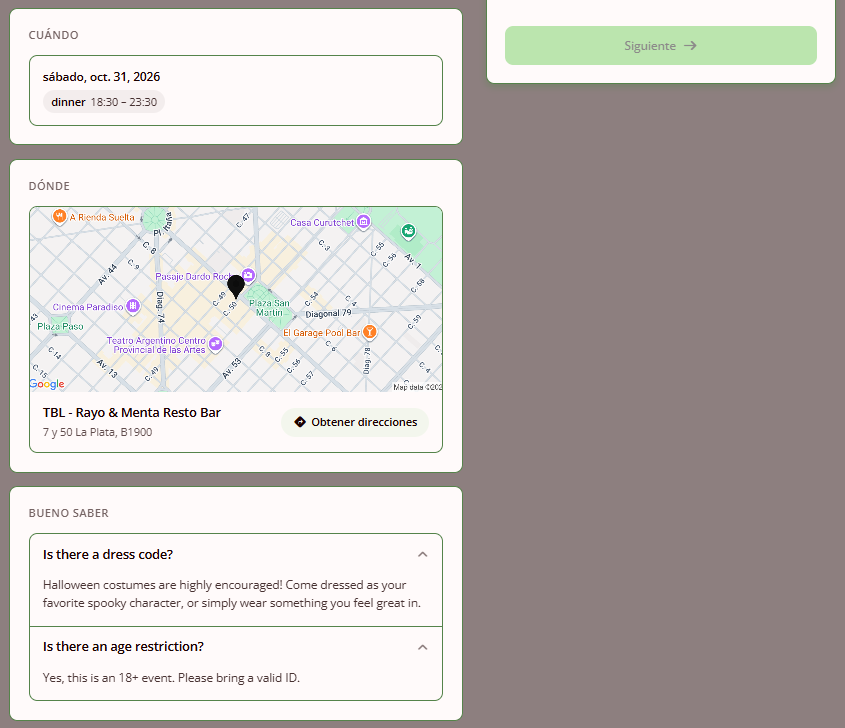
If you click on View public page, you will be redirected to your event’s widget. From there, guests can choose to add it to their calendar or to share the link. All the information will be displayed as follows:
Was this article helpful?
That’s Great!
Thank you for your feedback
Sorry! We couldn't be helpful
Thank you for your feedback
Feedback sent
We appreciate your effort and will try to fix the article