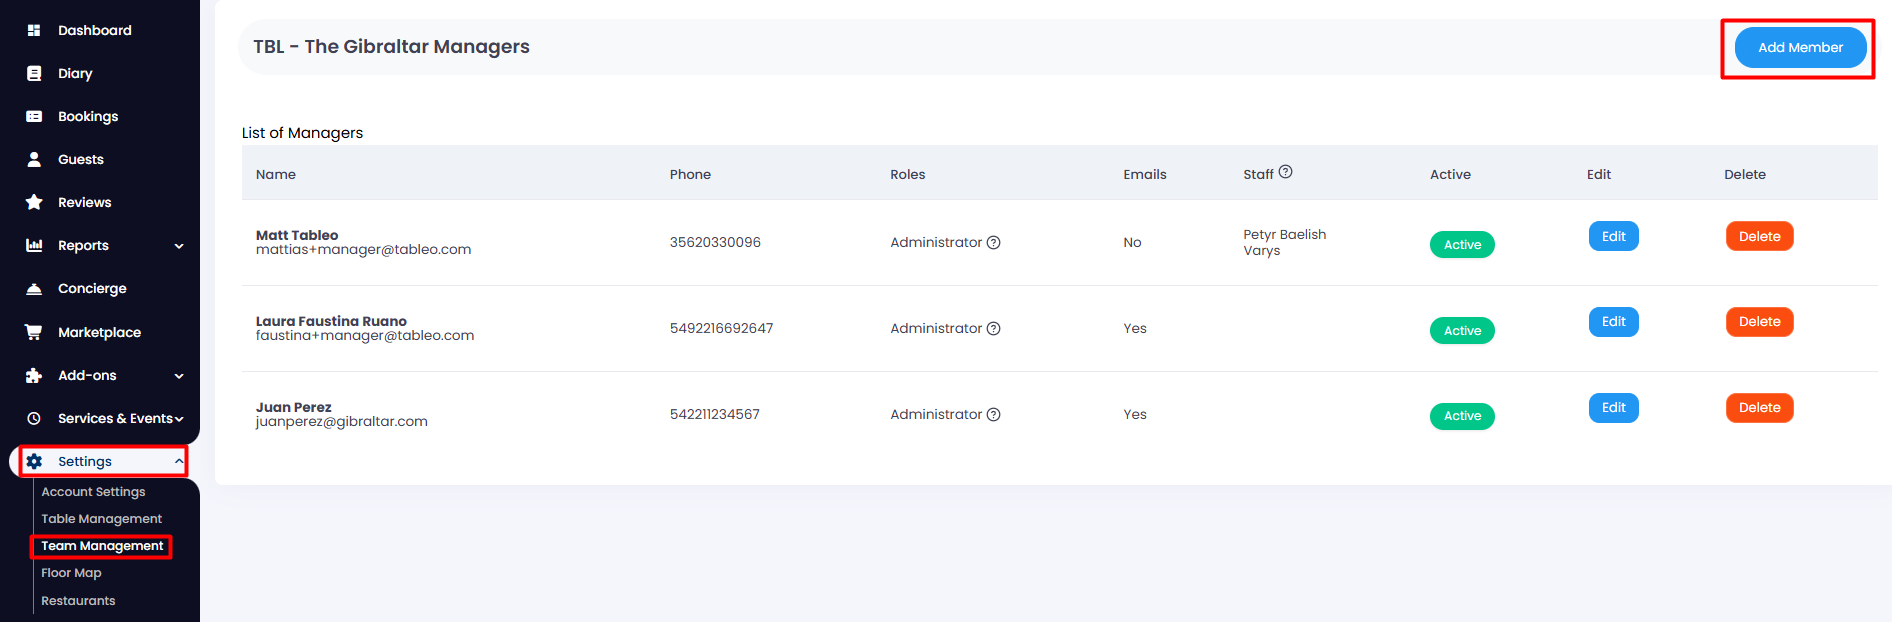
1. From the side menu, choose Settings > Team Management.
2. On the screen, a list of the actual managers will appear. From the top right corner, you can add a new one by clicking on the Add Member button.
3. A new tab will appear for you to complete the new manager’s details. Below, you can choose which role you want to assign by clicking on the toggle on the right.
Administrator: Has full access to the Tableo account, including Settings.
Manager: Has full access to the Tableo account, excluding Settings.
Booker: Can only create and edit bookings created by this user account.
Read Only: Read-only view.
Note: by placing your cursor over the tooltip icon, you can see details about the permissions for each role. When finished, click the Create button.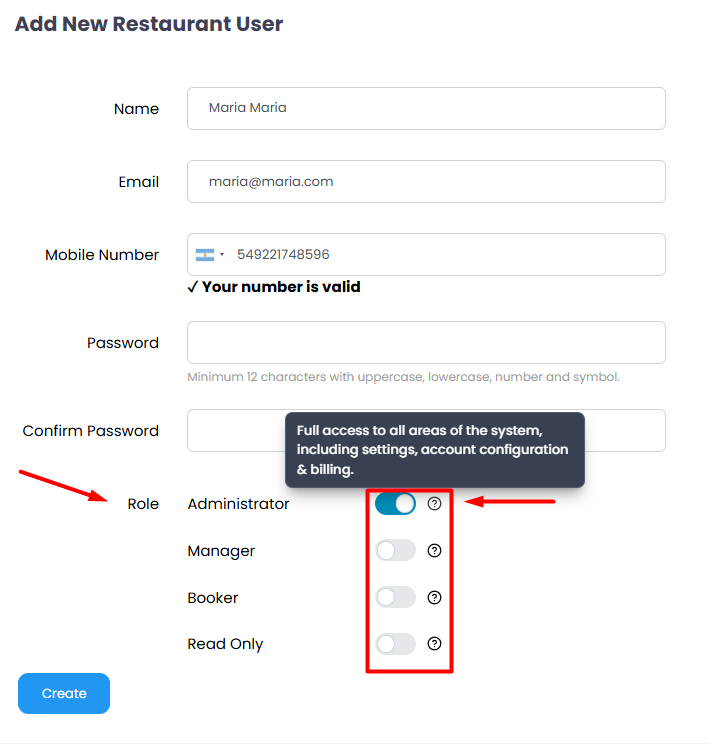
4. A new tab will appear, where the system will ask if you would like the user to receive emails, as shown below. Select the preferred options and then click on Update to save.
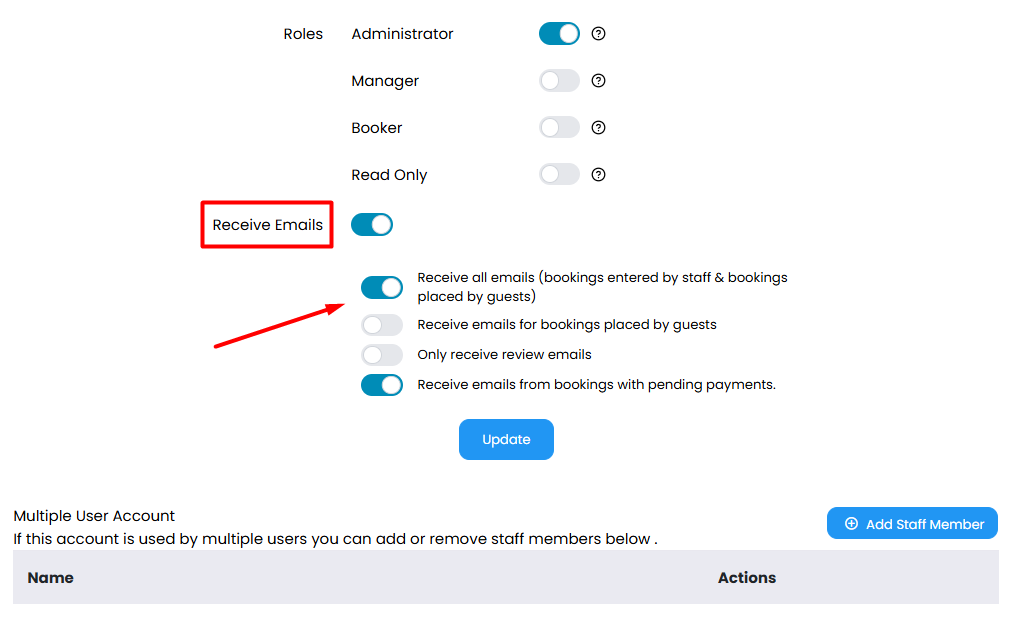
5. If you have a paid plan, the Multiple User Account section will appear at the bottom. The free plan only allows for one administrator account, so no Manager accounts can be added.
Visit this FAQ to allow staff members to edit and manage bookings on behalf of a Manager Account.

6. If you go back to the Team Management tab, you will now see the new member on screen. On the right, you can check their status, and you can Edit or Delete it by clicking on the correspondent buttom. 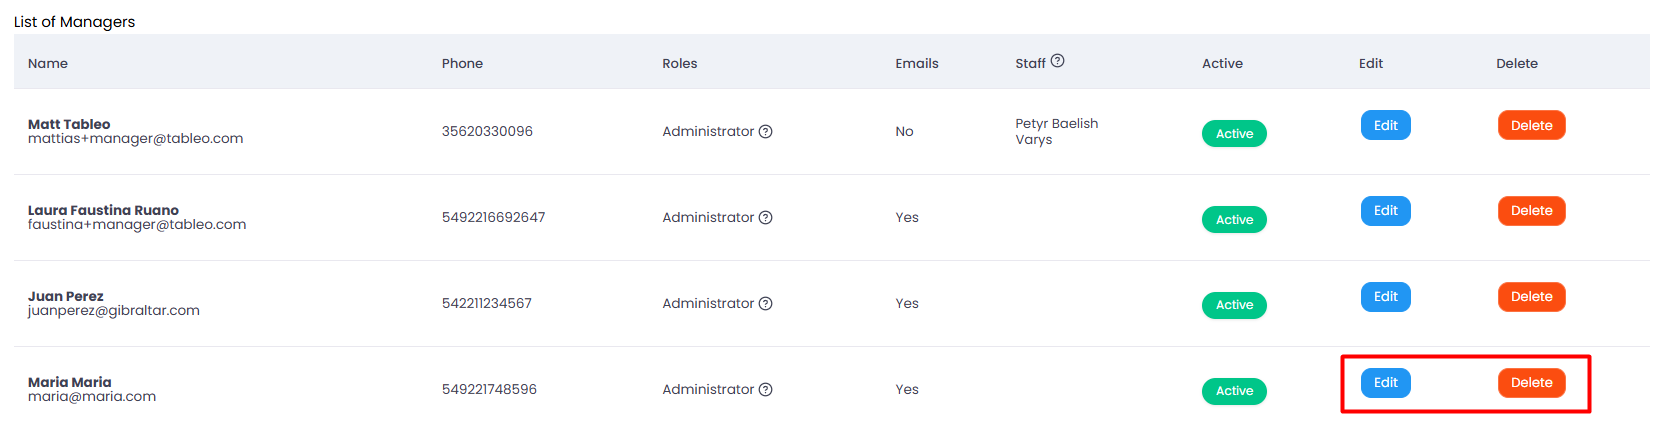
While we strive to ensure the accuracy and currency of the information in our knowledgebase, some articles may contain minor discrepancies due to the constant evolution of our services and products.
Was this article helpful?
That’s Great!
Thank you for your feedback
Sorry! We couldn't be helpful
Thank you for your feedback
Feedback sent
We appreciate your effort and will try to fix the article