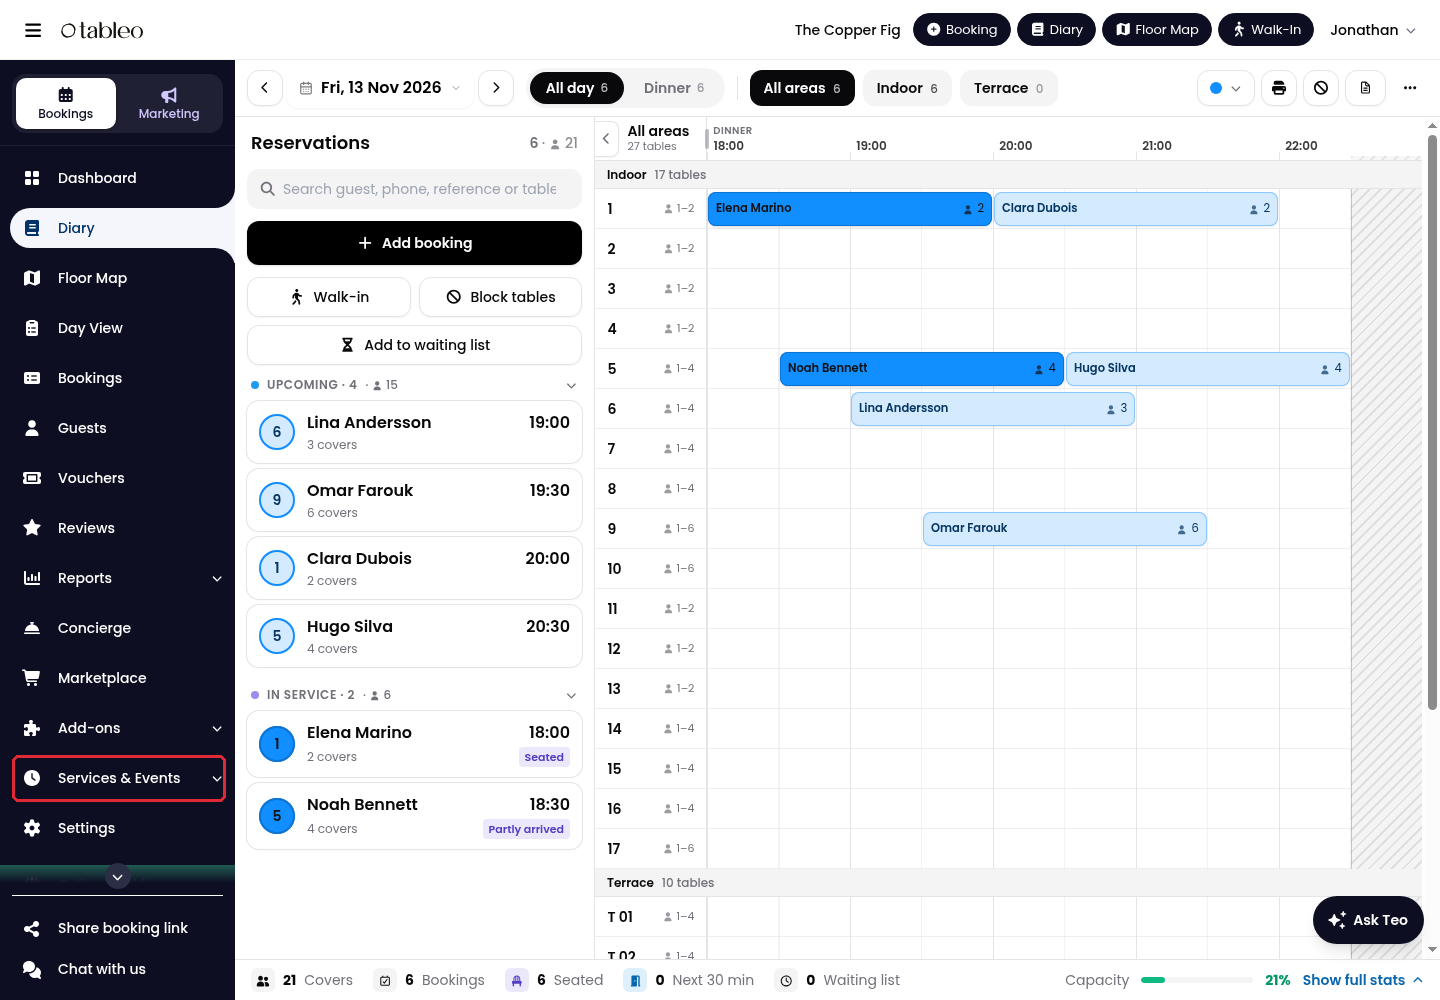
1. Click on Services & Events in the side menu, then select Seasonal Hours.
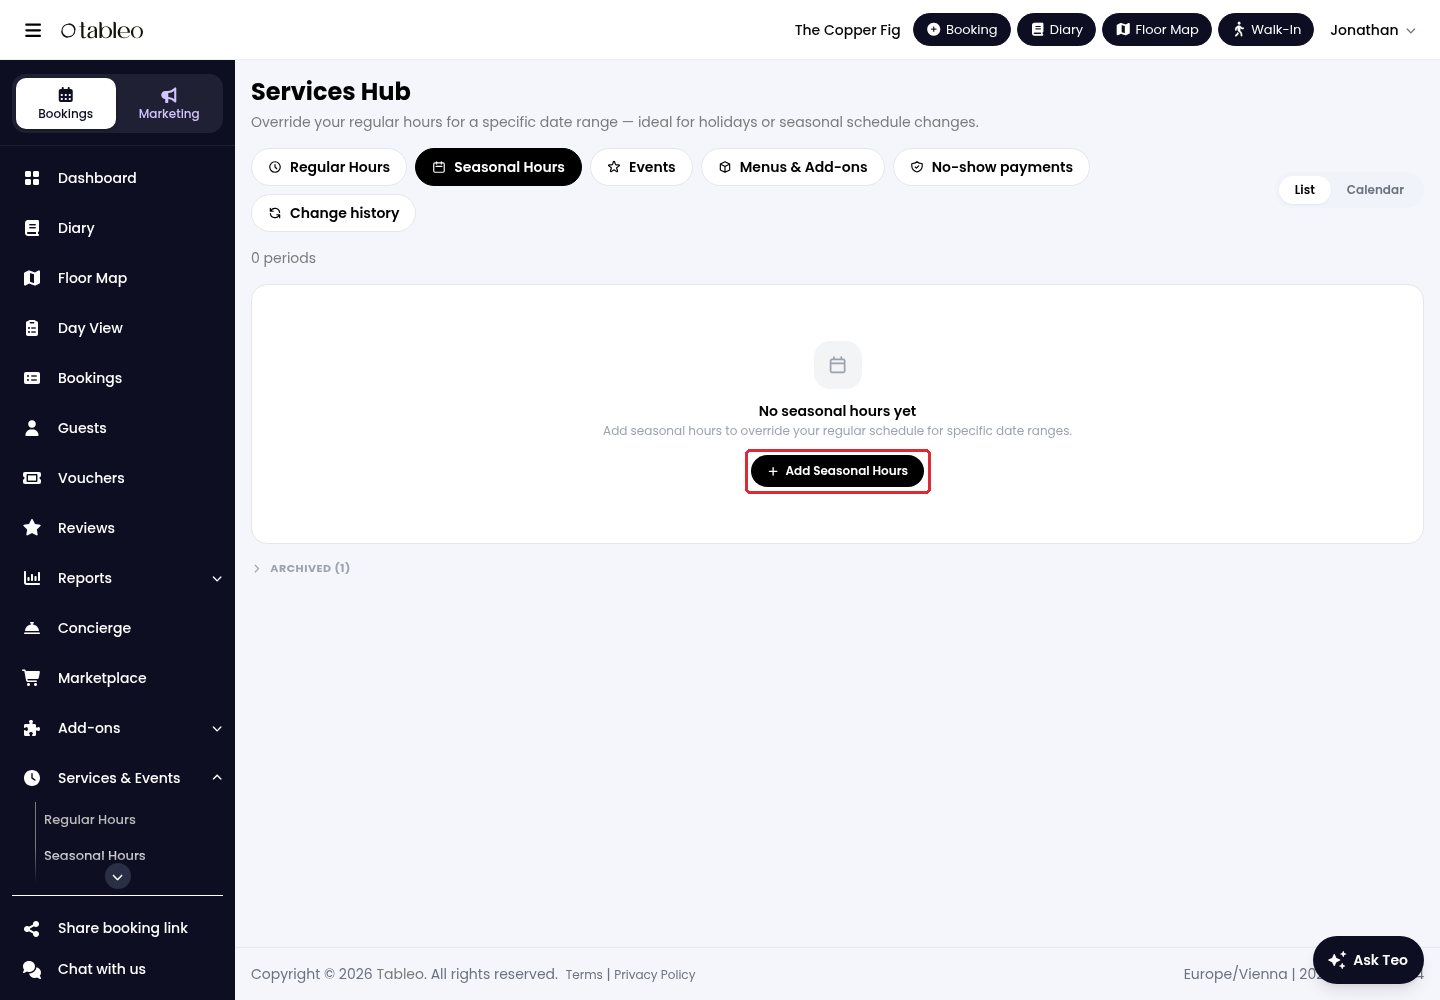
2. Click on Add Seasonal Hours.
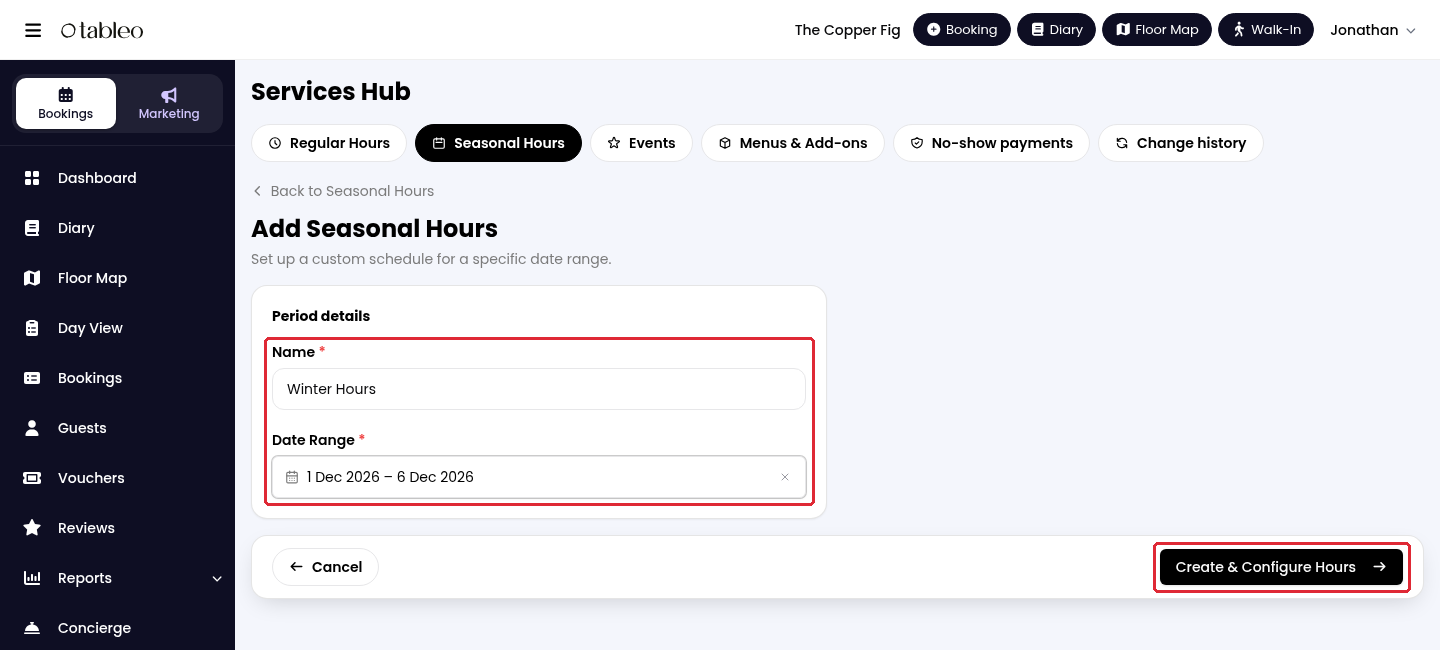
3. Enter a Name and choose the start and end dates in Date Range. Click on Done, then Create & Configure Hours.
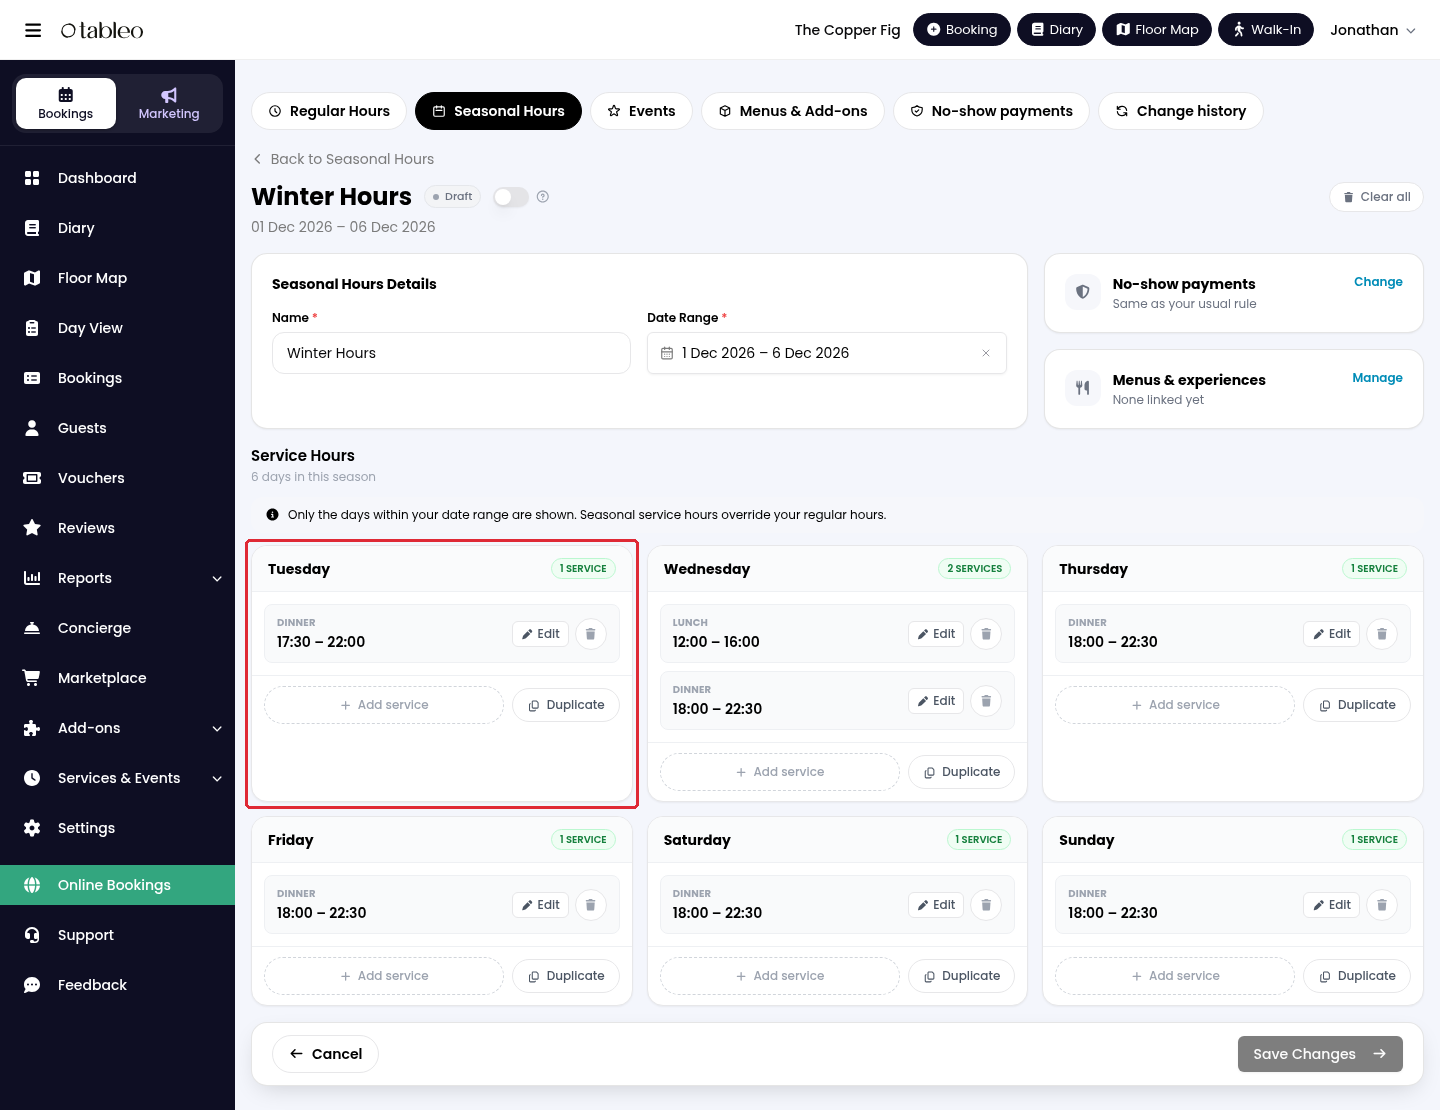
4. Under Service Hours, review the hours copied from your regular schedule. Click on Edit beside a service to change it.
5. Set Service Name, Open and Close, then click on Save Changes.
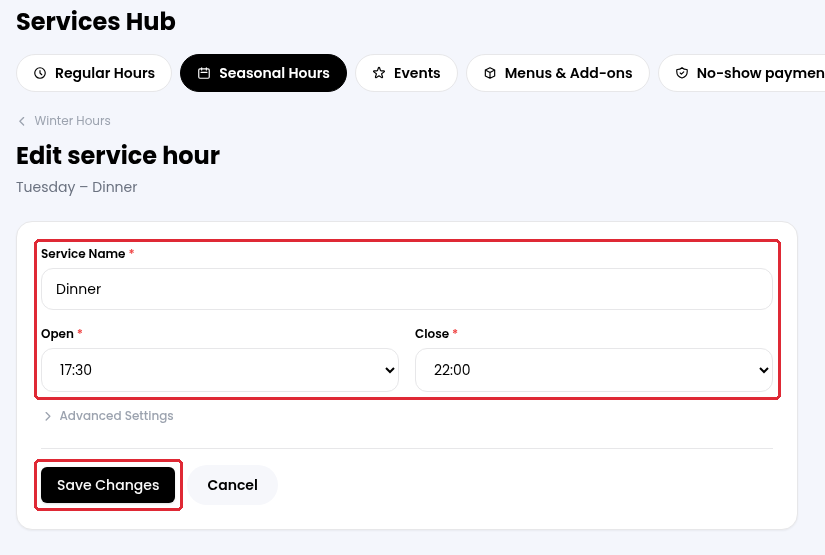
To add another service, click on Add service under the relevant weekday. Complete Service Name, Open and Close, then click on Save in the inline form.
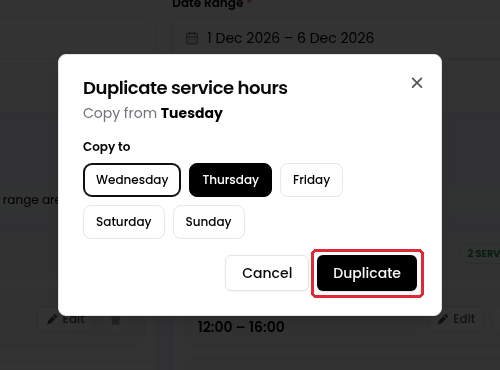
6. To copy a day’s service hours, click on Duplicate under that day. Select the destination days under Copy to, then click on Duplicate.
Optional: click on Change beside No-show payments to review the season’s payment rule. Online payments must be enabled before any payment is collected.
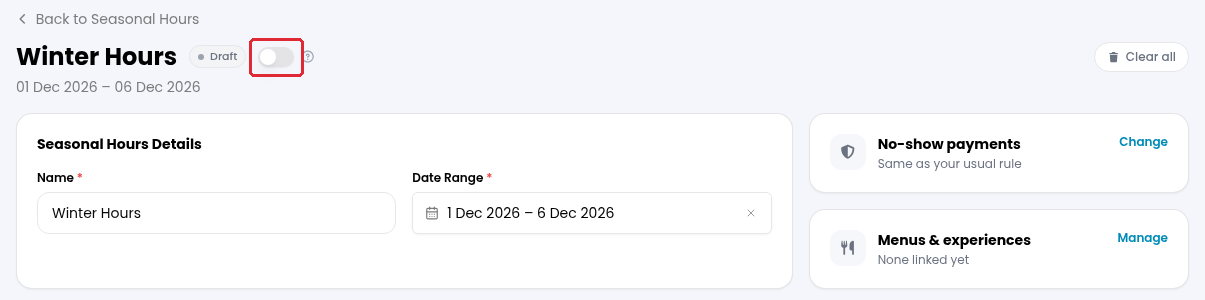
7. When you are ready to apply the seasonal hours, turn on the Activate switch beside the period’s name.
When the switch is on, the seasonal hours override your regular hours for those dates. When it is off, the period stays a draft and does not apply to bookings.
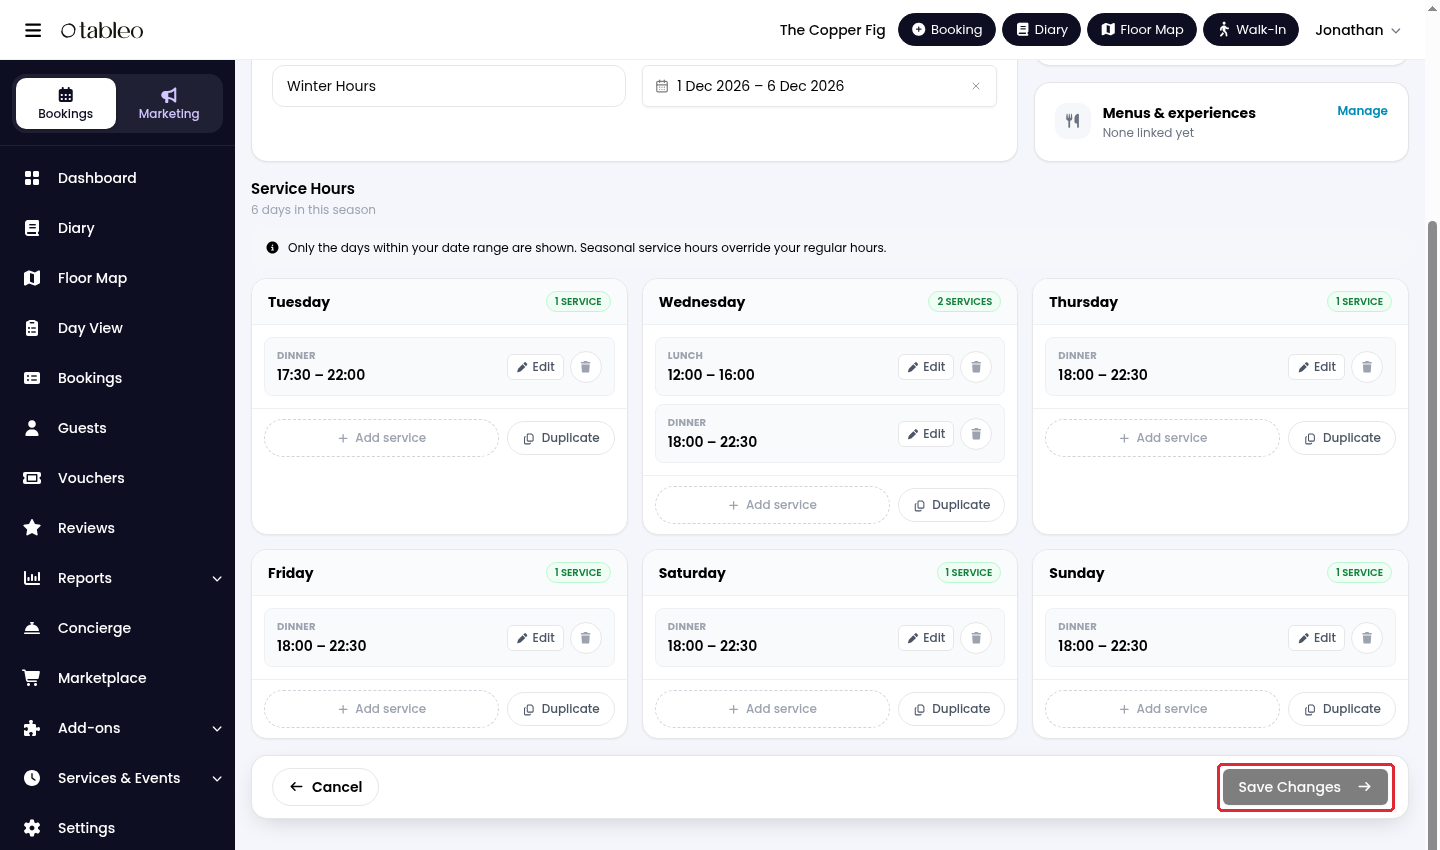
8. Scroll to the bottom and click on Save Changes to save any remaining changes.
While we strive to ensure the accuracy and currency of the information in our knowledge base, some articles may contain minor discrepancies due to the constant evolution of our services and products.
Was this article helpful?
That’s Great!
Thank you for your feedback
Sorry! We couldn't be helpful
Thank you for your feedback
Feedback sent
We appreciate your effort and will try to fix the article