Keep selected tables available for walk-ins by hiding them from online bookings. Hidden tables still appear in your Diary and can be assigned manually.
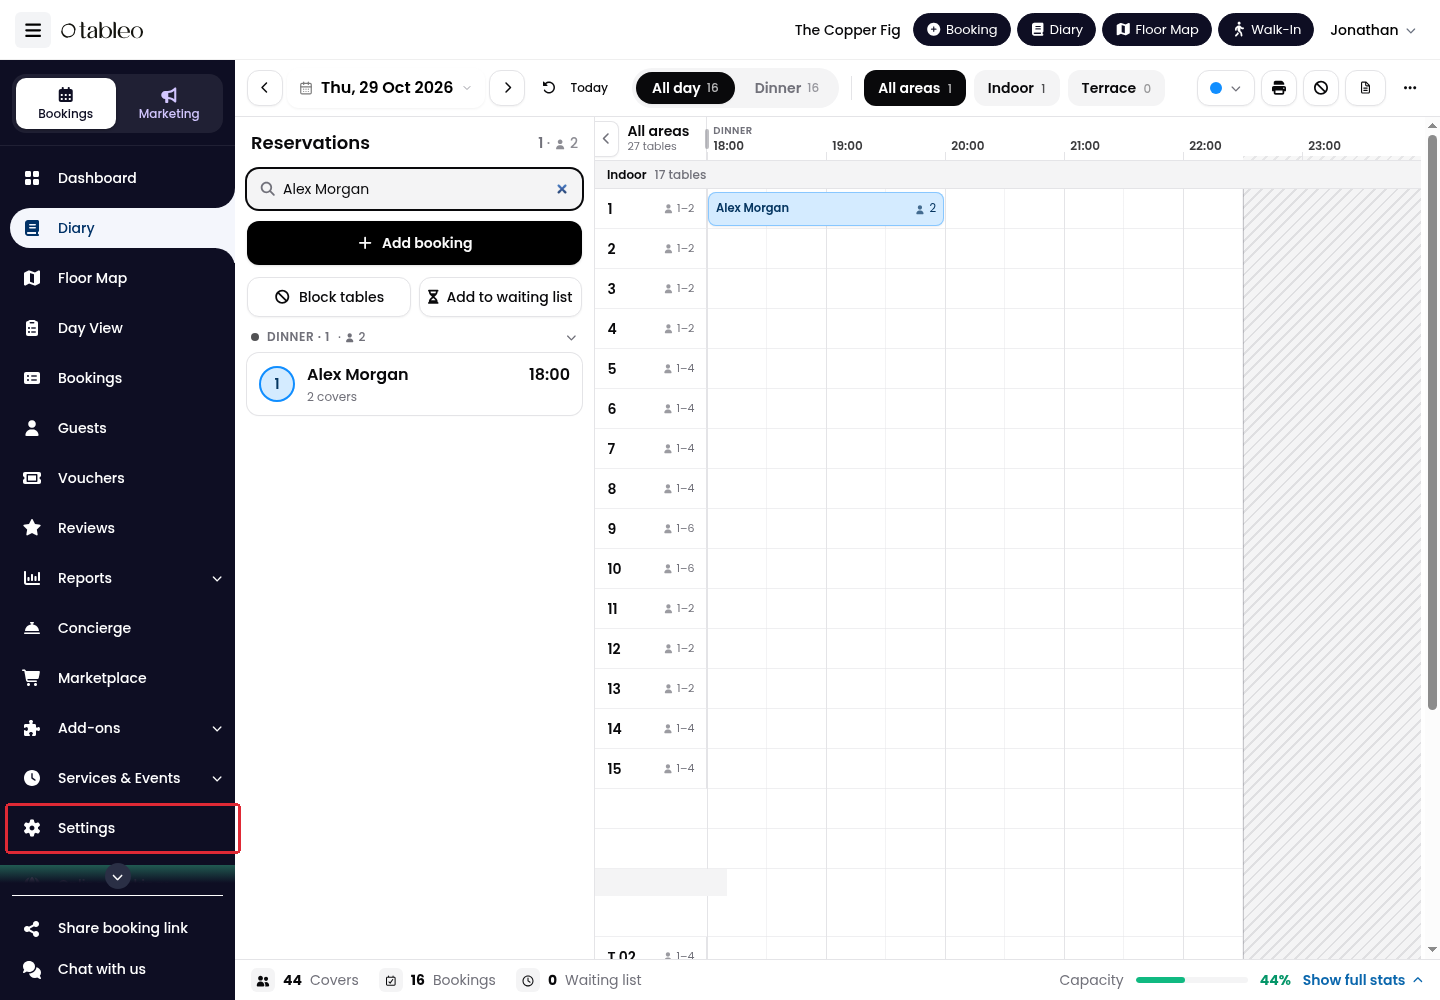
1. Click Settings in the side menu.
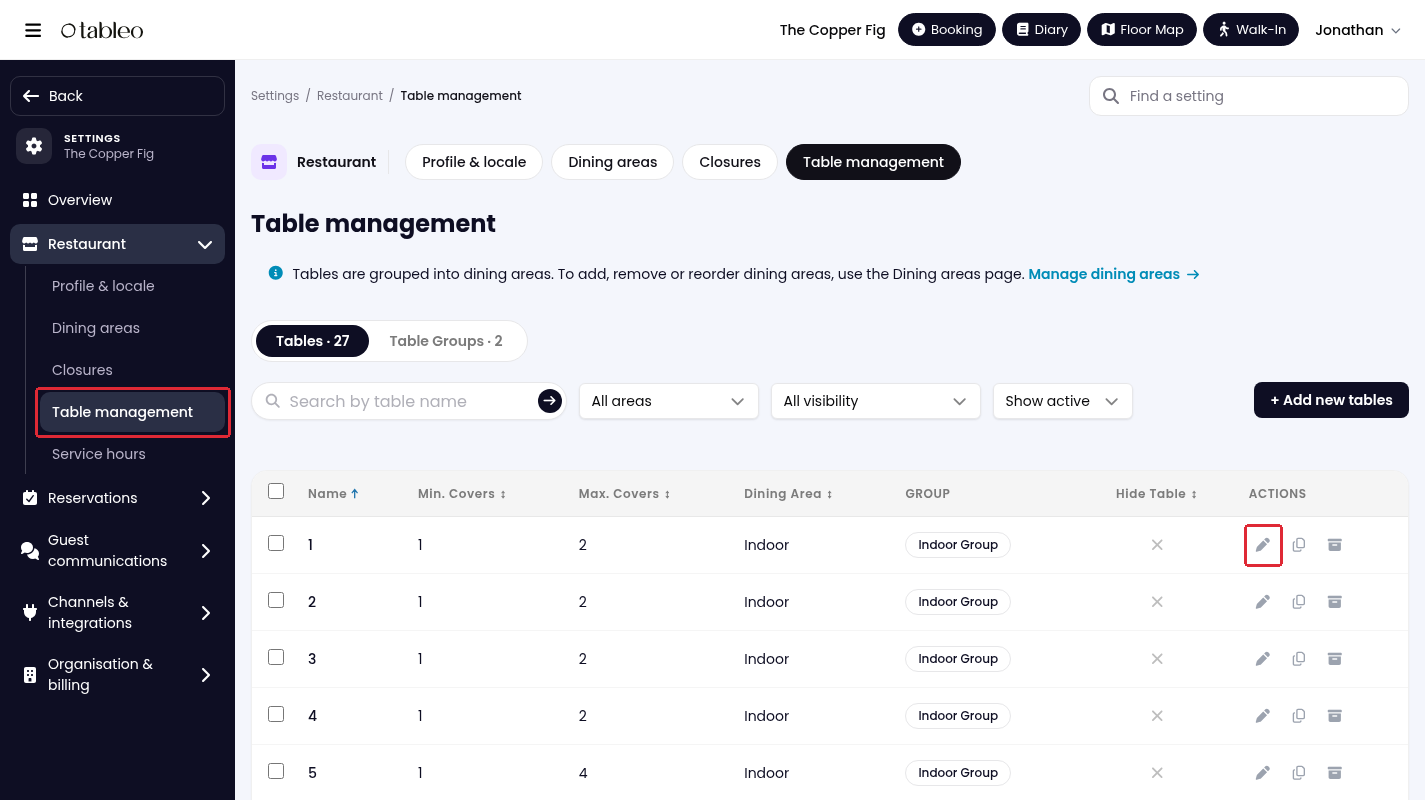
2. Under Restaurant, open Table management.
3. In Tables, find the table you want to keep for walk-ins and click its pencil icon in the ACTIONS column. Use the dining-area filter or search by table name if needed.
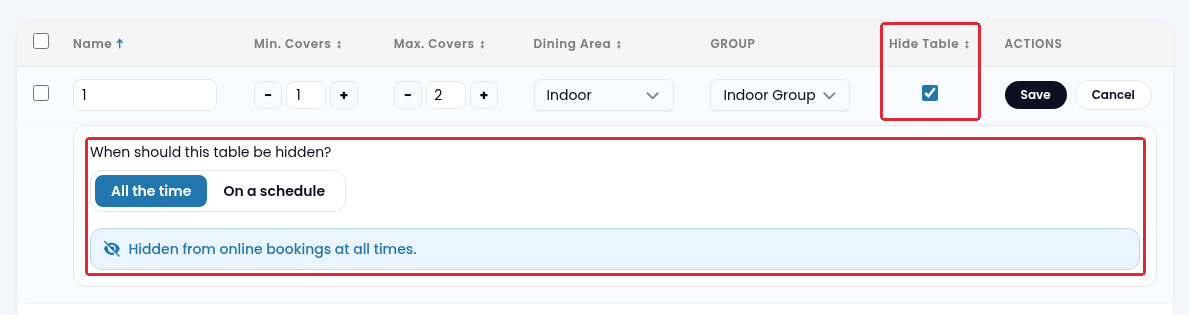
4. Tick Hide Table. Choose All the time to keep the table hidden from online bookings at all times.
5. To hide the table only at specific times, choose On a schedule. Set From and To, then select the days under On these days.
For example, select Thu, with From set to 18:00 and To set to 21:00, to keep the table for walk-ins during those hours on Thursdays.
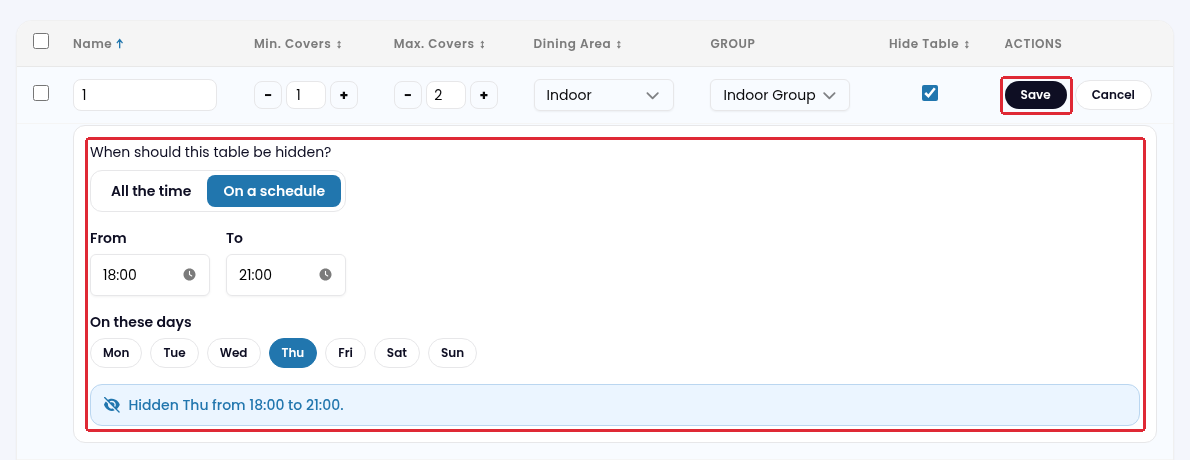
6. Click Save in the table row. Repeat for any other tables you want to keep for walk-ins.
To make the table available for online bookings again, edit it, untick Hide Table and click Save.
Another way to keep a table for walk-ins
You can also keep a table free for walk-ins by blocking it in the Diary for a specific date and time. Remove the block when you are ready to assign the table to a walk-in.
1. In the Diary, select the date and click Block tables. Alternatively, click Add booking, then select Block table.
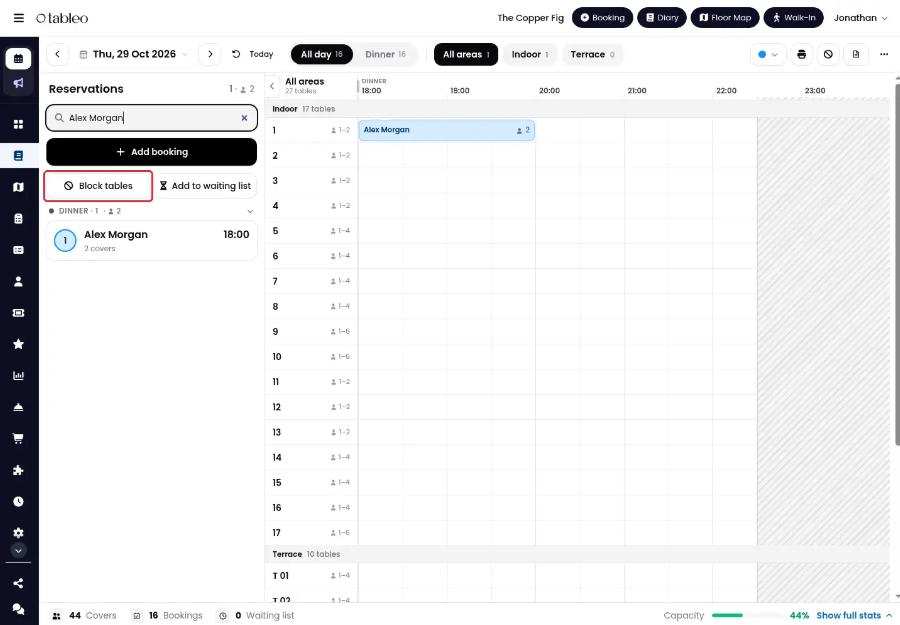
2. Set the start time and Duration.
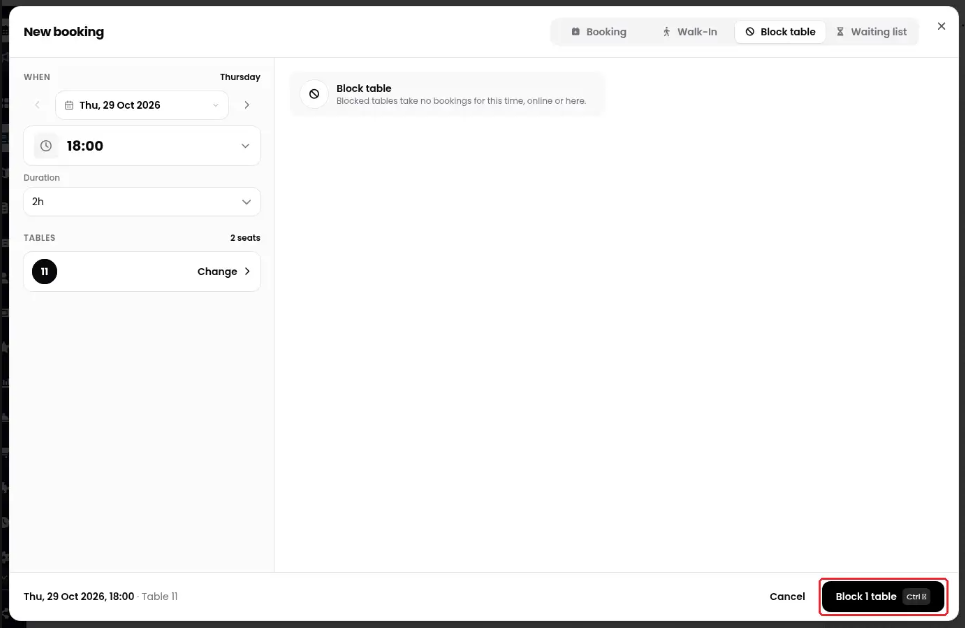
3. Click Choose tables, select the table you want to keep free, and click Confirm.
4. Check the details, then click Block 1 table.
A blocked table cannot take online or staff-entered bookings during that period. Remove the block before assigning a walk-in to it. To keep tables available for manual assignment while hiding them from online bookings, use Hide Table as explained above.
Was this article helpful?
That’s Great!
Thank you for your feedback
Sorry! We couldn't be helpful
Thank you for your feedback
Feedback sent
We appreciate your effort and will try to fix the article