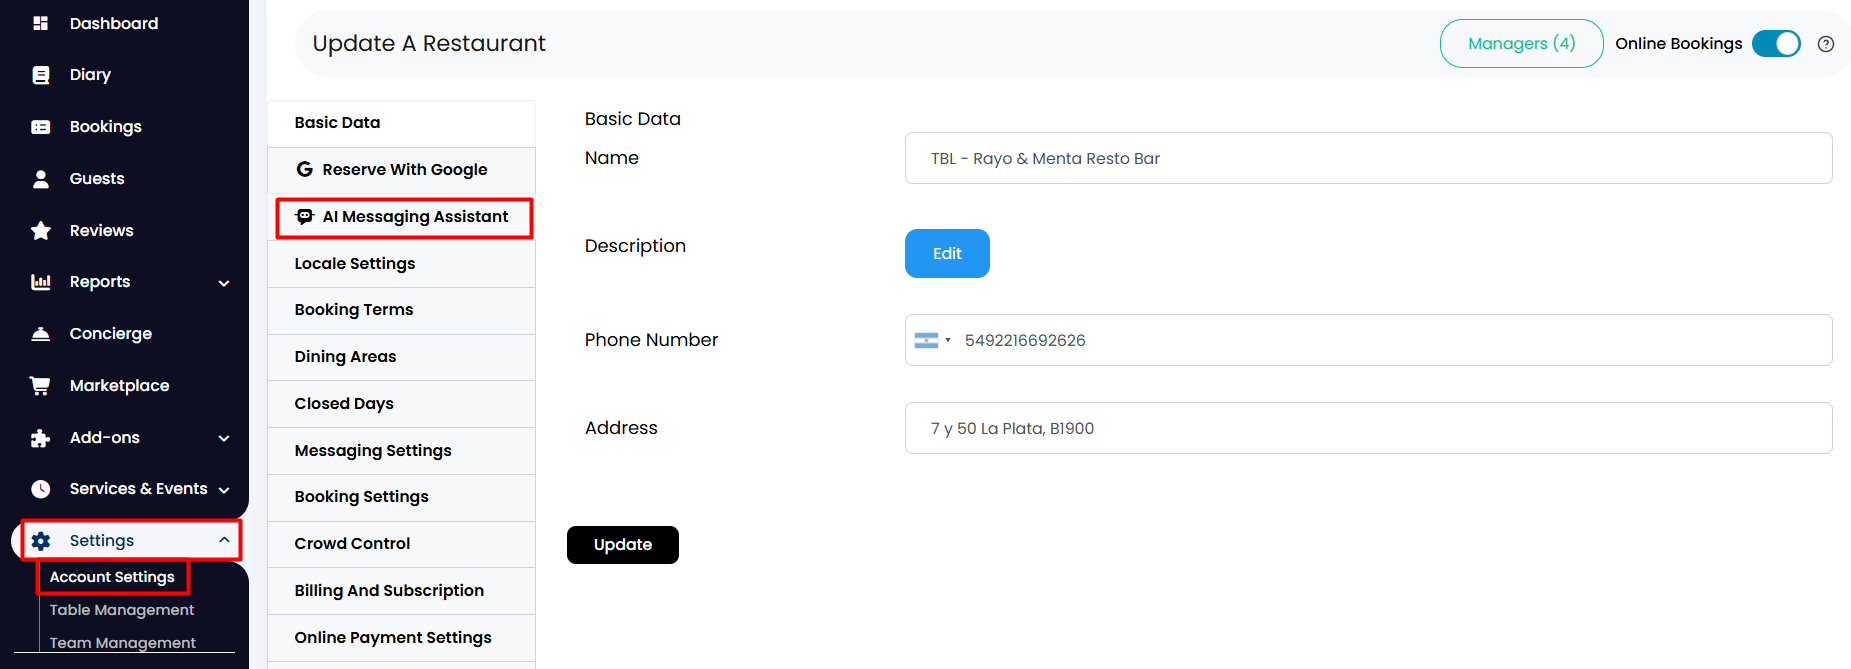
1. From the side menu, go to Settings > Account Settings > AI Messaging Assistant.
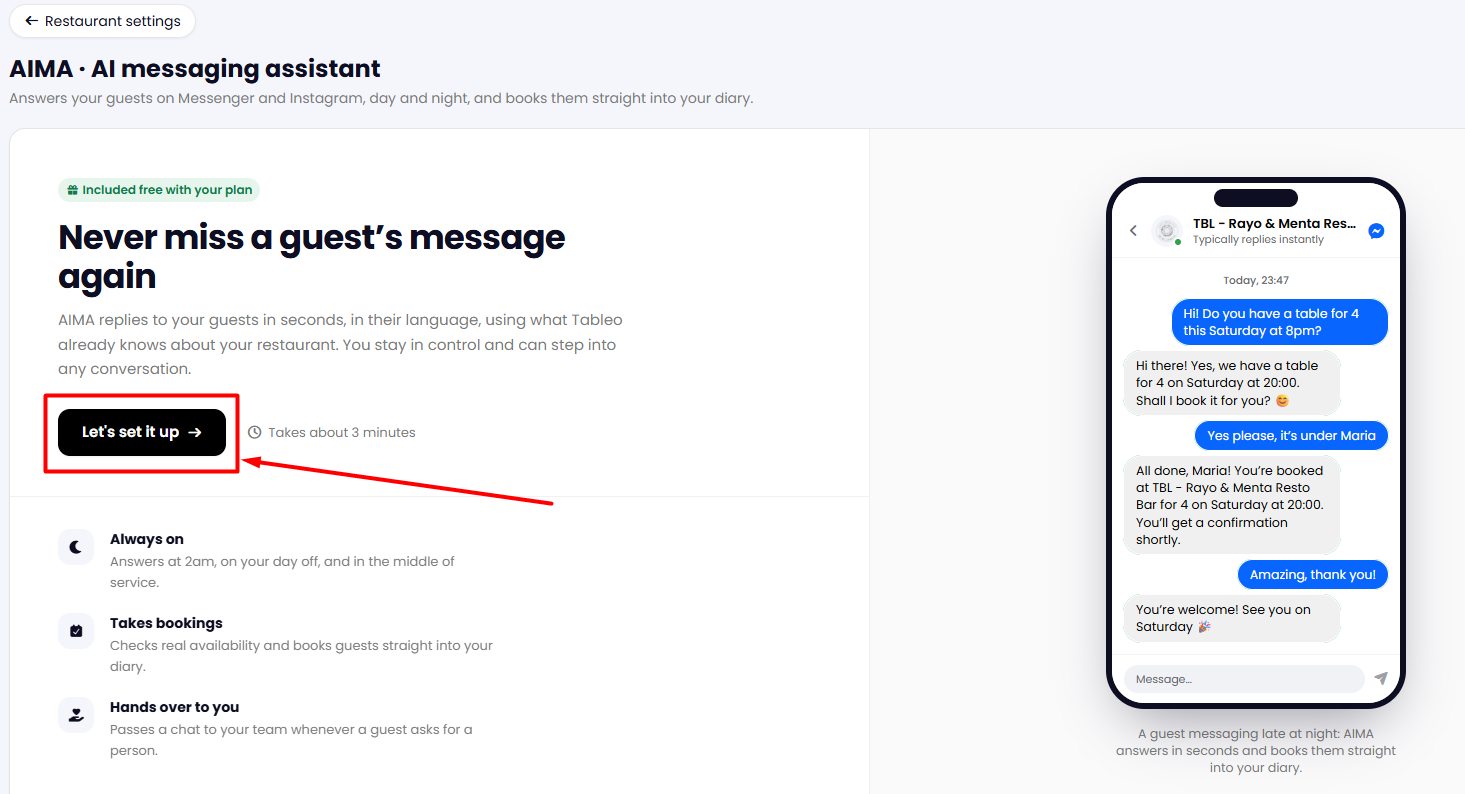
2. Click on Let's set it up.
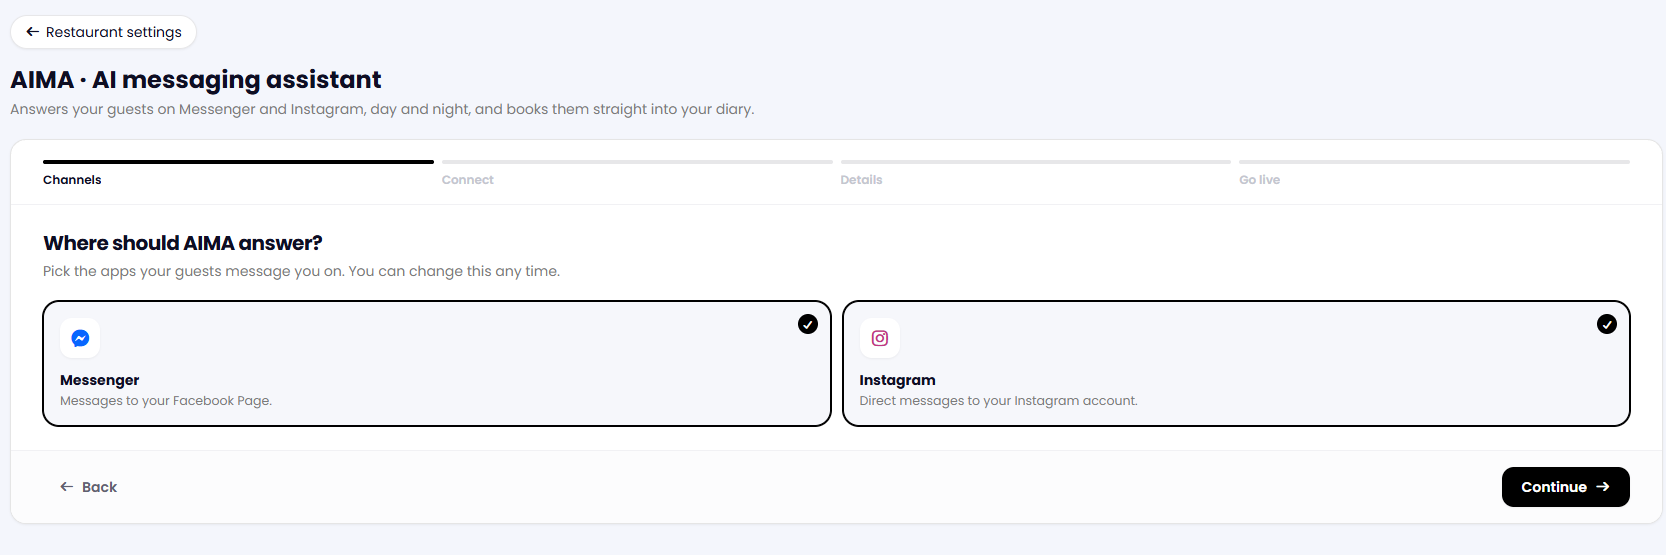
3. Choose where you would like the bot to reply: on Facebook Messenger, Instagram, or both. Then click on Continue.
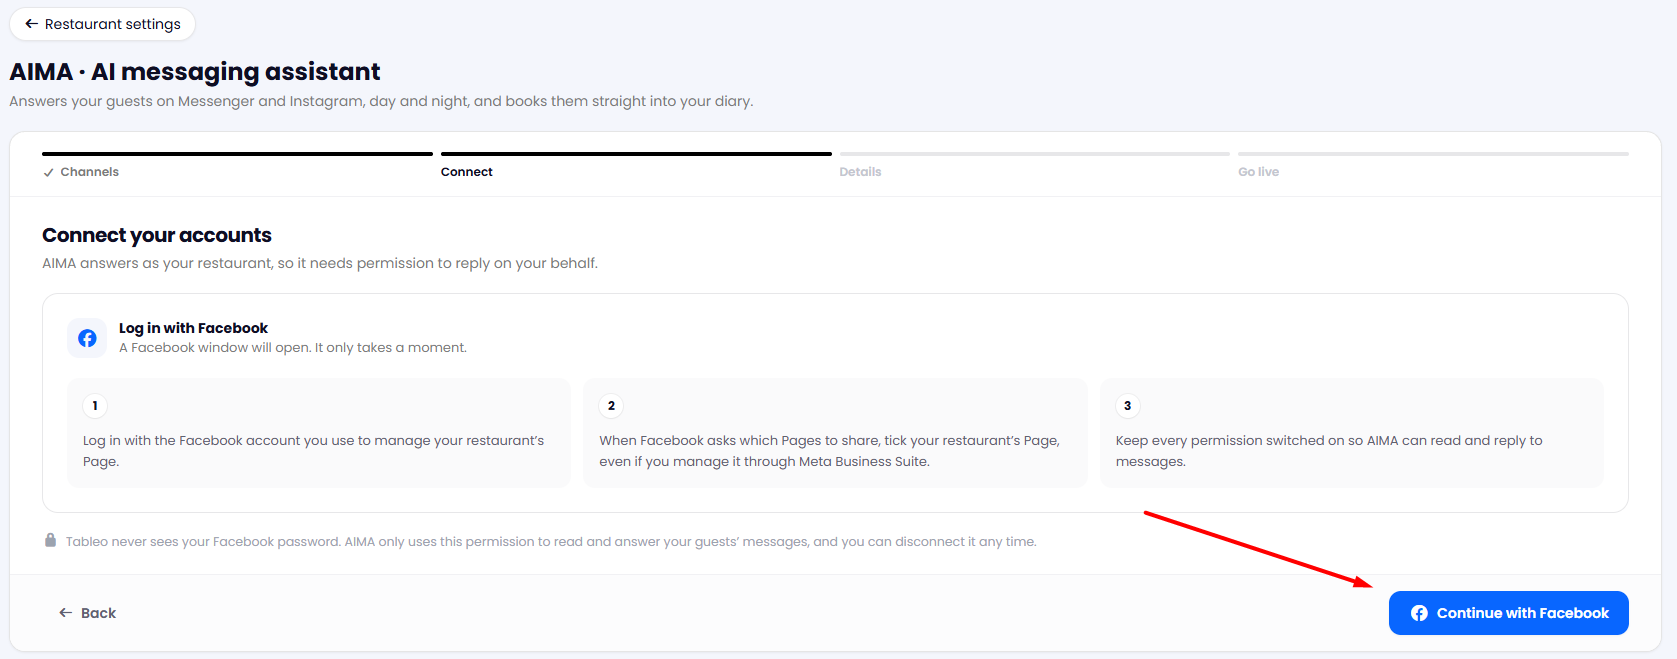
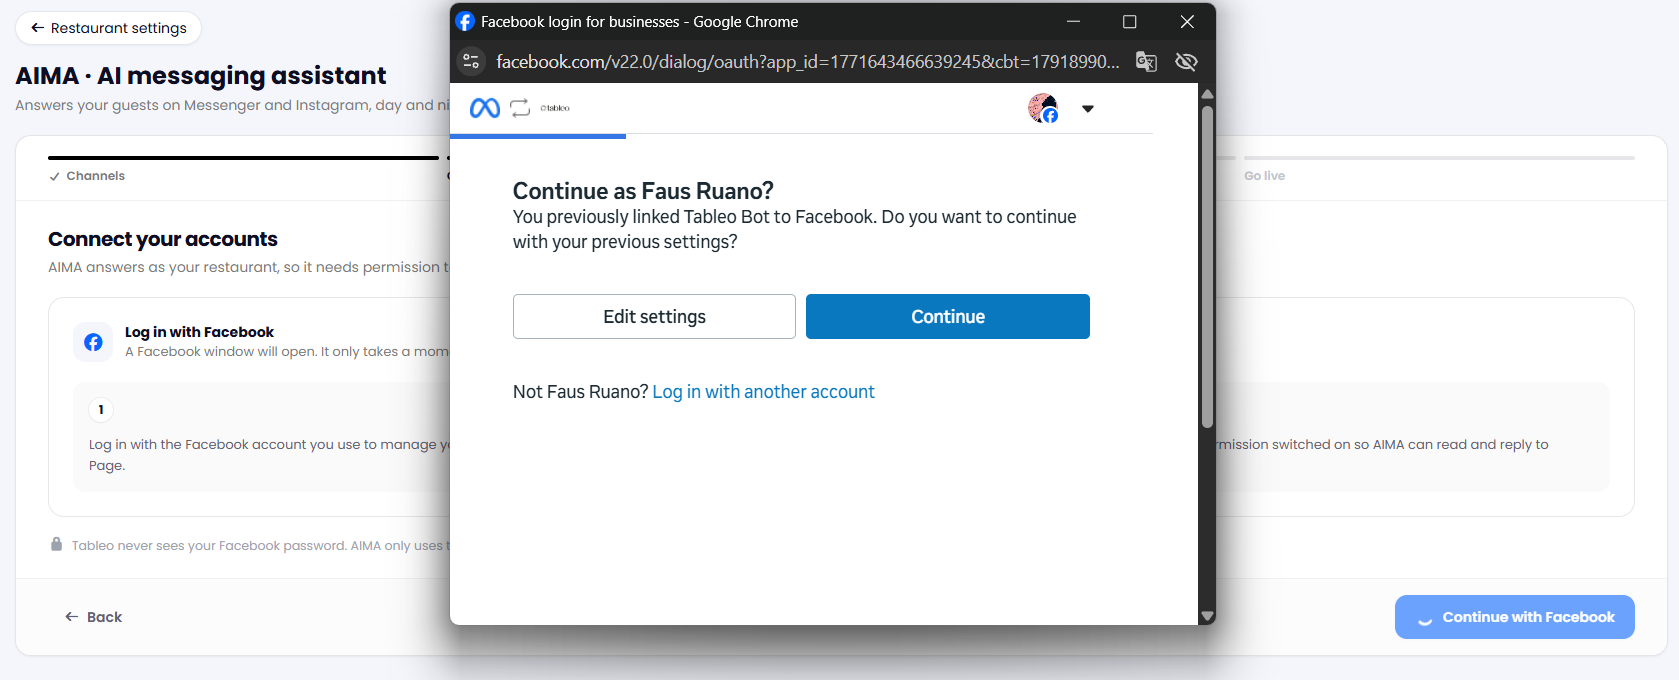
4. Click on Continue with Facebook.
5. Make sure you are logged into the Facebook account that has full access to manage your business page, and then click on Continue.
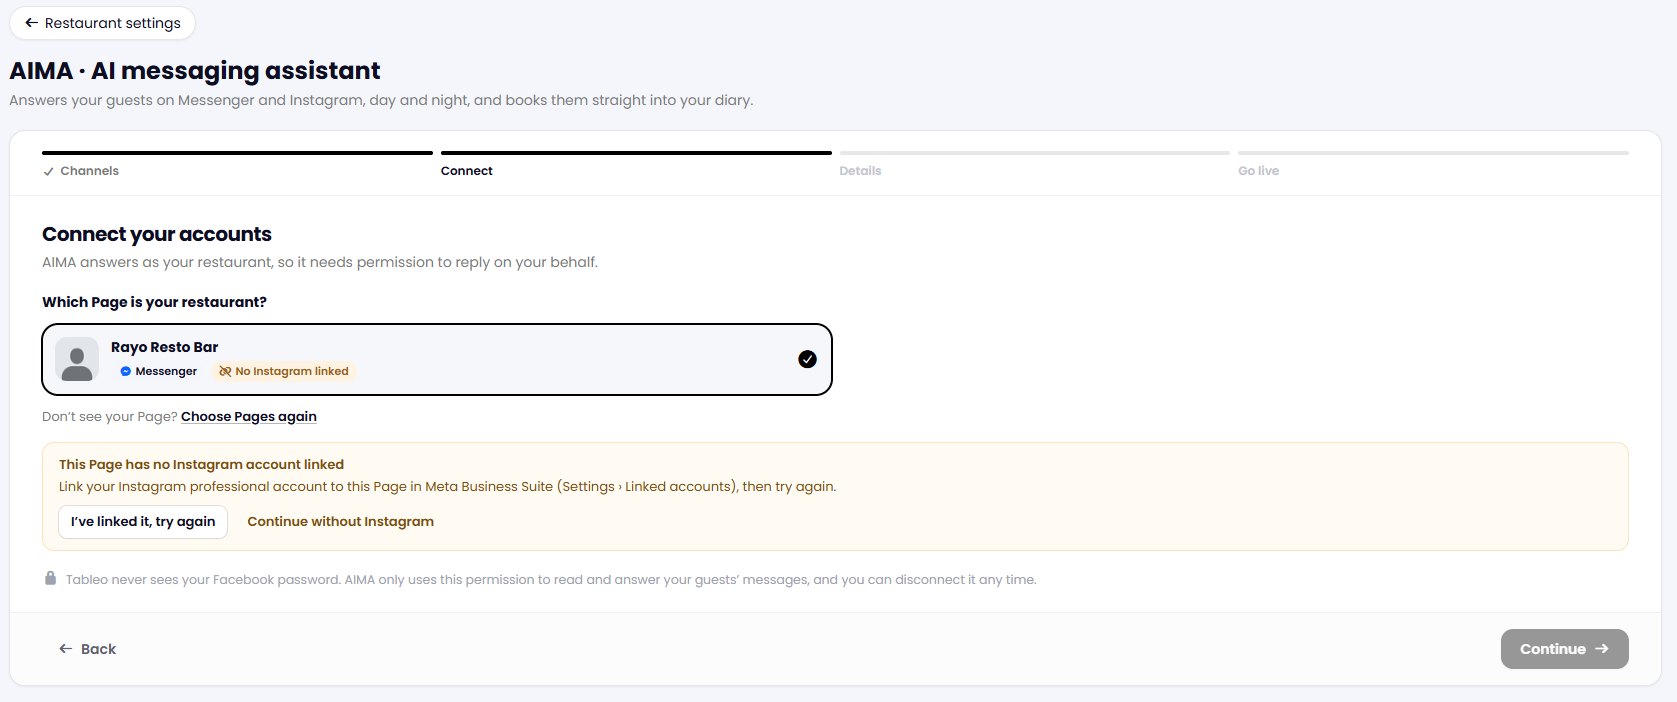
6. Select your restaurant's business page. If you do not have an Instagram account linked, select Continue without Instagram. Then click Continue in the bottom-right corner.
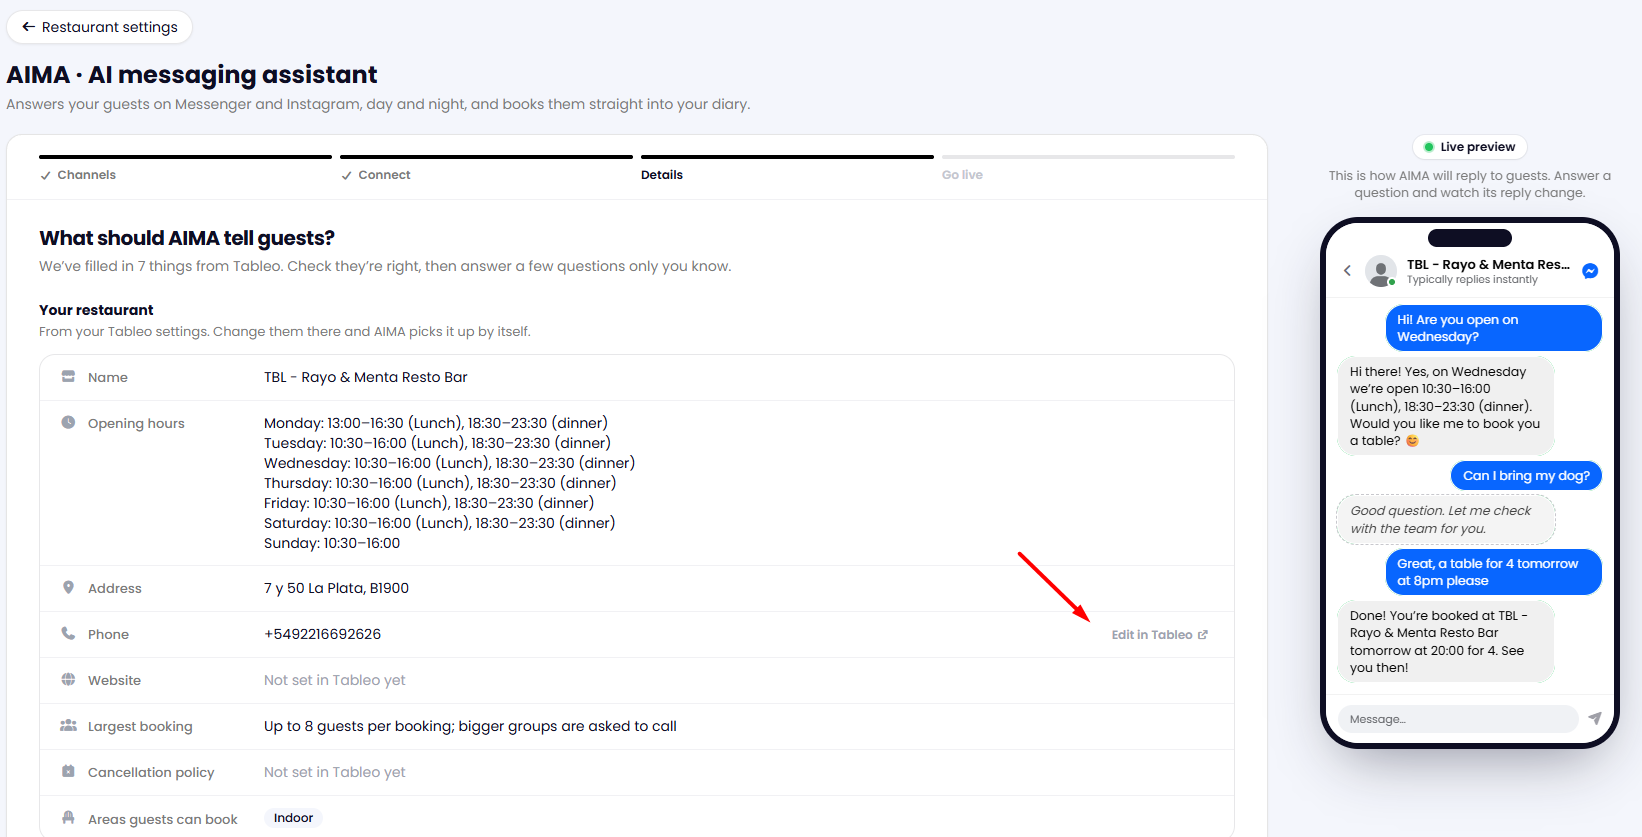
7. Here, you can review all the information your AI messaging assistant has access to. If you need to make any changes, hover over the relevant field and click Edit in Tableo on the right.
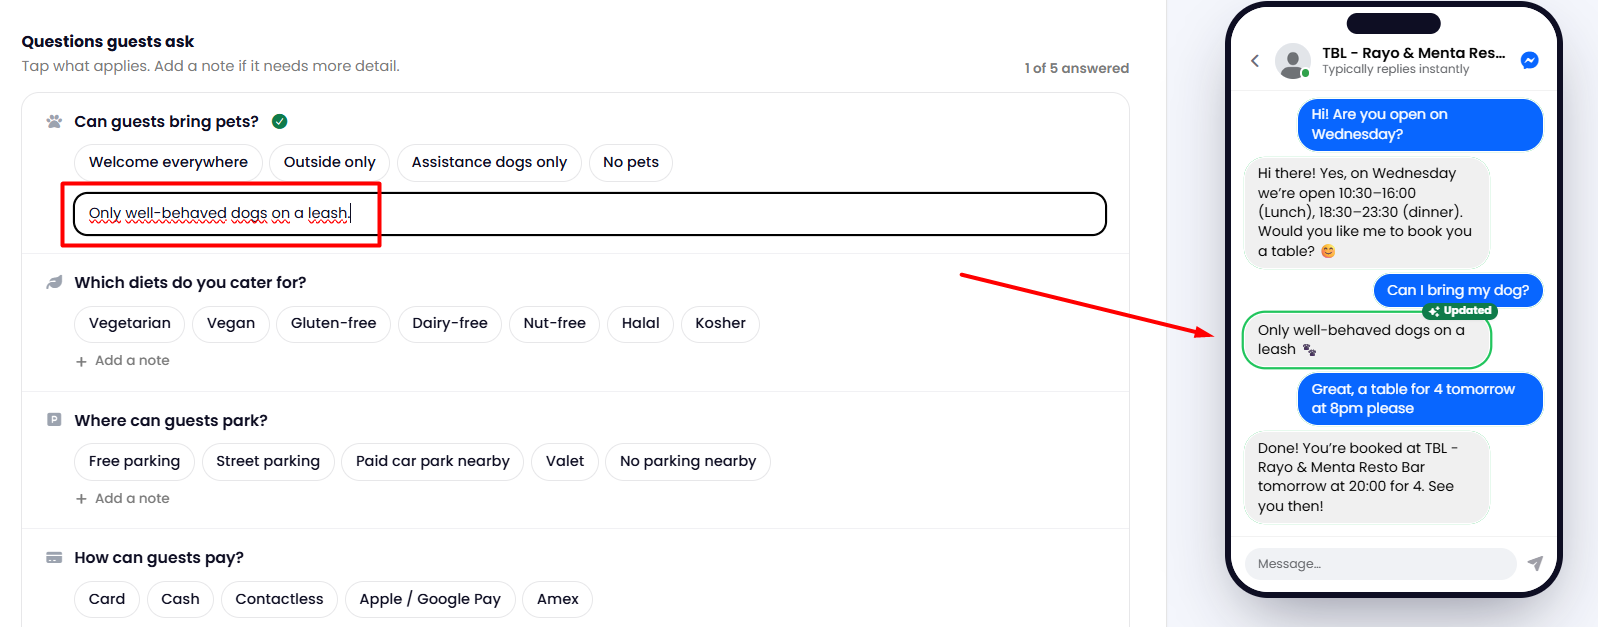
8. Scroll down to add any additional information you think would be useful for your AI messaging assistant. You can select the available tags or add a custom note.
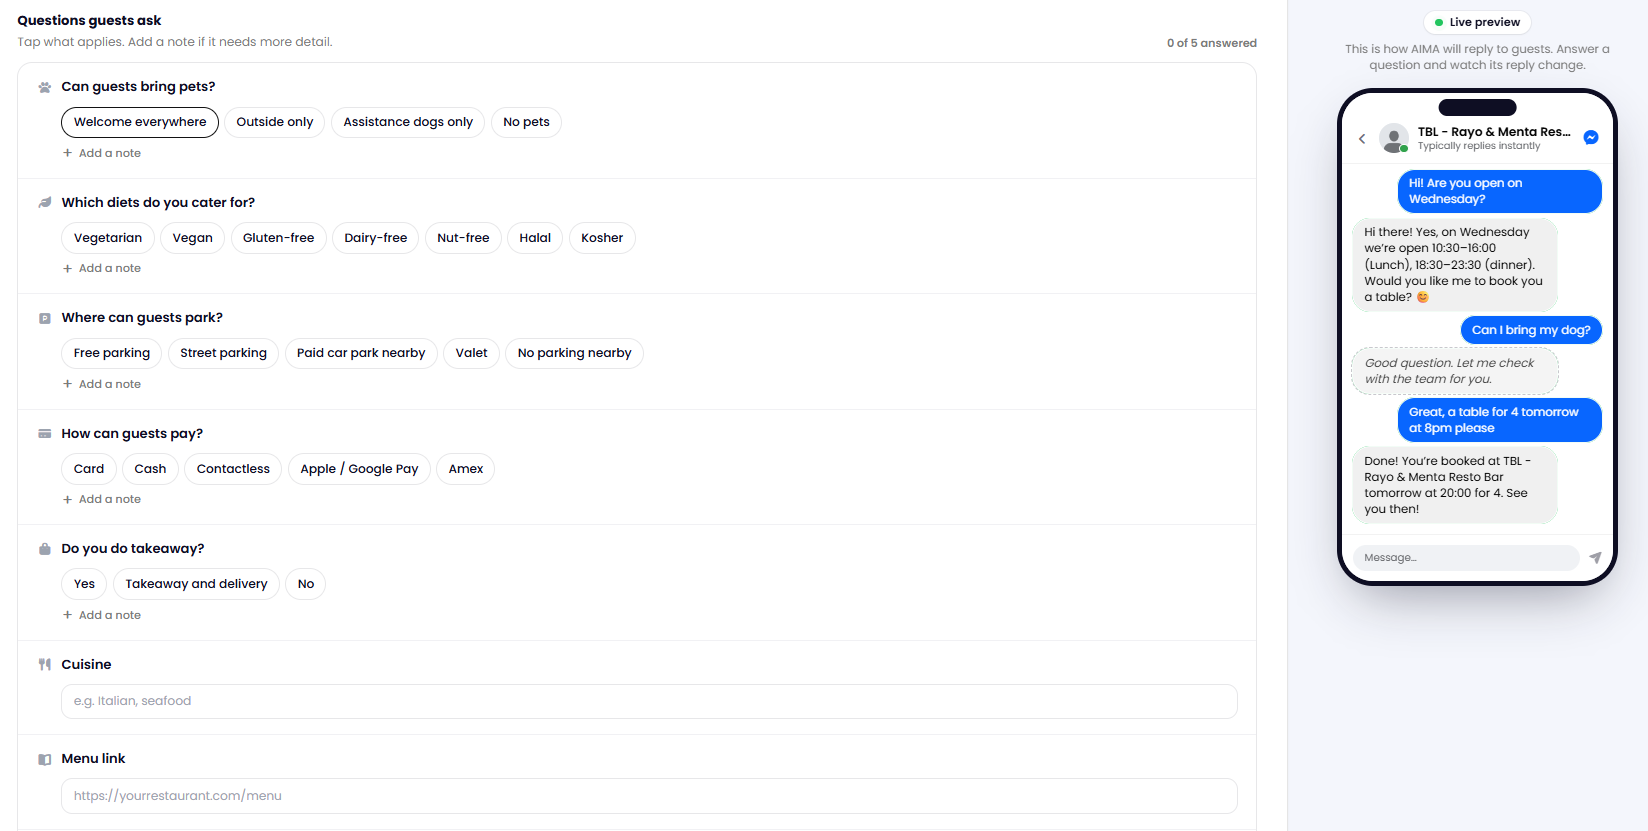
You can see a live preview on the right showing how the AI will respond to messages based on the tags you select and the notes you add.
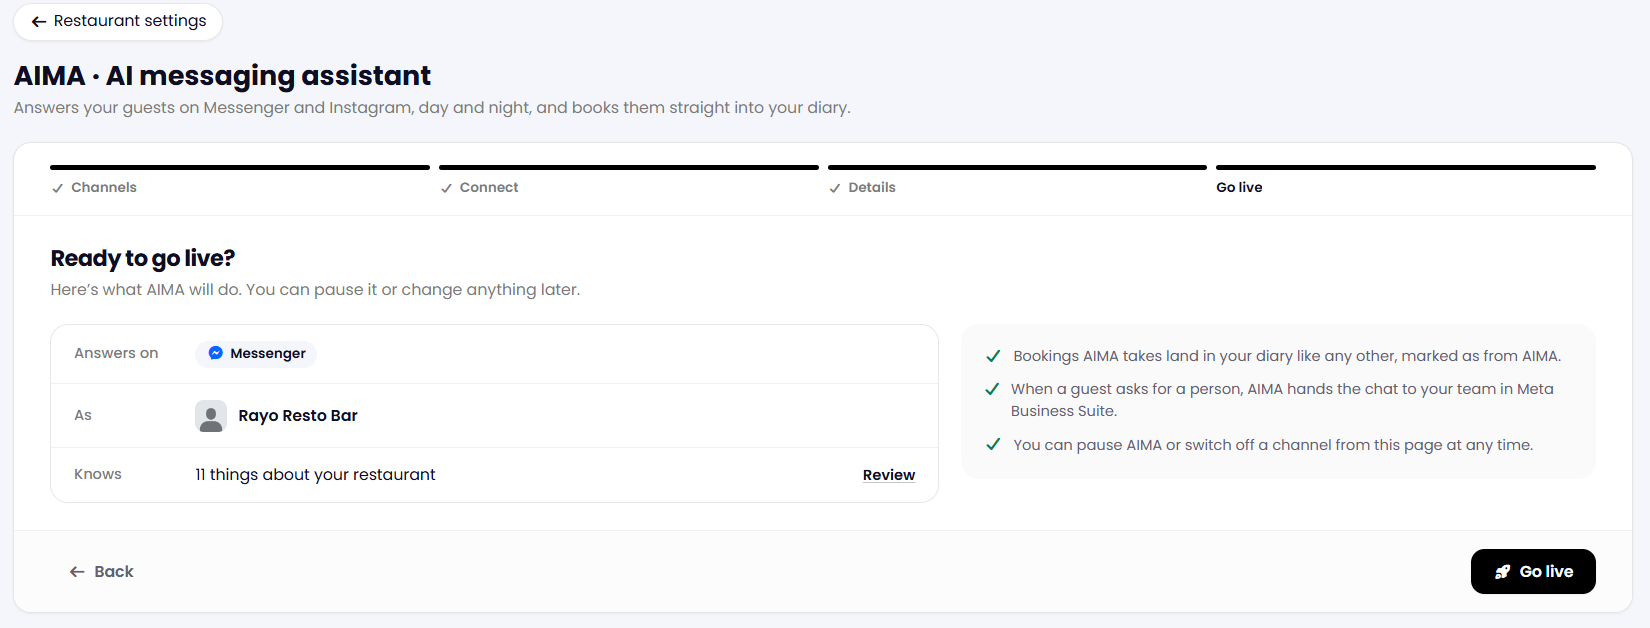
9. Review your AI setup one last time, then click Go Live to activate your AI messaging assistant.
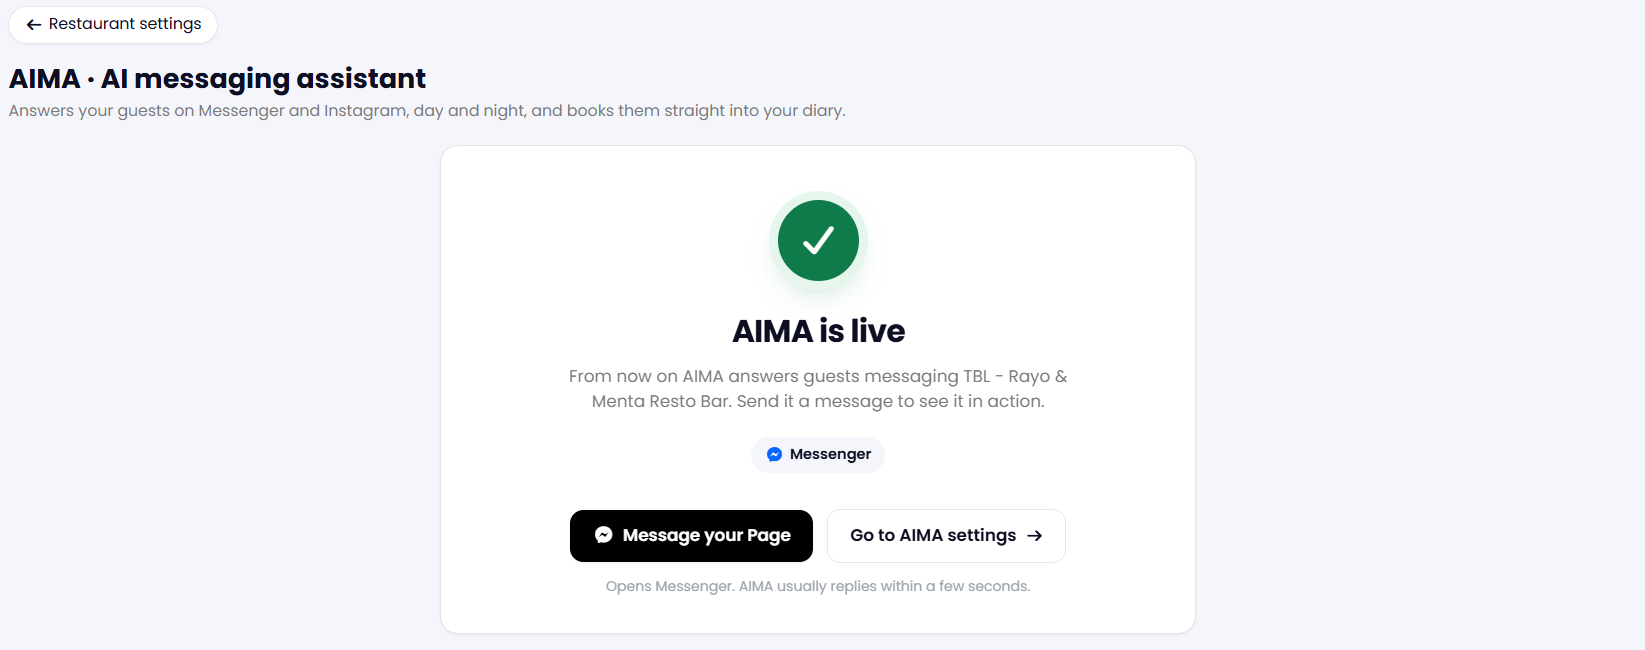
10. Once it's live, you can choose to message your page to test the bot or to go to your settings.
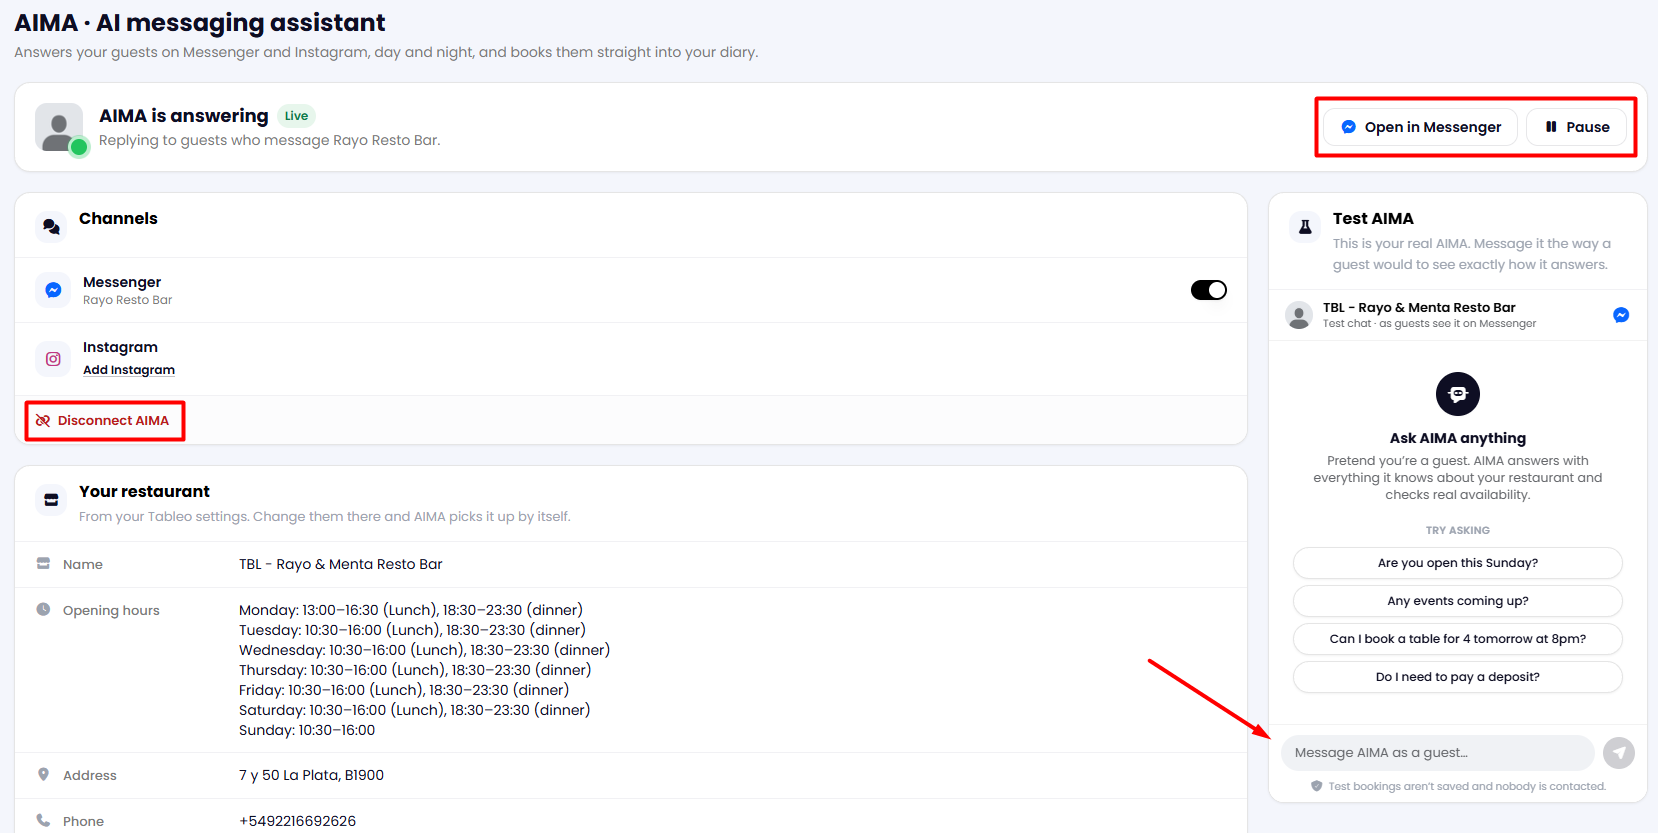
11. In AIMA Settings, you can test your AI messaging assistant at any time by selecting Open in Messenger or chatting in Test AIMA on the right directly in Tableo. You can also Pause the bot or disconnect AIMA completely from your account.
Was this article helpful?
That’s Great!
Thank you for your feedback
Sorry! We couldn't be helpful
Thank you for your feedback
Feedback sent
We appreciate your effort and will try to fix the article